


3D Room with a View - Christmas at Home
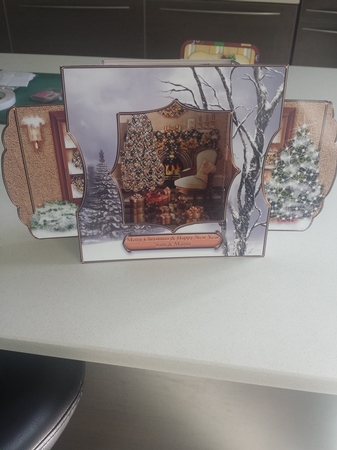
This is a stunning card kit from my 3d Room with a View collection. This Christmas Card Kit is a really beautiful design, that features a Christmas decorated room in a contemporary style complete with a beautiful snowscape view through the garland draped window.
The room has yew wood furniture and is decorated with a Christmas tree with gold ornaments and white lights. A beautiful Fireplace with roaring fire completes the scene along with a modern armchair! Lots of wrapped gifts towards the front of the room! The Front Frame features a snow scene with trees. The slider doors on the outside of the building, pull apart to reveal this stunning Christmas scene.
On the inside left of the room there is a yew chest of drawers, with a red poinsettia plant and a Window to the snowscape outside There are also Christmas ornaments.
To the inside right is a piece of Yew furniture with a Mirror above and a lovely Nativity Ornament. A really special card for Christmas, for your friends and loved ones!
This is a stunning concept that is very easy to make, even for beginners who are trying their hand at card making!
This beautiful Christmas card will take pride of place on anyone?s mantelpiece! Any of your recipients, will be well impressed that you have actually made it! It is so dimensional and you can peer right into the room, from the front frame!
The front frame reatures a snow scene and the doors is the window with a view to what?s inside. When you pull the slider doors open, the free standing card has an impressive width of 12 5/8 inch (32cm).
The height is 7 5/8 inch (19.3cm).
The depth from the Front Frame to the back of the room is 2 1/2 inch (6.5cm). ... and to top it all, it even folds down FLAT for posting, and will fit into a standard 8 inch x 8 inch envelope!
A photographic step by step tutorial, is included in the kit, but if you would like to see the tutorial before you buy, to see how very easy it is to make, then please click on the mortarboard icon, which will take you straight to it.
A large range of Christmas sentiment labels, are provided, for the front of the card, together with a blank label for your own peel-offs or stamp, please see above for the full list.
A text panel is also provided on the back of the card, for your own sentiments and greetings. Please take a look, at my other designs in this collection, by clicking on my photo, and typing ?Room? in my store search box.
If you would like to see my other designs, please click on my photo.
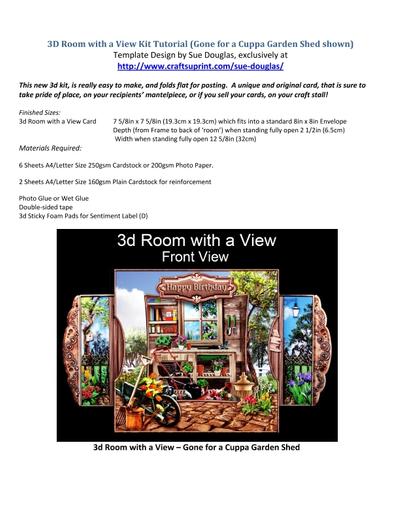
 3D Room with a View - Gone for a Cuppa Garden Shed
 3D Room with a View Kit - the Flower Shop
 3D Room with a View - DIY Shed
 3D Room with a View - Christmas Down at the Local Pub
 3D Room with a View - Down at the Local Pub
 3D Room with a View - Vintage Christmas
 3D Room with a View - Church Wedding
 3D Room with a View - Vintage Music Room
 3D Room with a View - My Craft Room
 3D Room with a View - Pamper Yourself
 3D Room with a View - Sweet Dreams New Baby Girl
 3D Room with a View - Sweet Dreams New Baby Boy
 3D Room with a View - Lets Rock!
 3D Room with a View - the Boudoir
 3D Room with a View - Secret Garden
Despite having really impressive 'Mantelpiece Appeal', they are so EASY to make, that even a beginner to Card Making would have no problems!
Please see the Tutorial below, which has photographs, and very clear instructions, at every step of the way!
The tutorial also has inside views of the whole collection, as the previews don't actually show that detail. Thanks for looking! x


Related Products

Photographs from the Community

 sparkles to the tree on the right, I added a little reindeer, snowflakes & mistletoe, I guarantee you will not be disappointed with the results and everyone who sees it will be amazed!)
Printed onto Crafty Bobs photo paper and followed the easy instructions, this was very easy to cut and very easy to put together with amazing results, slide open the window and it's Christmas with presents around the tree waiting to be opened, I added tiny diamonds to the inside tree and peel off (Flat) sparkles to the tree on the right, I added a little reindeer, snowflakes & mistletoe, I guarantee you will not be disappointed with the results and everyone who sees it will be amazed!


I printed all 6 sheets onto 250 gram smooth matt card and made up following the simple step by step detailed instructions.
Once you have cut out all the parts these are really easy to assemble and look so impressive.
The sliding doors open and shut so easily and when closed the card is completely flat but when opened it is an amazing 3D room with so much depth and detail.
These are so complete, all I added was a die-cut snowflake to the top left corner

I love these Rooms with a View cards and they are very popular at the markets. I haven't made one for a while and I am glad I have this one ready for Christmas.....I have orders for it already!
I printed the design onto good quality white card and cut out all the elements. I inked the edges of all the decoupage elements and, following the clear and concise instructions, assembled the card using spongy tape, I added the Merry Christmas greeting and some silver glitter glue to the snow flakes.
So pretty!
Printed all sheets out on to good quality photo paper, cut out & scored as per instructions & glued all bits together.
This is a beautiful Christmas card.