
Shaker card tutorial: make one in under an hour
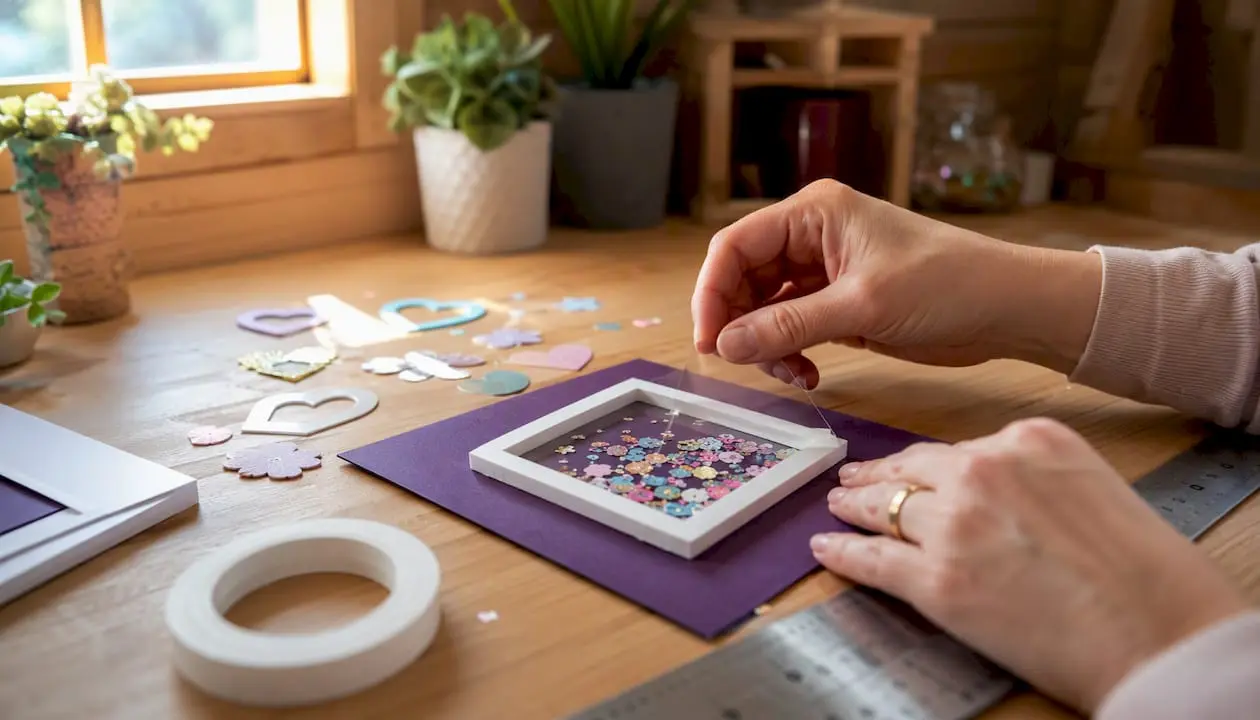
A shaker card is a handmade greeting card with a sealed window of clear acetate over a foam-walled well that traps loose fillers — sequins, confetti, tiny die-cuts — so they rattle and sparkle when the card moves. Follow this shaker card tutorial and you can finish a classic foam-well A2 card in under an hour, or a quick clear-envelope version in under 10 minutes. Every shaker card is built from three structural elements: a window (the acetate), a well (the foam spacer), and a wall (the card base backing).
Key takeaways
A successful shaker card depends on three things: a precisely trimmed acetate window, an airtight foam well, and the right filler quantity — get those right and the card works every time.
| Point | Details |
|---|---|
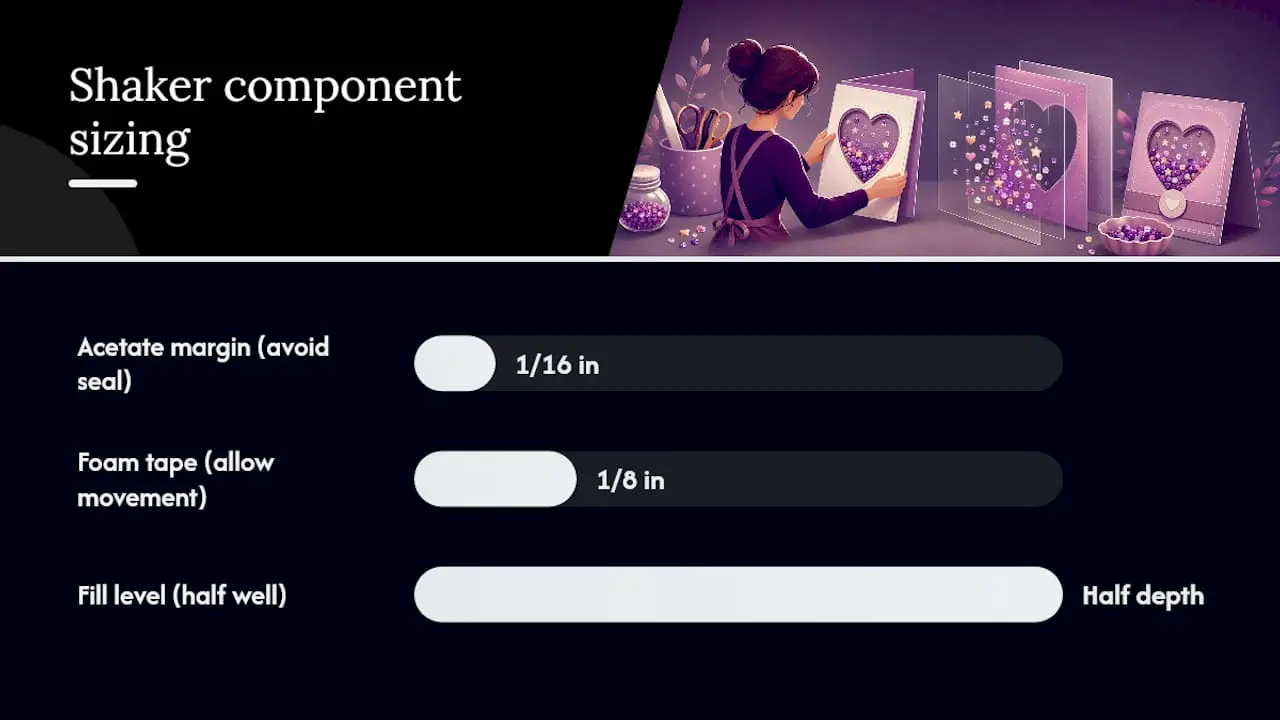
| Trim acetate carefully | Cut acetate 1/16 inch smaller than the window opening on every edge to avoid sealing problems. |
| Use 1/8-inch foam tape | This depth gives fillers enough room to move freely without making the card too bulky for an envelope. |
| Fill to half the well depth | Overfilling stops movement; a light pinch of holeless flat sequins performs better than a full well. |
| Choose the right method | Use the foam-well build for a polished result; switch to the clear-envelope shortcut for batches or quick makes. |
| Craftsuprint templates | Download ready-sized shaker frame panels from Craftsuprint to skip hand-cutting and speed up assembly. |
Table of Contents
- What supplies do you need for a shaker card tutorial?
- How to make a shaker card step by step
- Want a faster method? Try the clear-envelope shortcut
- What should you put inside a shaker card?
- Troubleshooting common shaker card problems
- Where can you find printable shaker card templates?
- Finishing ideas and occasions for shaker cards
- Why the foam-well method is worth the extra time
- Ready-to-use shaker card templates on Craftsuprint
- Sources
- FAQ
What supplies do you need for a shaker card tutorial?
Getting your materials sorted before you cut a single piece of card saves a lot of frustration. Below is a categorised list, followed by a sizing reference table for the most common card formats.
Must-have supplies
- Card base: A2 size folded, in white or kraft, medium-weight cardstock
- Front frame panel: Same card size as the base, with a window die-cut or hand-cut from the centre
- Acetate sheet: Clear, medium thickness suitable for crafting; available from craft supplies listings on Craftsuprint
- Foam tape: Approximately 1/8 inch depth, double-sided; such as Instant Dimension Foam Tape or similar
- Adhesive: Double-sided tape (6 mm) for acetate; liquid glue or wet adhesive for card layers
- Shaker fillers: Flat confetti-style sequins, small die-cuts, or fine glitter mix
- Cutting tool: Craft knife and self-healing mat, or a die-cutting machine
Optional extras
- Embossing folder or heat tool for texture on the frame
- Stamp set and ink for sentiments
- Decorative die-cuts for layering over the window frame
- Bone folder for crisp card folds
Panel sizes and foam depth at a glance
You can find acetate sheets, foam tape, and filler packs through the craft supplies classifieds on Craftsuprint, where independent UK sellers list materials alongside digital downloads.
How to make a shaker card step by step
You can complete this classic foam-well build in 45–60 minutes. Read through all the steps once before you start — the sequencing matters, particularly for die-cut placement.
-
Cut the card base. Score and fold a piece of 300 gsm cardstock to A2 size (10.5 × 14.8 cm). A bone folder gives a cleaner crease than pressing by hand.
-
Prepare the front frame. Cut a second piece of card to the same dimensions. Die-cut or hand-cut a window in the centre — a rectangle, circle, or arch all work. Keep the frame border at least 1.5 cm wide so there is enough room for the foam tape wall.
-
Cut and attach the acetate. Cut your acetate roughly 3 mm (1/16 inch) smaller than the window opening on every edge, so it sits behind the frame without protruding. Trim acetate slightly smaller than the frame and leave a wide enough border that the foam adhesive strips are fully hidden when the frame goes on top. Attach the acetate to the back of the front frame using 6 mm double-sided tape along all four edges.
-
Build the foam well. Apply 1/8-inch foam tape around the perimeter of the acetate on the back of the front frame, forming a closed rectangle. Press each strip firmly and overlap or butt the corners tightly — no gaps at the corners, because even a tiny opening will let fillers escape over time. The 1/8-inch depth is the standard choice: it gives fillers enough room to move freely without the well feeling hollow.
-
Add the fillers. Peel the backing from the foam tape but do not press the frame onto the card base yet. Tip a small pinch of sequins or confetti into the well through the open side. Less is more — overfilling stops the pieces from moving.
-
Seal and mount. Press the foam-walled frame firmly onto the card base, aligning all edges. Run your finger along every seam to bond the foam fully. If you plan to add decorative die-cuts or stamped layers over the frame, attach them before sealing — repositioning after the shaker is sealed is awkward and risks breaking the seal.
-
Add finishing layers. Stamp a sentiment, add a die-cut topper, or layer patterned paper panels around the window. Leave the card flat for at least 30 minutes before posting or gifting.
Pro Tip: Apply liquid glue to card-to-card joins and double-sided tape to the acetate only. Liquid glue on acetate tends to cloud the surface. Let all adhesives cure for at least 30 minutes before you shake the card vigorously — testing too early is the most common cause of seal failure.
For video guidance, the most useful shots to look for in any tutorial are: an exploded-layer view showing all components before assembly, a close-up of corner foam placement, and the final sealing step.
Want a faster method? Try the clear-envelope shortcut
This approach takes under 10 minutes and needs no foam tape at all. It suits bulk card-making sessions or anyone who wants to test the shaker effect before committing to the full build.
- Choose a small clear cellophane or acetate envelope slightly smaller than your card front.
- Stamp or place your focal image — a die-cut flower, a printed panel, a sentiment — and slide it into the envelope.
- Add a small pinch of fillers. Keep loose pieces under 1/4 inch so they move freely inside the narrow pocket.
- Seal the envelope opening with a strip of double-sided tape, then run a second strip across the seal for security.
- Adhere the sealed envelope to your card front using foam squares or double-sided tape.
The trade-off is a shallower well and slightly less dramatic filler movement compared with the foam-well method. Choose the envelope route when you are making a batch of 10 or more cards, when you are short on foam tape, or when the card is for a child and a thinner profile is easier to post.
What should you put inside a shaker card?
Filler choice affects both how the card looks and how reliably it works. The wrong pieces jam, sink, or scratch the acetate from the inside.
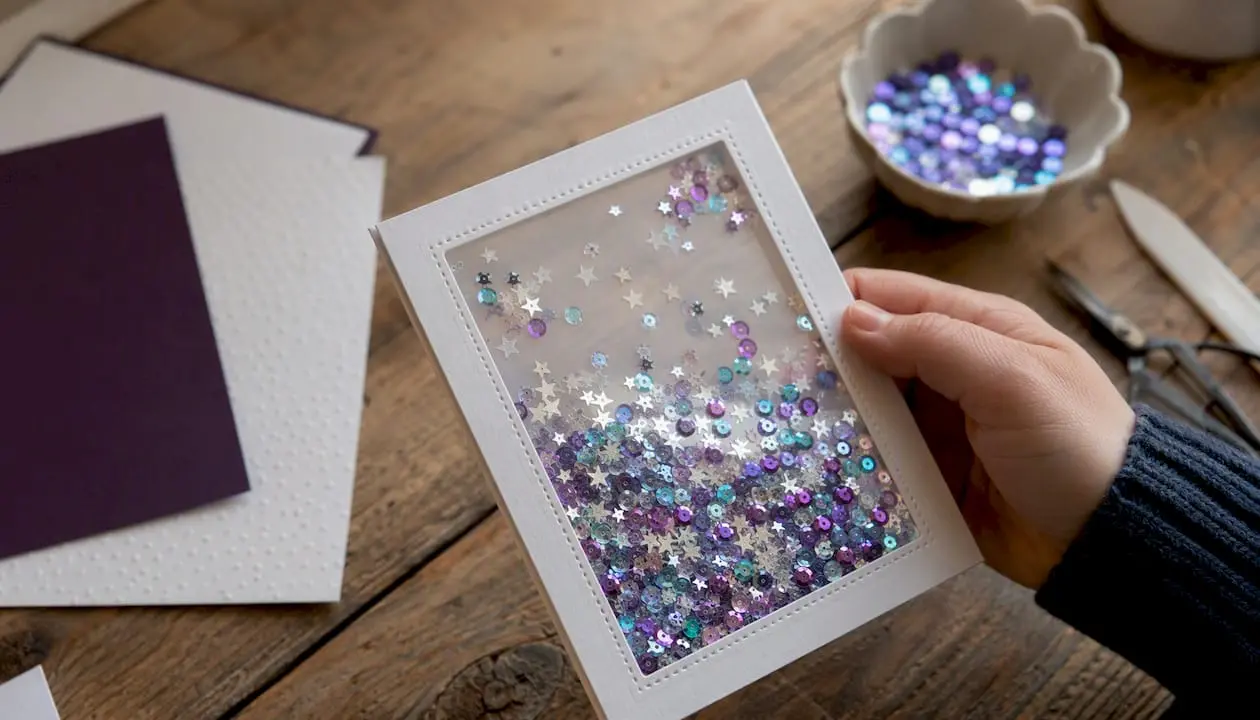
- Flat confetti-style sequins (no holes): The top recommendation from experienced makers. Holeless sequins slide more freely and are far less likely to snag on the acetate or catch on each other than beaded or holed varieties.
- Mixed sizes: Combining a few larger sequins with smaller ones reflects light at different angles and creates more visual interest than a single uniform size.
- Tiny die-cut shapes: Stars, hearts, or snowflakes cut from thin cardstock add texture and colour. Keep them flat and under 1/4 inch.
- Fine glitter or micro-beads: Use sparingly. Glitter can cloud the acetate over time if it scratches the surface, and micro-beads roll unpredictably.
- Chunky beads or large gems: Avoid these in small windows. They sit rather than shake, and their weight can stress the foam seal.
For UK sourcing, Craftsuprint’s decoration materials section lists sequin packs and embellishment sets from independent sellers, many with next-day UK delivery options.
Pro Tip: Mix two filler types for the best effect: flat holeless sequins as the base layer, then a small handful of tiny die-cut shapes on top. The different weights mean the pieces separate and resettle at different speeds, which looks far more dynamic than a single filler type.
Troubleshooting common shaker card problems
Most failures trace back to one of four issues. Here is how to spot and fix each one.
- Fillers leaking: The foam wall has a gap, almost always at a corner. Microscopic gaps in adhesive strips are the most common long-term failure point. Press corners firmly and consider double-layering the foam at each corner for extra security.
- Fillers not moving: The well is overfilled. Open the card carefully at the foam seam (before it has fully cured), remove a pinch of filler, and reseal.
- Acetate fogging: Liquid glue has touched the acetate surface. Use only double-sided tape on acetate. If it has already fogged, the acetate needs replacing.
- Misaligned frame or die-cuts: Decorative elements were added after sealing. Always adhere die-cuts and stamped layers to the frame before the shaker is closed.
Pre-sealing checklist:
- Foam strips pressed firmly with no visible gaps at corners
- Acetate clean and free of fingerprints
- Filler level no more than half the well depth
- All decorative die-cuts already adhered to the frame
- Adhesive on card layers allowed to tack before pressing
Pro Tip: Keep shaker cards away from young children and pets until you are certain the seal is airtight. Small sequins and micro-beads are a choking hazard. If the card is for a child, use larger, flat paper confetti shapes and double-seal every foam edge.
Where can you find printable shaker card templates?
Templates cut build time significantly, particularly for the front frame where a precise window opening is the hardest part to cut by hand.
- A2 frame templates: The most common format, with a rectangular or oval window pre-sized for standard card bases. Available as SVG files for cutting machines (Cricut, Silhouette) or PDF for manual cutting.
- Circle and arch windows: Popular for floral and wedding designs; usually sold as part of a themed kit.
- Nesting shape sets: A frame with a matching insert shape, so the window and the focal image align perfectly.
Craftsuprint’s shaker cards category collects downloadable panels, frame designs, and themed kits from independent designers. Before downloading, check the licence terms on each listing: most Craftsuprint designs are for personal use, with commercial licences available separately for craft sellers.
For assembly guidance that goes beyond the shaker itself, the beginner’s kit assembly guide on Craftsuprint covers layer organisation and cutting order in detail.
Finishing ideas and occasions for shaker cards
Once the shaker mechanism is sealed, the card front is a blank canvas. A few finishing techniques make a significant difference to the final result.
- Embossing: Run the frame panel through an embossing folder before cutting the window. Subtle texture around the shaker draws the eye inward.
- Foiling: A foiled sentiment strip above or below the window adds a premium feel without obscuring the shaker.
- Stamped sentiments: Ink directly onto the card base below the window, or onto a separate strip adhered to the front.
- Die-cut overlays: A partial frame of flowers or leaves layered over the window corners adds depth without blocking the view.
For UK occasions, shaker cards suit: Christmas (silver and gold sequins, snowflake die-cuts), birthdays (rainbow confetti, balloon shapes), Mother’s Day (pastel florals), weddings (pearl micro-beads, heart confetti), and baby showers (star or cloud shapes in soft colours).
Making a batch? Pre-cut all frames in one session, pre-fill envelopes or wells, then seal and decorate in a second pass. The DIY card kit examples post on Craftsuprint shows how to organise components for batch production efficiently.
Share finished cards on Instagram or Pinterest using #shakercard and #cardmaking to connect with the UK crafting community and get feedback on your designs.
Why the foam-well method is worth the extra time
The clear-envelope shortcut is genuinely useful, and there are sessions where it is the right call. But after working through both methods repeatedly, the foam-well build produces a result that is simply in a different category. The filler movement is more dramatic, the window sits flush with the card surface, and the finished card feels considered rather than improvised.
The single most important variable is foam depth. At 1/8 inch, fillers have just enough room to cascade without the well looking cavernous. Go shallower and the pieces barely shift; go deeper and the card starts to feel bulky in an envelope. That 3 mm sweet spot is not arbitrary — it is the measurement that consistently produces the best shake-to-profile ratio.
Filler choice matters almost as much. Holeless flat sequins are not just a preference; they are a practical decision. Holed sequins catch on each other and on the acetate edge, which kills the movement within a few shakes. Mixing two sizes of holeless sequins with a handful of tiny die-cut shapes gives you the light-catching variety without the jamming risk.
Craftsuprint’s shaker card templates and downloadable panels are worth using as a starting point, particularly for the front frame. Getting the window opening precise by hand is the step most beginners underestimate. A clean SVG or PDF template removes that variable entirely and lets you focus on the assembly.
Ready-to-use shaker card templates on Craftsuprint
Craftsuprint gives you a faster route from idea to finished card. Instead of drafting a frame from scratch, you can download a ready-sized shaker panel, print or cut it, and move straight to assembly.

The shaker cards category on Craftsuprint holds frame designs, themed kits, and full card panels from independent UK designers, covering everything from Christmas to baby showers. Designs come in SVG and PDF formats, sized for standard A2 and square card bases. New members can also claim a free Create & Craft gift on sign-up, which often includes printable card projects. Browse the paper crafts classifieds to find printed panels and supplies alongside digital downloads. Head to Craftsuprint, pick a shaker frame that fits your occasion, and download it today.
Sources
The following tutorials and references informed this guide. Each covers a specific aspect of shaker card construction in more detail.
- How To Make A Shaker Card In 4 Simple Steps!
- How to Make a Shaker Card: 7 Step Easy Tutorial With a Clear Envelope
- Two ways to make a shaker card! - CZ Design
- How to Make a Shaker Card: Simple Tips for Maximum Sparkle | Altenew
- Step by Step Tutorial: How to Make an Easy Shaker Card - Spellbinders Blog
FAQ
What is a shaker card?
A shaker card is a greeting card with a sealed acetate window over a foam-walled well containing loose fillers — sequins, confetti, or small die-cuts — that move when the card is shaken.
How long does it take to make a shaker card?
The classic foam-well method takes 45–60 minutes from start to finish. The clear-envelope shortcut can be completed in under 10 minutes.
What fillers work best inside a shaker card?
Holeless flat confetti-style sequins are the top choice because they slide freely without snagging. Keep all loose pieces under 1/4 inch for best movement, especially in small windows.
How do I stop my shaker card from leaking?
Press foam tape firmly at every corner with no gaps, and consider double-layering the foam at corners. Allow all adhesives to cure for at least 30 minutes before shaking the card.
Where can I find shaker card templates in the UK?
Craftsuprint’s shaker cards category offers downloadable SVG and PDF frame panels from independent UK designers, sized for standard A2 and square card bases.