
Craft kit assembly tutorial: beginner's step-by-step guide
TL;DR:
- A craft kit assembly tutorial provides step-by-step guidance from unboxing to finishing a DIY project. It emphasizes thorough preparation, proper tool use, careful instruction reading, and dry fitting to ensure successful building. Patience and following the process prevent common errors and lead to personalized, professional-looking results.
A craft kit assembly tutorial is a structured, step-by-step guide that walks you through building a DIY project from raw components to a finished piece. Whether you are working on a miniature house, a paint-by-numbers canvas, or a paper craft set, the process follows the same core principles: prepare your workspace, organise your parts, assemble in sequence, and finish with care. Beginners who follow a clear craft project step-by-step process make fewer errors and produce more satisfying results. Craftsuprint offers a wide range of downloadable kits and tutorials designed specifically for hobbyists who want professional-looking results without prior experience.
What tools and materials do you need for craft kit assembly?
The right tools make the difference between a frustrating build and a smooth one. Gathering everything before you start means you will not have to stop mid-assembly to hunt for a missing item.
Core tools every crafter needs
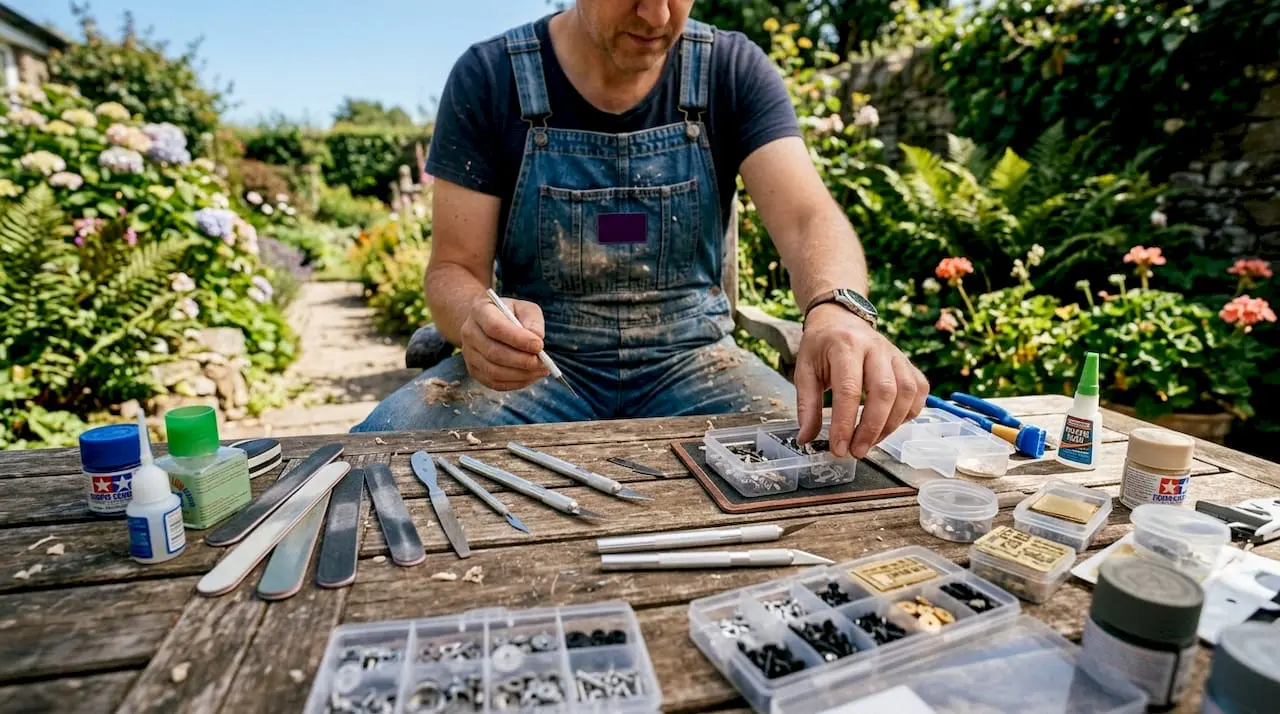
These are the tools that appear across almost every kit type:
- Precision scissors for cutting paper, card, and thin plastic cleanly
- A hobby knife (such as a craft knife with replaceable blades) for scoring and trimming
- A self-healing cutting mat to protect your work surface and guide straight cuts
- Tweezers for placing small components without fingerprints or misalignment
- Sandpaper (fine grit, 220 or above) for smoothing wooden edges before gluing
- A ruler for measuring and scoring fold lines accurately
Beginner model kit builders benefit most from precision cutting and sanding tools. Skipping sandpaper on wooden kits leaves rough edges that prevent clean joins.
Adhesives: choosing the right glue
Glue choice depends entirely on your materials. The wrong adhesive ruins components that cannot be replaced.
| Material | Recommended adhesive | Why |
|---|---|---|
| Wood to wood | PVA or wood glue | Strong bond, dries clear, sands well |
| Paper to wood | Glue stick | Prevents wrinkling and allows repositioning |
| Plastic to plastic | Plastic model cement | Fuses surfaces chemically for a firm hold |
| Embellishments | Craft glue or gel | Precise application on small decorative pieces |
For paper elements, avoid liquid or super glue entirely. Both cause wrinkling and bubbling that cannot be undone once dry.
Setting up your workspace
Good lighting is not optional. A bright, directed light source (a daylight LED lamp works well) lets you see fine details, alignment marks, and glue coverage clearly. Lay out your tools in a fixed order so you reach for them without looking. Keep a damp cloth nearby for wiping excess adhesive before it sets.
Pro Tip: Place a sheet of baking paper under your work. Glue will not stick to it, so accidental drips peel away cleanly without damaging your project.
Check the essential craft supplies checklist on Craftsuprint before purchasing tools. It covers everything from adhesives to finishing materials in one place.
How do you organise and prepare kit components effectively?
Rushing the unboxing stage is the single most common beginner mistake. Slowing down at the start saves time and prevents errors later. Treat the first 20 minutes as an investment, not a delay.
Unboxing and sorting
Follow this sequence every time you open a new kit:
- Lay all components out on a flat, clean surface before touching anything
- Count every piece against the parts list in the instruction manual
- Group components by type: structural pieces, decorative elements, hardware, and consumables
- Number or label small bags if the kit does not already do so
- Set aside any pieces that look damaged or incorrectly cut before you begin
Checking your inventory against the manual catches missing parts early. Discovering a missing component on hour six of a build is far more stressful than finding it before you start.
Reading the instructions fully before starting
Read the entire instruction manual once before picking up a single tool. This sounds obvious, but most beginners skip it. A full read-through reveals which steps require drying time, which parts must be painted before assembly, and where the trickiest joins occur. You will also spot any steps that require two pairs of hands.
Dry fitting: the step most beginners skip
Dry fitting means assembling parts without glue to check alignment and fit before committing. It is a mandatory phase, not an optional one. A part that looks correct in isolation can sit at the wrong angle once placed in context. Dry fitting catches this before the glue goes on.
Pro Tip: Use small pieces of low-tack masking tape to hold dry-fitted parts temporarily. This lets you check the full structure before applying any adhesive.
For a broader look at what to expect when starting out, the mini kits starter guide on Craftsuprint covers common pitfalls in plain language.
What is the step-by-step process for craft kit assembly?
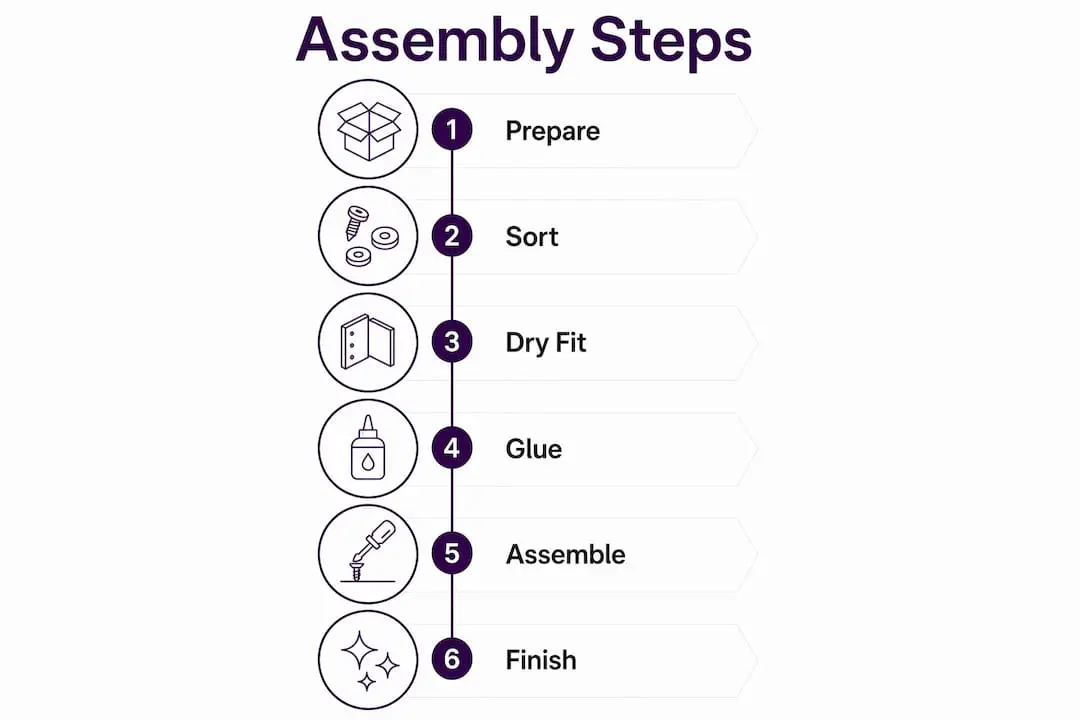
The assembly process follows a fixed sequence regardless of kit type. Skipping stages or working out of order causes alignment problems that compound as the build progresses.
The core assembly sequence
- Build the base or structural frame first. Every kit has a foundation. Assemble and cure this before adding walls, layers, or details. A solid base prevents everything above it from shifting.
- Dry fit the next layer before gluing. Check orientation, alignment, and fit. Adjust now, not after the glue sets.
- Apply glue to one surface only, in a thin layer. Use minimal glue applied in thin layers to one surface. Hold pieces together for at least 30 seconds for a secure bond.
- Work in sections, allowing each to cure before moving on. Rushing this stage causes joins to slip. Set a timer if needed.
- Add interior details and decorative layers next. These go in before closing walls or roofs, as access becomes limited once the structure is enclosed.
- Install any LED lighting before closing the structure. Test LED components before installation. Troubleshooting after concealment is extremely difficult.
- Close the outer structure and allow a full cure. Do not handle the kit until the adhesive has fully set.
- Apply finishing touches last. Paint, varnish, embellishments, and personal details go on after the structure is stable.
Glue application: the “less is more” rule
Over-gluing is the most common beginner error. Excess adhesive squeezes out of joins, stains visible surfaces, and weakens the bond by preventing surfaces from making direct contact. Apply a thin, even layer to one surface only. Press firmly, hold for 30 seconds, then set aside without disturbing.
Assembly approaches by kit type
Different kit formats require slightly different priorities during the build process.
| Kit type | Primary challenge | Key technique |
|---|---|---|
| Miniature house | Structural alignment | Dry fit every wall before gluing; build from base up |
| Paint-by-numbers | Colour bleed and coverage | Work one number at a time; paint pieces before assembly |
| Paper craft | Wrinkling and tearing | Use glue sticks; score fold lines with a bone folder |
| Model kit | Seam lines and flash | Sand all parts before assembly; use sprue cutters cleanly |
| Book nook | Depth and layering | Build back to front; test lighting at each layer |
Standard kits typically take 8–12 hours for beginners to complete. Advanced builds requiring multiple adhesive curing stages can take considerably longer. Plan your sessions around drying time rather than trying to complete everything in one sitting.
Common errors and how to avoid them
Forcing parts that do not fit is the fastest way to crack a component. If a piece resists, check the orientation first. Most kits use asymmetric tabs that only fit one way. Rushing the curing stage is equally damaging. Glue that has not fully set will shift under the weight of the next layer, pulling the entire structure out of alignment.
Pro Tip: Keep a cocktail stick or toothpick nearby for applying tiny amounts of glue to small components. It gives far more control than squeezing directly from the bottle.
How do you troubleshoot common issues and personalise your finished kit?
Even careful builders encounter problems. The key is catching them early and knowing how to correct them without causing further damage.
Identifying and fixing common problems
- Misaligned joins: If glue has not fully cured, gently reposition and re-clamp. If fully cured, use a hobby knife to score the join carefully, apply a small amount of fresh adhesive, and re-press.
- Gaps between parts: Fill with a small amount of wood filler (for wooden kits) or white craft glue mixed with fine sawdust. Sand smooth once dry.
- Warped paper or card: Place under a heavy book overnight. For severe warping, lightly dampen the reverse side and press flat.
- LED components not working: Check the battery connection first, then the polarity. Most beginner LED failures are polarity errors, not faulty components.
- Paint bleed on paint-by-numbers kits: Painting pieces before assembly and working one number at a time produces cleaner results. Work from light colours to dark to reduce bleed.
Personalising your finished kit
A finished kit is a starting point, not an end point. Customising kits transforms a standard project into a unique gift or keepsake. Simple changes make a significant impact:
- Swap the suggested paint colours for a personal palette
- Add embellishments such as dried flowers, ribbon, or washi tape
- Sign and date the base or back panel
- Apply a coat of clear varnish for durability and a professional finish
- Add a personal message card inside a miniature or box kit
For card-based kits, the card embellishments guide on Craftsuprint offers practical ideas for adding texture and detail to finished pieces.
Pro Tip: Photograph each stage of your build as you go. If something goes wrong, you have a visual record to refer back to. It also makes a satisfying record of your progress.
Key takeaways
A successful craft kit build depends on preparation, patience, and following the assembly sequence in order rather than rushing towards the finished result.
| Point | Details |
|---|---|
| Prepare before you build | Gather all tools, check inventory, and read the full instructions before starting. |
| Dry fit every component | Always test alignment without glue before committing to any join. |
| Apply glue sparingly | Use thin layers on one surface only and hold for at least 30 seconds. |
| Test LEDs before concealment | Check all lighting components before closing any structure around them. |
| Personalise the finished piece | Paint swaps, embellishments, and a clear varnish coat turn a kit into a unique keepsake. |
Why slowing down is the best assembly technique I know
Most people treat the instruction manual as a last resort. I have watched beginners tear open a kit, skip the parts count, and start gluing within five minutes. By hour two, they are trying to prise apart a misaligned wall with a butter knife. The manual is not bureaucracy. It is the fastest route to a finished kit.
The first hour of any build is the most important. Sorting components, dry fitting the base, and reading ahead to spot the tricky joins costs you 20 minutes. It saves you two hours of corrective work. That ratio holds across every kit type I have worked with, from simple paper sets to multi-room miniature houses.
The other thing I would push back on is the idea that personalisation is something you do at the end. The best builds I have seen treat customisation as part of the process from the start. Choosing a non-standard colour palette before you open the paint pots, or deciding where to add an embellishment before the walls go up, produces a far more coherent result than bolting on decoration after the fact.
Dry fitting is the technique that separates confident builders from frustrated ones. It costs nothing and prevents the kind of permanent errors that make crafters give up. If you take one habit from this guide, make it that one.
— Rob
Craftsuprint has the supplies and tutorials to take your kits further
Craftsuprint brings together downloadable craft kits, tutorials, and supplies in one place, so you spend less time sourcing materials and more time building.

Whether you are looking for craft tools and supplies to complete your workspace or browsing for your next project, Craftsuprint’s catalogue covers everything from paper craft sets to card making kits. The Create & Craft downloads section offers step-by-step tutorials across a wide range of kit types, ideal for beginners who want guided support beyond the instruction sheet. New members can also claim a free members gift to get started with quality materials straight away.
FAQ
What does a craft kit assembly tutorial cover?
A craft kit assembly tutorial covers the full build process from unboxing and parts organisation through to finishing and personalisation. It includes tool selection, adhesive techniques, and step-by-step assembly guidance.
How long does it take to assemble a craft kit as a beginner?
Standard kits typically take 8–12 hours for beginners to complete. More complex builds with multiple curing stages can take considerably longer across several sessions.
What is the most important step in craft kit assembly instructions?
Dry fitting parts before applying any glue is the most critical step. Dry fitting verifies alignment and prevents permanent errors that are difficult or impossible to correct once adhesive has cured.
What glue should I use for a paper craft kit?
Use a glue stick for paper-to-wood or paper-to-card joins. Glue sticks prevent bubbling and allow repositioning, which liquid glue and super glue do not.
Are craft kits suitable for complete beginners?
Craft kits are well suited to beginners, particularly those labelled as starter or beginner sets. Following a clear DIY craft kit guide and taking time to prepare before building produces professional-looking results even on a first attempt.