
Cut and Score Pillow Box Templates for Cricut, 3 Sizes Ready
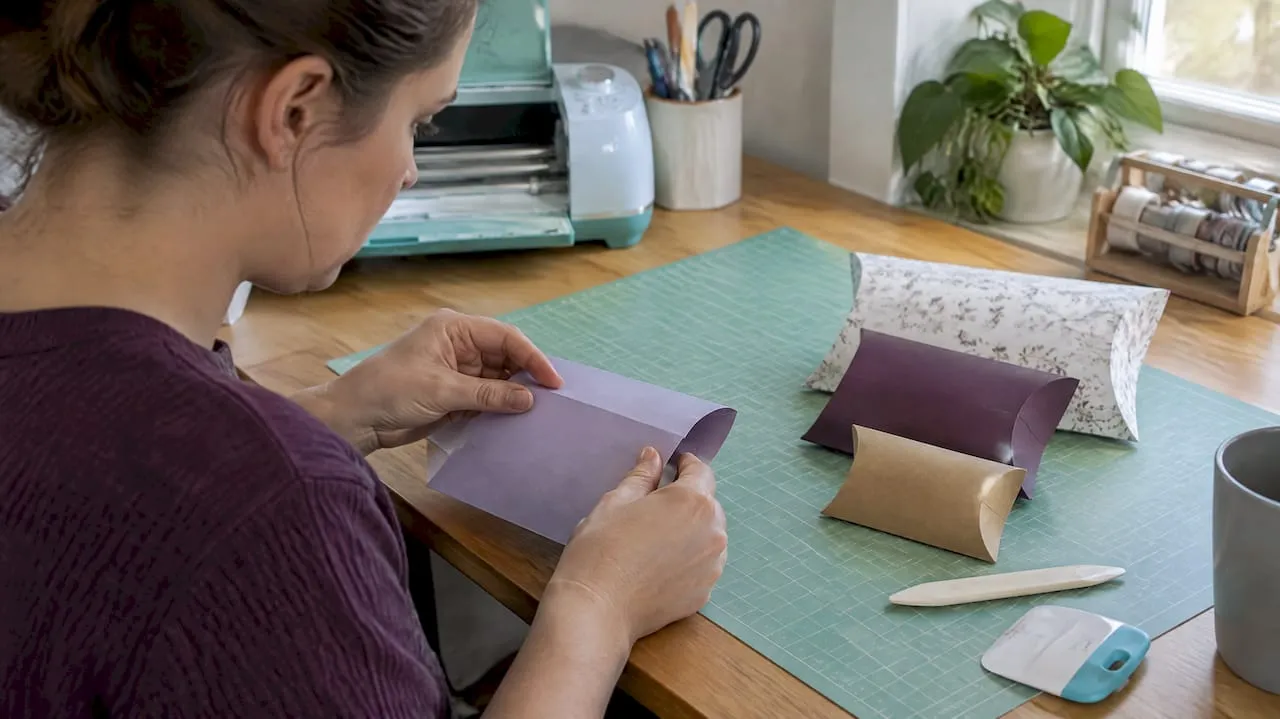
Use PDF templates for hand-cut printing and SVG files with score lines for cutting machines. Download ready-to-print templates or machine-ready SVGs from Craftsuprint’s pillow box category, check the finished size against what you’re packing, and pick a cardstock weight that holds a curve without cracking at the fold.
TL;DR:
- Most pillow box templates are-sized for specific items, with small, medium, and large options suited for jewelry, cosmetics, or toys, respectively.
- Using cardstock between 200 and 300 GSM ensures the finished box maintains its shape without cracking at the fold lines.
- Proper preparation of SVG and PDF files, including checking scale and correct score line formatting, prevents issues during cutting and folding.
- Running test cuts and scores on scrap material reduces waste and ensures the machine settings produce a clean, precise fold before batch production.
- Decorate boxes after assembly with light techniques like stamping or ribbon tying, avoiding heavy embellishments near fold lines to preserve the crispness of the shape.
Table of Contents
- Common pillow box sizes and template layouts
- What paper, tools and adhesives you need
- Preparing SVG and PDF files for cutting machines
- Printing, scoring and cutting without wasting sheets
- Assembling a tidy pillow box step by step
- Decorating and finishing pillow boxes for gifting
- Where to find more pillow box templates and tutorials
- DIY templates or pre-made boxes: which makes sense?
- Download pillow box templates and cutting files from Craftsuprint
- FAQ
- Sources
Common pillow box sizes and template layouts
Most pillow box templates fall into three rough size bands, and the one you need depends on what’s going inside.
- Small boxes suit jewellery, badges or small trinkets, often finished around 70 to 90 millimetres long.
- Medium boxes work for cosmetics, soap bars or chocolates, with finished sizes closer to 100 to 130 millimetres.
- Larger boxes handle bulkier gifts such as mugs or small toys and need a wider flat sheet to form the curve.
A good working example is a finished box of 110 × 80 × 25 millimetres, which needs a flat knife-line template of 134 × 175 millimetres once you allow for the curved tabs and overlap. Smaller designs fit on a single A4 or US letter sheet; larger ones are often tiled across two sheets or exported one-per-sheet so the curve isn’t compressed to fit the page. PDF files suit this single-sheet, print-and-cut approach, while SVG files are built for cutting machines that need separate cut and score layers rather than a flat printed outline.
What paper, tools and adhesives you need
The cardstock you choose decides whether the finished box holds its curve or collapses at the seam.
- Cardstock weight: 200 to 300 GSM gives enough body to hold the pillow shape without being too stiff to score cleanly.
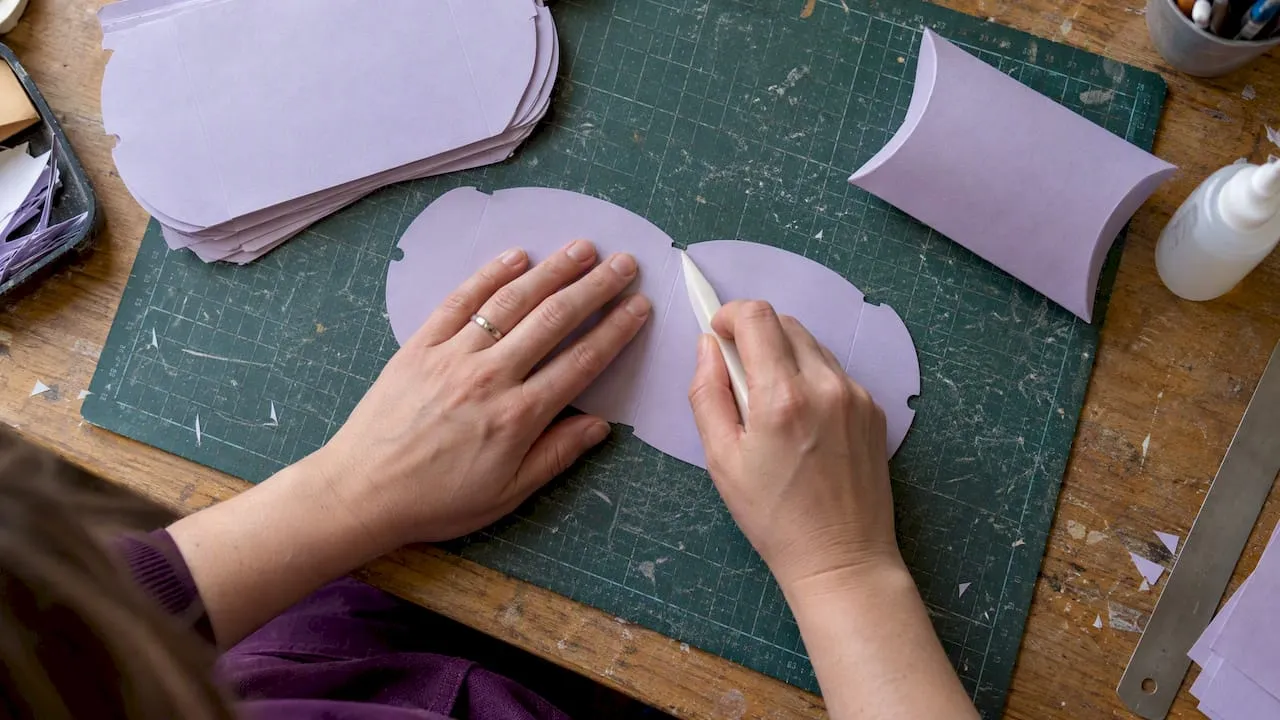
- Scoring tools: a bone folder or scoring stylus creates a clean crease; a craft knife and self-healing mat handle any hand-cut trimming.
- Adhesives: PVA glue suits porous cardstock, while double-sided tape gives a faster, less messy finish on glossy or laminated stock.
If a box will touch food directly rather than just wrap it, check that the paper carries proper food-contact documentation, such as a Declaration of Compliance and migration test report, before using it for edible items.
Pro Tip: Keep a scrap offcut from every print run so you can test glue and scoring on the same stock before committing to the final box.
Preparing SVG and PDF files for cutting machines
Getting the file right before you print saves far more time than fixing a bad cut after the fact.
- Check the score lines: SVG files use either solid or dashed strokes for scoring; some cutting software reads dashed lines automatically, while others need the dashed strokes expanded or converted to a path before they’re recognised.
- Confirm scale and units: open the file at 100% and measure a known edge against your ruler, since a resized or unit-mismatched import will throw off every fold.
- Upload to Design Space: Cricut Design Space accepts SVG uploads and lets you set individual lines to ‘Score’; group the score layer with the base shape and use Attach before selecting Make, or the machine will cut and score in the wrong order.
Pro Tip: If your software only draws solid outlines, duplicate the score layer and switch the copy’s operation to ‘Score’ or ‘Draw’ rather than trying to edit the original cut line.
Printing, scoring and cutting without wasting sheets
Print settings matter as much as the file itself.
For scoring, run the fold line once with a bone folder before you try to fold it; on heavier stock, a second light pass along the same line reduces the risk of the surface cracking rather than creasing. Score depth should stay shallow relative to the sheet, deep enough to guide the fold but not so deep it cuts through.
When cutting by machine, start conservative:
- Run a single test cut on scrap stock before committing to the full sheet.
- Increase blade pressure or force gradually rather than guessing at a high setting first.
- Check that cut lines and score lines land on the same registration point as the printed outline.
A small test cut and a single full-scale prototype typically save several sheets of wasted cardstock compared with adjusting settings mid-run, which matters once you’re printing a batch rather than one box, according to guidance from a pillow box template supplier.
A quick alignment checklist before a full print run: confirm 100% scale, check the paper is loaded the right way round, run one test score and one test cut, then compare both against the template’s stated finished dimensions.
Assembling a tidy pillow box step by step
Once your sheet is cut and scored, the build itself takes only a few minutes.
- Pre-crease every score line by folding and unfolding each one before you try to shape the box, so the cardstock moves freely rather than fighting the curve.
- Form the body by bringing the two short ends together to create the curved pillow shape, checking that the centre seam sits flat.
- Apply glue to the marked tabs only, using a thin, even line so excess doesn’t seep out along the seam.
- Press and hold the seam for a few seconds until the glue grips, then shape the curved ends by pressing the top and bottom points inward.
- Tuck or fold the end flaps into their slots, or secure them with a small sticker, ribbon or brad if the template doesn’t include a tuck tab.
If the flap gapes open rather than sitting flush, the score line was likely too shallow or placed slightly off the fold point, so rescoring a fraction further in usually fixes it. If glue shows through the front of the box, you’ve used too much: a thinner bead applied with a fine-tip applicator or glue pen solves this on the next attempt.
Decorating and finishing pillow boxes for gifting
A plain pillow box is sturdy enough to decorate without weakening the structure, as long as you keep heavier techniques away from the score lines.
- Stamping and embossing work well on most cardstocks, though very textured or embossed surfaces can make scoring less precise if done before folding.
- Varnish or gloss finishes are best applied before cutting, since a fully cured coating can resist a clean score.
- Liners, windows and ribbons add a finished look: a cellophane window cut before scoring, or a ribbon tied around the finished box rather than through the seam, keeps the closure intact.
For small-batch sellers, printing labels or branding separately and applying them after assembly keeps every box consistent without reprinting the whole template each time. If you’re packing something like small gifts of coffee or treats, a simple tag or wrap often finishes the presentation better than extra decoration on the box itself.
Pro Tip: Batch-score and batch-cut a whole run of boxes before gluing any of them, so you’re not switching tools halfway through a production run.
Where to find more pillow box templates and tutorials
We publish printable pillow box templates across various pillow box designs, alongside the main pillow boxes category, which carries both PDF layouts and cutting-ready files.
- Step-by-step guidance on designing printable paper crafts for readers building their own templates from scratch.
- A tutorial on scoring and precision for printable envelopes that applies directly to clean pillow box folds.
Browse either page to find a template that matches your finished size and preferred file format.
DIY templates or pre-made boxes: which makes sense?
A DIY template costs almost nothing beyond paper and time, which makes sense for one-off gifts or small test batches. Once you’re making dozens of identical boxes for a shop or market stall, professional bulk printing often works out cheaper per box and more consistent than hand-scoring every sheet. Prototype one run yourself first, confirm the size and fold work, then decide whether scaling up to bulk printing is worth it.
Most people assume the template is the hard part of a pillow box. It isn’t: the fold is. A template only tells you where to cut, it says nothing about whether your cardstock will crease cleanly or crack, and that detail decides whether the finished box looks handmade in a good way or in a bad one.
— Rob
Download pillow box templates and cutting files from Craftsuprint
We stock printable templates and cutting files built for exactly this kind of project, so you’re not starting from a blank page or guessing at measurements. Browse our cutting files for SVG downloads ready for Cricut and similar machines, or our card making category for print-and-cut PDF layouts.
- Ready-to-print PDF sheets sized for direct hand-cutting.
- Machine-ready SVGs with score lines already separated from the cut lines.
- Tutorials covering assembly and finishing for each template style.
Pick a format that matches your tools and start with one template before building a full batch.
FAQ
How do I make a pillow box?
Tuck or secure the end flaps last, checking the seam sits flat before the glue fully sets.
How can I make a DIY decorative pillow box?
Start from a plain pillow box template, then add stamping, embossing or a ribbon tie once the box is fully assembled and the glue has cured. Keep heavier decoration away from the score lines so the fold stays crisp.
Where can I find free Cricut box templates?
Our pillow box templates page carries printable and cutting-ready designs, and Cricut’s own Design Space library includes free box projects alongside paid ones. Always check the file includes separate score and cut layers before uploading.
Where can I find custom pillow boxes?
Our cutting files category offers SVG templates you can resize or customise before cutting your own boxes. For bulk custom printing rather than DIY cutting, a specialist packaging printer is usually the better route once you’re ordering at scale.
What paper weight works best for a pillow box?
Cardstock between 200 and 300 GSM gives enough structure to hold the curved shape without cracking at the score line. Lighter paper folds more easily but often loses its shape once the box is handled or gifted.
Sources
- Fast Printing Pillow Box Template (110x80x25mm)
- How to upload images into Design Space
- How to make SVG files with score lines for Cricut
- Food contact paper compliance UK | Buyer’s guide | GMLUK