


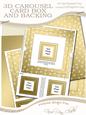
3D Wedding Carousel Card Kit
A gorgeous 3D Wedding design with that added WOW factor! A square card that once opens ties back into a carousel with 5 double page spreads and coordinating triple layered pages creating a visually beautiful card from any angle, including from above! The pages have a small amount of decoration but are mostly left blank to decorate as you wish.
These are lots of 3D decoupage included in the kit including a selection of:- greetings, blank sentiment plaques, tags, journalling panels and ribbons but as the decoupage is all separate you can make this fabulous card differently every time to suit the recipient!! They could even be used as mini scrabook albums or Mini Wedding Albums etc.
Wherever possible I have designed these kits with easy cut layers so they are great for those who find cutting difficult and for children's crafting too! More experienced crafters have the option of making the designs as complex as they wish!
Everything you need to make a really gorgeous 3D card that is approximately 14 x 14 cm square (5.5 x 5.5 inches) and folds flat for posting in a card box or gusseted envelope.
I have also designed a card box kit to complement this design which also includes coordinating backing papers and easy fold photo frames too and is available separately.
There are many more of my Carousel Card Kits to choose from and together they would make a great set of cards to sell at craft fairs etc.
Full photo instructions are included in the kit.
This design is great for Wedding Cards, Anniversary Cards etc


Photographs from the Community

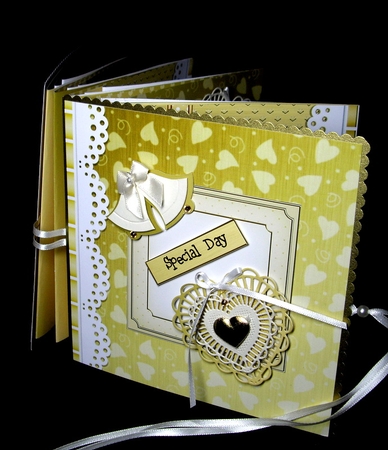
 and has a choice of 3 backing papers. This gives a truly professional finish to the card. I scored and cut out the card parts and joined together using DST. I glued gold organza ribbon round the closed "book" ,leaving a length each end to tie a bow. I added the card covers with DST. Then I added a selection of the many decorative detals included with DST. I printed some labels in Spanish( it's for a Spanish wedding!)on blank labels . I also added a satin heart and bow with charm wedding rings and two champagne glasses from my stash. I've included a photo of the closed card and one in its matching box. This is a beautiful keepsake and looks spectacular. Well worth the time involved printing and cutting out. It's a real "WOW!" card. A super design.)

This carousel kit has a clear illustrated tutorial which I followed to make up the card. I used C.B's matte photo paper and smooth card for the card parts and a mix of 160 decoupage paper, glossy and matte photo paper for decorating.
After printing all the carrousel parts,I put the reverse side through the printer again using backing paper from cup 417812_359 (the matching card box) and has a choice of 3 backing papers.
This gives a truly professional finish to the card. I scored and cut out the card parts and joined together using DST. I glued gold organza ribbon round the closed "book" ,leaving a length each end to tie a bow. I added the card covers with DST.
Then I added a selection of the many decorative detals included with DST. I printed some labels in Spanish( it's for a Spanish wedding!)on blank labels . I also added a satin heart and bow with charm wedding rings and two champagne glasses from my stash. I've included a photo of the closed card and one in its matching box.
This is a beautiful keepsake and looks spectacular. Well worth the time involved printing and cutting out. It's a real "WOW!" card. A super design.


I printed onto 160 gram thin card. Any card thicker than this gives too much bulk to the finished result.
This time I did not print the backing sheet onto the reverse but I added shimmer gold velum to the back of the far inner sections so that no white was showing on the spine of the card.
The centre and front sections did not matter as the white does not show up much, and what does show blends in nicely with the white in the design.
I think I will do this in any future carousel cards I make as otherwise it does use up a lot of ink when you print the backing sheet onto 17 sheets in all.
I have finally learnt after doing so many of these now. I used some of the images in the kit and some of my own die-cut wedding shapes, cut out using gold card and I was really delighted with my finished result.
I made my own box as I do find the matching boxes are not deep enough and the lid pops off.
My box was made from pearl patterned ivory card. These cards really are amazing and my picture does not do this justice. This is a beautiful keepsake that will be treasured for many years