
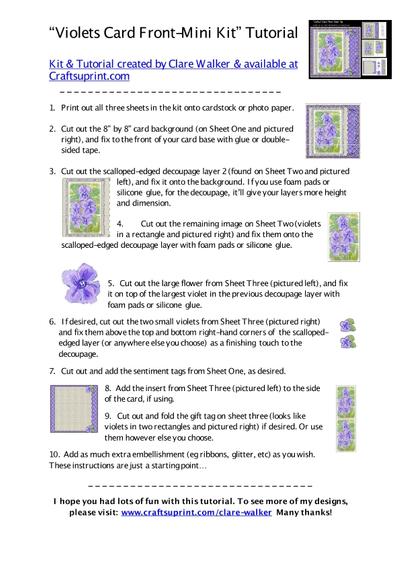
Violets Card Front-Mini Kit Tutorial Kit & Tutorial created by Clare Walker1. Print out all three sheets in the kit onto cardstock or photo paper.2. Cut out the 8 by 8 card background on Sheet One, and fix to the front of your card base with glue or double-sided tape3.
Cut out the scalloped-edged decoupage layer 2 (found on Sheet Two), and fix it onto the background. If you use foam pads or silicone glue, for the decoupage, it`ll give your layers more height and dimension. 4.
Cut out the remaining image on Sheet Two (violets in a rectangle) and fix them onto the scalloped-edged decoupage layer with foam pads or silicone glue. 5.
Cut out the large flower from Sheet Three, and fix it on top of the largest violet in the previous decoupage layer with foam pads or silicone glue.6.
If desired, cut out the two small violets from Sheet Three and fix them above the top and bottom right-hand corners of the scalloped-edged layer (or anywhere else you choose) as a finishing touch to the decoupage. 7.
Cut out and add the sentiment tags from Sheet One, as desired.8.
Add the insert from Sheet Three to the side of the card, if using.9. Cut out and fold the gift tag on sheet three (looks like violets in two rectangles) if desired (or use however else you choose).10.
Add as much extra embellishment (eg ribbons, beads, glitter, sparkles etc) as you wish. These instructions are just a starting point…
Created By
