ART DECO 3D FRAME CARD 1


Made this card in 2 different ways to give completely different look In both cases I folded front of 3d card as follows, with mountain fold (using score line closest to frame), and valley fold (using score line furthest from frame).
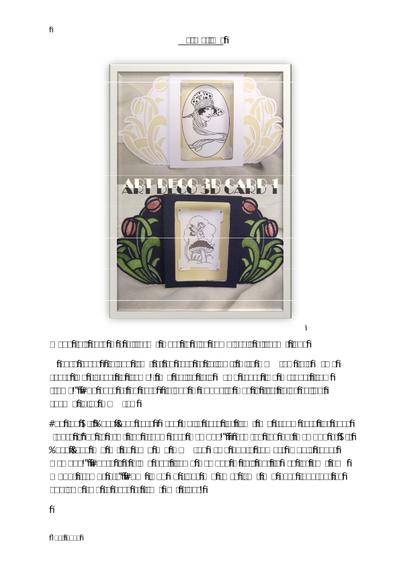
The back of 3d card I folded in opposite way ie first folds valley, second folds mountain. The top Art Deco Lady card I used white card for front and cream card for back (there is jpg to print the cream card included).
I printed the pdf included of Art Deco Lady and cut by hand and mounted using photo corners (whole sheet included).
There is a blank oval frame included in this pdf to use for your own rubber stamps etc.
Then lined up sides and stuck front and back together by applying glue to back of front (cut sides) For the bottom design in picture I did the same as above (except used dark navy card for front, still using cream for back), and printed out the sheet of pixies, cut out one, and mounted using photo corners again.
Main difference with this card is that printed out Tulips Insert pdf on paper and cut out by hand (no need to be too careful as wont see edges..), but before sticking front and back together lined up tulip design so showed through cuts in card front and stuck, before sticking front to corresponding back of the card ie sandwiching tulip design pdf in between.
Added gems to corners of photo corners, and a little gold stickles glitter glue to the wings of the pixie and toadstool NB.
When printing pdfs use Actual Size option in pdf print dialogue Another alternative is to cut front of card and vellum insert card back file,and then cut vellum using vellum insert file and sandwich in between the front and back (as when using tulip insert) ie to give an alternative see thru effect - Folds flat for posting - Other uses include adding own photo attaching with photo corners for a photo frame, or even an elegant menu