


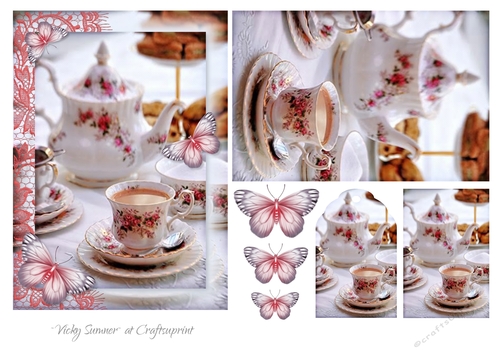
Afternoon Tea 15
Size approx 5x7"
Saved at 200dpi
Will resize well
Personal Use
Commercial use for hand made designs only







Photographs from the Community (4)
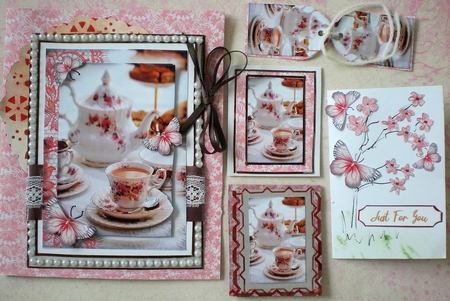

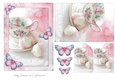
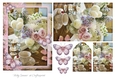
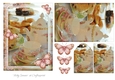
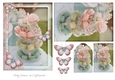
Thank you Vicky, for another one of your “afternoon tea” series, and the third one I have made. The original Old English style cup and saucer and teapot, are comforting visions, which hold special memories, for special celebrations, like Mothers’ day, Birthdays, new home, and sometimes even Sympathy. I printed the sheet provided, and made 2 copies, onto 180gsm CB white card. I used the first copy to cut out the main image. This then became my first backing sheet. I made a bronze and lace ribbon, using 3cm wide synthetic curling ribbon, and attached lace across the centre, using D.S. tape. I then used red power tape to attach this bronze and lace ribbon to the back of this main image 1.5cm up from the bottom edge. I used D.S. tape to attach the next 2 backing sheets, the first of these is white and measures 11.5 X 8.5cm, and the next is silver and measures 12.5 x 9.5 cm. I made the main card using Clare Walker’s Christmas lace Effect,cup814313_79993, which I had colour changed to a pale red using P.S. I printed this on both sides of the sheet and then cut it at 24 x 14.5 cm, and scored and folded it. I then attached a 10cm sized doily that I have given an aged appearance by rubbing brown and orange permanent pens onto my fore finger and smudging the colour onto the doily. I then backed this with a red backing sheet and attached it to the top left hand corner of the card front. Before completing the bronze peel off strips, the decoupage, the pearls, and bow, I completed the insert. The Insert background is the same as the card front, as I had printed the image on both sides of the main card. I used the second image of the tea set, from the first sheet I had copied, to attach to a silver sheet 10 x 7cm which I slanted to the left, and then attached both to the left hand side of the insert. I added 3 pearls to each slanted corner. I then made a silver and white rectangle to fit on the right hand side for the verse and personal greeting. I then began to complete the card front. I coloured some silver peel offs with a bronze permanent pen, and attached them round the edges of the silver and the white backing sheets. I next added the strings of pearls. I used the second copy I had made of the sheet provided to cut out the main image and trim it down so that I had removed the background but retained the butterflies. I then used padded D.S. tape to attach this to the front of the card. I cut out the three butterflies from the first sheet and attached these using tiny padded squares. I used the remaining larger image to cut out the image of the tea cup saucer and plate, and attach it using tiny padded squares. I used 2 lengths of 4mm wide ribbon to make a double bow and attached it to the right hand side of the card front, and sat back and admired this beautiful card. I then used all the left over images to make various gift cards, which I have photographed. I have used the same papers as I have already used in the making of the main card, but in different combinations. The tiny flowers are drawn and cut out from the left over pieces of the main pale red card. This design enabled me to use all of the elements provided on the 2 copies of the sheet. This makes my purchase more appealing value wise than I had even anticipated, so thank you Vicky. This decoupage design is an excellent choice for any card maker.
Pamela Horton

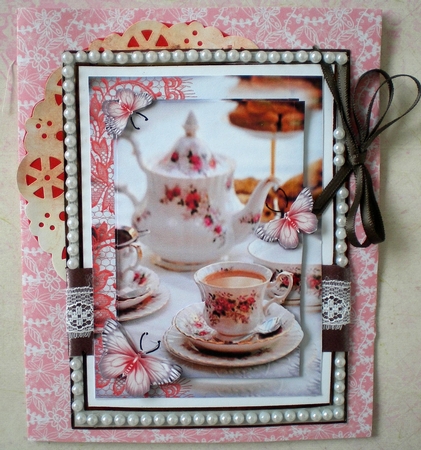
Thank you Vicky, for another one of your “afternoon tea” series, and the third one I have made. The original Old English style cup and saucer and teapot, are comforting visions, which hold special memories, for special celebrations, like Mothers’ day, Birthdays, new home, and sometimes even Sympathy. I printed the sheet provided, and made 2 copies, onto 180gsm CB white card. I used the first copy to cut out the main image. This then became my first backing sheet. I made a bronze and lace ribbon, using 3cm wide synthetic curling ribbon, and attached lace across the centre, using D.S. tape. I then used red power tape to attach this bronze and lace ribbon to the back of this main image 1.5cm up from the bottom edge. I used D.S. tape to attach the next 2 backing sheets, the first of these is white and measures 11.5 X 8.5cm, and the next is silver and measures 12.5 x 9.5 cm. I made the main card using Clare Walker’s Christmas lace Effect,cup814313_79993, which I had colour changed to a pale red using P.S. I printed this on both sides of the sheet and then cut it at 24 x 14.5 cm, and scored and folded it. I then attached a 10cm sized doily that I have given an aged appearance by rubbing brown and orange permanent pens onto my fore finger and smudging the colour onto the doily. I then backed this with a red backing sheet and attached it to the top left hand corner of the card front. Before completing the bronze peel off strips, the decoupage, the pearls, and bow, I completed the insert. The Insert background is the same as the card front, as I had printed the image on both sides of the main card. I used the second image of the tea set, from the first sheet I had copied, to attach to a silver sheet 10 x 7cm which I slanted to the left, and then attached both to the left hand side of the insert. I added 3 pearls to each slanted corner. I then made a silver and white rectangle to fit on the right hand side for the verse and personal greeting. I then began to complete the card front. I coloured some silver peel offs with a bronze permanent pen, and attached them round the edges of the silver and the white backing sheets. I next added the strings of pearls. I used the second copy I had made of the sheet provided to cut out the main image and trim it down so that I had removed the background but retained the butterflies. I then used padded D.S. tape to attach this to the front of the card. I cut out the three butterflies from the first sheet and attached these using tiny padded squares. I used the remaining larger image to cut out the image of the tea cup saucer and plate, and attach it using tiny padded squares. I used 2 lengths of 4mm wide ribbon to make a double bow and attached it to the right hand side of the card front, and sat back and admired this beautiful card. I then used all the left over images to make various gift cards, which I have photographed. I have used the same papers as I have already used in the making of the main card, but in different combinations. The tiny flowers are drawn and cut out from the left over pieces of the main pale red card. This design enabled me to use all of the elements provided on the 2 copies of the sheet. This makes my purchase more appealing value wise than I had even anticipated, so thank you Vicky. This decoupage design is an excellent choice for any card maker.
Pamela Horton
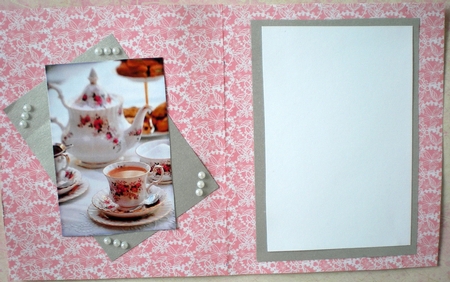
Thank you Vicky, for another one of your “afternoon tea” series, and the third one I have made. The original Old English style cup and saucer and teapot, are comforting visions, which hold special memories, for special celebrations, like Mothers’ day, Birthdays, new home, and sometimes even Sympathy. I printed the sheet provided, and made 2 copies, onto 180gsm CB white card. I used the first copy to cut out the main image. This then became my first backing sheet. I made a bronze and lace ribbon, using 3cm wide synthetic curling ribbon, and attached lace across the centre, using D.S. tape. I then used red power tape to attach this bronze and lace ribbon to the back of this main image 1.5cm up from the bottom edge. I used D.S. tape to attach the next 2 backing sheets, the first of these is white and measures 11.5 X 8.5cm, and the next is silver and measures 12.5 x 9.5 cm. I made the main card using Clare Walker’s Christmas lace Effect,cup814313_79993, which I had colour changed to a pale red using P.S. I printed this on both sides of the sheet and then cut it at 24 x 14.5 cm, and scored and folded it. I then attached a 10cm sized doily that I have given an aged appearance by rubbing brown and orange permanent pens onto my fore finger and smudging the colour onto the doily. I then backed this with a red backing sheet and attached it to the top left hand corner of the card front. Before completing the bronze peel off strips, the decoupage, the pearls, and bow, I completed the insert. The Insert background is the same as the card front, as I had printed the image on both sides of the main card. I used the second image of the tea set, from the first sheet I had copied, to attach to a silver sheet 10 x 7cm which I slanted to the left, and then attached both to the left hand side of the insert. I added 3 pearls to each slanted corner. I then made a silver and white rectangle to fit on the right hand side for the verse and personal greeting. I then began to complete the card front. I coloured some silver peel offs with a bronze permanent pen, and attached them round the edges of the silver and the white backing sheets. I next added the strings of pearls. I used the second copy I had made of the sheet provided to cut out the main image and trim it down so that I had removed the background but retained the butterflies. I then used padded D.S. tape to attach this to the front of the card. I cut out the three butterflies from the first sheet and attached these using tiny padded squares. I used the remaining larger image to cut out the image of the tea cup saucer and plate, and attach it using tiny padded squares. I used 2 lengths of 4mm wide ribbon to make a double bow and attached it to the right hand side of the card front, and sat back and admired this beautiful card. I then used all the left over images to make various gift cards, which I have photographed. I have used the same papers as I have already used in the making of the main card, but in different combinations. The tiny flowers are drawn and cut out from the left over pieces of the main pale red card. This design enabled me to use all of the elements provided on the 2 copies of the sheet. This makes my purchase more appealing value wise than I had even anticipated, so thank you Vicky. This decoupage design is an excellent choice for any card maker.
Pamela Horton
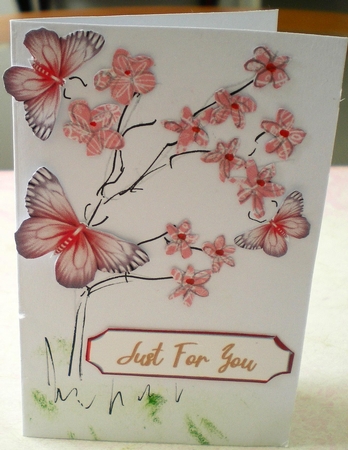
Thank you Vicky, for another one of your “afternoon tea” series, and the third one I have made. The original Old English style cup and saucer and teapot, are comforting visions, which hold special memories, for special celebrations, like Mothers’ day, Birthdays, new home, and sometimes even Sympathy. I printed the sheet provided, and made 2 copies, onto 180gsm CB white card. I used the first copy to cut out the main image. This then became my first backing sheet. I made a bronze and lace ribbon, using 3cm wide synthetic curling ribbon, and attached lace across the centre, using D.S. tape. I then used red power tape to attach this bronze and lace ribbon to the back of this main image 1.5cm up from the bottom edge. I used D.S. tape to attach the next 2 backing sheets, the first of these is white and measures 11.5 X 8.5cm, and the next is silver and measures 12.5 x 9.5 cm. I made the main card using Clare Walker’s Christmas lace Effect,cup814313_79993, which I had colour changed to a pale red using P.S. I printed this on both sides of the sheet and then cut it at 24 x 14.5 cm, and scored and folded it. I then attached a 10cm sized doily that I have given an aged appearance by rubbing brown and orange permanent pens onto my fore finger and smudging the colour onto the doily. I then backed this with a red backing sheet and attached it to the top left hand corner of the card front. Before completing the bronze peel off strips, the decoupage, the pearls, and bow, I completed the insert. The Insert background is the same as the card front, as I had printed the image on both sides of the main card. I used the second image of the tea set, from the first sheet I had copied, to attach to a silver sheet 10 x 7cm which I slanted to the left, and then attached both to the left hand side of the insert. I added 3 pearls to each slanted corner. I then made a silver and white rectangle to fit on the right hand side for the verse and personal greeting. I then began to complete the card front. I coloured some silver peel offs with a bronze permanent pen, and attached them round the edges of the silver and the white backing sheets. I next added the strings of pearls. I used the second copy I had made of the sheet provided to cut out the main image and trim it down so that I had removed the background but retained the butterflies. I then used padded D.S. tape to attach this to the front of the card. I cut out the three butterflies from the first sheet and attached these using tiny padded squares. I used the remaining larger image to cut out the image of the tea cup saucer and plate, and attach it using tiny padded squares. I used 2 lengths of 4mm wide ribbon to make a double bow and attached it to the right hand side of the card front, and sat back and admired this beautiful card. I then used all the left over images to make various gift cards, which I have photographed. I have used the same papers as I have already used in the making of the main card, but in different combinations. The tiny flowers are drawn and cut out from the left over pieces of the main pale red card. This design enabled me to use all of the elements provided on the 2 copies of the sheet. This makes my purchase more appealing value wise than I had even anticipated, so thank you Vicky. This decoupage design is an excellent choice for any card maker.
Pamela Horton
More Products from Digital Designs by Victoria