

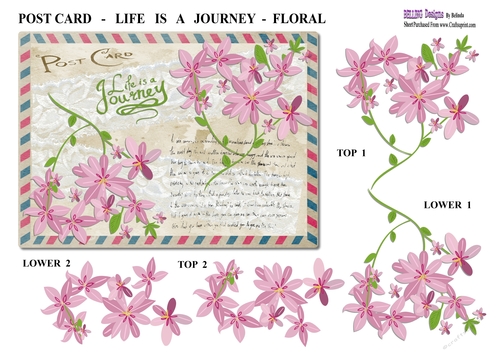

Post Card - Life Is A Journey - Floral
Pretty Post card, card topper with lace ribbon in background and floral embellishments, sentiment, decoupage pieces.
Included: Main Card Topper, Decoupage Pieces
Sentiment: Life Is A Journey
A4 Sheet
jpg full resolution 300dpi


Photographs from the Community (3)
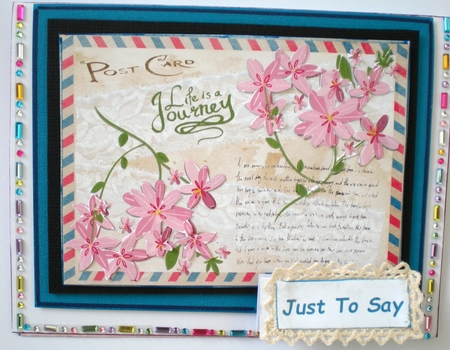

This delightful postcard style of card has a very old world attraction to the eye. It is a very long time since I have received a post card from overseas. It would have been way back in the 1950’s, and I love it, just as I did receiving them so many years ago. It is certainly very imaginative. I printed the sheet supplied, onto 200gsm white matte card, and cut out the main element. I made 2 backing sheets, a black textured card which measures, 11.5 x 8.5cm, and a deep sky blue textured card which measures,12.5 x 9.5cm. I then used a blue permanent pen to colour the edges of the main element and both of the backing sheets. I used padded tape to attach these three together, and the same tape to attach them to the white card front, which measures, 14.5 x 10.5 cm. I used a deep plum coloured pen to colour the edges of this white card. I used some jewel peel offs to attach to the sides and lower edge of the card front. I noticed when cutting out the decoupage pieces that the piece marked for the top 2, is actually the match for the lower 2. I did not use all the tiny pieces, my card is quite small for easy posting, and the extra pieces were not really necessary. I will be able to use them on inserts for other cards. I never seem to be able reduce my stash. I did not use padded D.S. tape to attach the decoupage, instead I used white glue, and I applied with a point of a darning needle. I then used a dressmakers pin, to poke into the centre, and then to pick up the small elements and put them in place. This worked a treat, and made it very easy to move the tiny pieces exactly where I wanted them. I made a 3 step concertina fold style sentiment tag. I printed the sentiment using the computer. I cut it at 4cm x 2cm and coloured the edges blue. I used a length of ivory lace to attach to the back of the sentiment using white glue. I then used D.S. tape to attach this sentiment to the concertina tag front. I coloured some heart peel offs with the plum coloured pen, and attached then inside the flap of the tag. I used padded tape to close the tag back, and to attach the completed tag to the card front. To make the insert, I used a pink, flower textured light card cut to 21 x 13.5cm, and coloured the edges with the plum coloured pen. I hand wrote the greeting, and used one of the pieces of the decoupage as an adornment. I have made this in plenty of time for the Valentine celebration. Thank you Belinda. I love the design
Pamela Horton

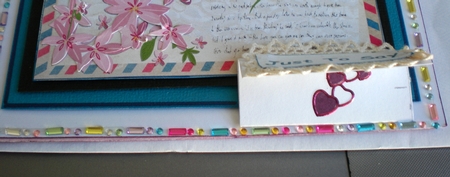
This delightful postcard style of card has a very old world attraction to the eye. It is a very long time since I have received a post card from overseas. It would have been way back in the 1950’s, and I love it, just as I did receiving them so many years ago. It is certainly very imaginative. I printed the sheet supplied, onto 200gsm white matte card, and cut out the main element. I made 2 backing sheets, a black textured card which measures, 11.5 x 8.5cm, and a deep sky blue textured card which measures,12.5 x 9.5cm. I then used a blue permanent pen to colour the edges of the main element and both of the backing sheets. I used padded tape to attach these three together, and the same tape to attach them to the white card front, which measures, 14.5 x 10.5 cm. I used a deep plum coloured pen to colour the edges of this white card. I used some jewel peel offs to attach to the sides and lower edge of the card front. I noticed when cutting out the decoupage pieces that the piece marked for the top 2, is actually the match for the lower 2. I did not use all the tiny pieces, my card is quite small for easy posting, and the extra pieces were not really necessary. I will be able to use them on inserts for other cards. I never seem to be able reduce my stash. I did not use padded D.S. tape to attach the decoupage, instead I used white glue, and I applied with a point of a darning needle. I then used a dressmakers pin, to poke into the centre, and then to pick up the small elements and put them in place. This worked a treat, and made it very easy to move the tiny pieces exactly where I wanted them. I made a 3 step concertina fold style sentiment tag. I printed the sentiment using the computer. I cut it at 4cm x 2cm and coloured the edges blue. I used a length of ivory lace to attach to the back of the sentiment using white glue. I then used D.S. tape to attach this sentiment to the concertina tag front. I coloured some heart peel offs with the plum coloured pen, and attached then inside the flap of the tag. I used padded tape to close the tag back, and to attach the completed tag to the card front. To make the insert, I used a pink, flower textured light card cut to 21 x 13.5cm, and coloured the edges with the plum coloured pen. I hand wrote the greeting, and used one of the pieces of the decoupage as an adornment. I have made this in plenty of time for the Valentine celebration. Thank you Belinda. I love the design
Pamela Horton
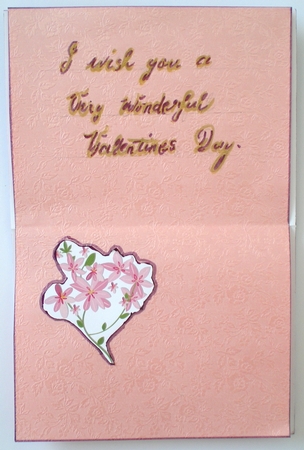
This delightful postcard style of card has a very old world attraction to the eye. It is a very long time since I have received a post card from overseas. It would have been way back in the 1950’s, and I love it, just as I did receiving them so many years ago. It is certainly very imaginative. I printed the sheet supplied, onto 200gsm white matte card, and cut out the main element. I made 2 backing sheets, a black textured card which measures, 11.5 x 8.5cm, and a deep sky blue textured card which measures,12.5 x 9.5cm. I then used a blue permanent pen to colour the edges of the main element and both of the backing sheets. I used padded tape to attach these three together, and the same tape to attach them to the white card front, which measures, 14.5 x 10.5 cm. I used a deep plum coloured pen to colour the edges of this white card. I used some jewel peel offs to attach to the sides and lower edge of the card front. I noticed when cutting out the decoupage pieces that the piece marked for the top 2, is actually the match for the lower 2. I did not use all the tiny pieces, my card is quite small for easy posting, and the extra pieces were not really necessary. I will be able to use them on inserts for other cards. I never seem to be able reduce my stash. I did not use padded D.S. tape to attach the decoupage, instead I used white glue, and I applied with a point of a darning needle. I then used a dressmakers pin, to poke into the centre, and then to pick up the small elements and put them in place. This worked a treat, and made it very easy to move the tiny pieces exactly where I wanted them. I made a 3 step concertina fold style sentiment tag. I printed the sentiment using the computer. I cut it at 4cm x 2cm and coloured the edges blue. I used a length of ivory lace to attach to the back of the sentiment using white glue. I then used D.S. tape to attach this sentiment to the concertina tag front. I coloured some heart peel offs with the plum coloured pen, and attached then inside the flap of the tag. I used padded tape to close the tag back, and to attach the completed tag to the card front. To make the insert, I used a pink, flower textured light card cut to 21 x 13.5cm, and coloured the edges with the plum coloured pen. I hand wrote the greeting, and used one of the pieces of the decoupage as an adornment. I have made this in plenty of time for the Valentine celebration. Thank you Belinda. I love the design
Pamela Horton
More Products from Belling Designs