

French Writings Water LilyCompleted by Pamela Horton The whispering Platypus
OccasionThis is a very romantic sheet designed by Pauline Black. I have been able to make valuable and multiple use of this design. I am sharing one of those with you. Using, 200gsm matte white card, I printed off the sheet supplied, in the smallest, usable size, which made the main, framed feature, measure,12cm high x 8.5 cm wide. I made a backing sheet in the same card, 13cm x 9cm.and used D.S. Tape to attach these together.
I used a stitching pattern designed by, Emy Van Schaik, Ed-J, the letter J,cup280509_1549, to out the design and then stitch and complete the beading. I set this aside, while I prepared the 3 backing sheets. I kept within the colour scheme portrayed in, the water lily design, so the largest backing sheet, is a soft green.14.75x11cm, the next is a deep pink,14.25 x 10cm, and the smallest is a deep purple, 13.5cm x 9.75cm. I used D.S Tape to matt these together. I set this backing sheet aside while I prepared the decorative strips. I used my manual cutter to cut a soft green strip 0.8cm wide x 22cm long. I used narrow, D .S. tape to attach it from the right hand top corner to the lower,left hand corner. This makes the strip run at the same angle as the shape of the letter. J. The next 6 strips are in 2 separate widths, and were selected to match, the mauve shade of pink, depicted in the Water Lily petals. The narrow strips are 0.5cm wide and vary in length, one at 11cm. , one at 9cm, and one at 5cm. These will also be attached with narrow D.S Tape and will need to be trimmed later. The wider 1cm strips are different lengths also, one is 9cm, one is14cm and one is 7cm. These will be attached with narrow D.S Tape. The tape needs to go, right to the edge of the green backing sheet. The extra D.S Tape will be trimmed when you neaten the edges level.
To attach these to the backing sheets. Working with the backing sheets Right side Up and flat on the work surface, and using a ruler and an HB pencil, mark the following dots that will position the strips.
From left to right, and along the top edge, place a dot at, 3cm, 5cm and 6cm. Turn the work, CLOCKWISE, and again starting from the left. place a dot at 7cm, 8.5cm, and 10.5cm. Turn the work CLOCKWISE, and again, starting from the left, place a dot at, 2cm, 4cm, and 5cm. Turn the work CLOCKWISE and again, working from the left, place a dot at, 8.5cm,10cm, and 12cm, and turn your work clockwise back to the correct position. These dots represent the top edge of each strip. Each strip is attached in turn starting with a 1cm wide 10cm long strip, and attaching it so that is longer than the green strip, matching the top edge of the strip to the dot, made on the top edge of the card and the dot on the left hand edge of the card. This line it forms, will be in line, with the green strip previously attached, corner to corner. Complete the rest of the strips, in the order and size, as depicted in the photograph of the completed card. Trim the excess of the strips away carefully. Using Power tape, I then attached the backing sheets to the main purple card front 15 x 11 cm. I used the same power tape to attach the main art work that was stitched and beaded to the backing sheets. I cut and glued some extra butterflies to the card front, and attached, a dangling, Thank You sentiment.
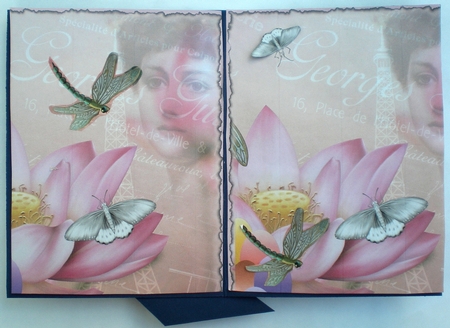
For the INSERT, I printed off 2 copies of the sheet provided, onto copy paper, at actual size, and cut the sheets to size, to make the insert. I cut and glued a butterfly and 2 dragonflies as extra bling.
What a delightfully romantic card this has made. Thank You, Pauline
Pamela Horton
