


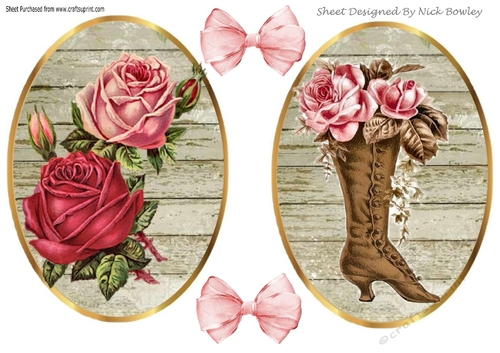

beautiful wood effect toppers with vintage roses and boot
beautiful wood effect toppers with vintage roses and boot, with organza bows, makes two beautiful cards, lots of other toppers to see


Photographs from the Community (4)
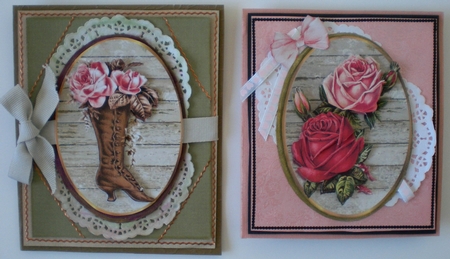

I really do like being able to purchase 2 card topper designs, for the price of one, particularly when they come with such detail, and flair. Thank you Nick, I love this card topper. I used CB matte white 200gsm card to print the sheet provided, twice. I cut out all the elements from the first sheet. I then made one template of an oval frame, as the oval shape is exactly the same size for both of the toppers, by tracing around the oval topper supplied, and allowing a width of 3mm wider to use as a cutting line. I used a camel coloured textured card, to then make both ovals. I used a gold metallic pen to colour in the outer edge by 0.5cm of one oval textured card shape, and a deep burgundy to colour in the second oval by a width of 0.5cm. I then used a gold glitter glue pen to randomly colour the burgundy edged oval. I wanted it to appear almost antique, but a little shabby chic as well. I used the same gold glitter glue pen to colour over the metallic gold pen on the other oval shape, but in a more definite and accurate manner. I then went ahead to complete the pink card by attaching a pink heart embossed ribbon to the back of the gold edged oval, using white glue, and then attaching 2 halves of a 9cm white doily to the upper left corner and the lower right corner, and wrapping the ribbon around to the back and securing all together with white glue. I used white glue to attach this to the first backing sheet, which is a soft salmon pink, semi-gloss rose embossed heavy duty paper, which measures 12.75x 11.25cm. I then attached the topper using padded D.S. tape. I cut out the matching roses from the second copied sheet and used padded D.S. tape, and tiny squares to attach this to the front of the topper. The next backing sheet is a black textured card which measures, 13.25 x 11.50cm. I attached this to the back of the pink backing sheet using padded D.S. tape. Before attaching this to the card front, I added the organza bow and 2 tails of the matching ribbon, and attached some delicate black peel off strips to the edges of the pink backing sheet. The main card is a light weight, pale salmon pink textured card, cut at 25x14 cm, then scored and folded. I used the same embossed rose pink paper for the insert, and added some ribbon tails and an organza bow to the left hand side. On the right hand side I added a simple hand cut flower from a rose print paper, I had coloured with a dark pink cream chalk. I then began to complete the second topper, by colouring two white 9cm doilies, using dark and light green and deep rose red cream chalks, to make them appear aged and almost shabby chic. I used padded D.S. tape attach these to the back of the Burgundy and gold edged oval. I used a 1.5 m wide grosgrain, pale moss green ribbon to attach across the middle of this oval, and using power tape to secure it to the front of the oval. I made a textured dark moss green backing sheet which measures 12.5 x 11cm, and used white glue to attach the back of the doilies to this backing sheet. I then used copper coloured peel off strips to attach across each corner. I marked the position of these strips with a tiny pencil dot before attaching them, to make sure they sat equidistant from one another and looked balanced. I did not leave a long enough tail for each of these strips and had some difficulty in getting them to tuck out of sight, so I recommend attaching these before attaching it to the next backing sheet and leaving at least 1cm to overlap and tuck behind. The next backing sheet, is a very pale moss green textured light card and measures 14.5 x 12cm. I attached this using padded D.S. tape, and before I wrapped the ribbon around to the back and secured it, I used the same style of copper peel off strips to attach to the 4 sides of the moss green backing sheet. I tied a bow and used power tape to attach it. I used the second copy of the sheet to cut out the boot with the flower spray, and used padded D.S tape and small squares to attach it to the topper. The main card is a heavy 250gsm matte gold embossed card, which I cut at 25 x 15.5cm, and scored and folded it before I attached the completed topper using padded D.S. tape. I used a pink rose and some paper strips to attach to the left hand side of the insert. For the right hand side, I used 2 sheets of rose printed paper. One is cut 14.5 x 10cm and is white glued right side up, the other is glued to the top of this with the white side showing and measures 13.5 x 8.5 and is edged with copper peel off strips, and has an organza bow attached to the corner. These both have turned out to be stunning cards, suitable for so many female occasions and celebrations. I am absolutely thrilled with the results. Thank you Nick for offering them for purchase, I really love them both. I am sending a big hug for you and your designing flair.
Pamela Horton

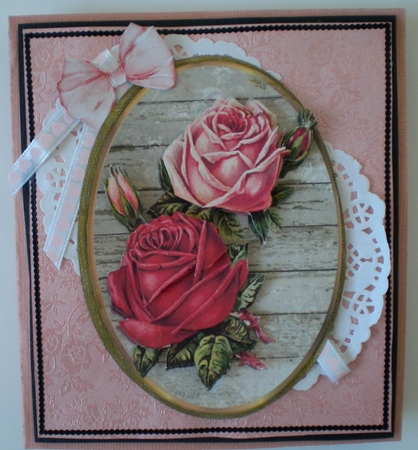
I really do like being able to purchase 2 card topper designs, for the price of one, particularly when they come with such detail, and flair. Thank you Nick, I love this card topper. I used CB matte white 200gsm card to print the sheet provided, twice. I cut out all the elements from the first sheet. I then made one template of an oval frame, as the oval shape is exactly the same size for both of the toppers, by tracing around the oval topper supplied, and allowing a width of 3mm wider to use as a cutting line. I used a camel coloured textured card, to then make both ovals. I used a gold metallic pen to colour in the outer edge by 0.5cm of one oval textured card shape, and a deep burgundy to colour in the second oval by a width of 0.5cm. I then used a gold glitter glue pen to randomly colour the burgundy edged oval. I wanted it to appear almost antique, but a little shabby chic as well. I used the same gold glitter glue pen to colour over the metallic gold pen on the other oval shape, but in a more definite and accurate manner. I then went ahead to complete the pink card by attaching a pink heart embossed ribbon to the back of the gold edged oval, using white glue, and then attaching 2 halves of a 9cm white doily to the upper left corner and the lower right corner, and wrapping the ribbon around to the back and securing all together with white glue. I used white glue to attach this to the first backing sheet, which is a soft salmon pink, semi-gloss rose embossed heavy duty paper, which measures 12.75x 11.25cm. I then attached the topper using padded D.S. tape. I cut out the matching roses from the second copied sheet and used padded D.S. tape, and tiny squares to attach this to the front of the topper. The next backing sheet is a black textured card which measures, 13.25 x 11.50cm. I attached this to the back of the pink backing sheet using padded D.S. tape. Before attaching this to the card front, I added the organza bow and 2 tails of the matching ribbon, and attached some delicate black peel off strips to the edges of the pink backing sheet. The main card is a light weight, pale salmon pink textured card, cut at 25x14 cm, then scored and folded. I used the same embossed rose pink paper for the insert, and added some ribbon tails and an organza bow to the left hand side. On the right hand side I added a simple hand cut flower from a rose print paper, I had coloured with a dark pink cream chalk. I then began to complete the second topper, by colouring two white 9cm doilies, using dark and light green and deep rose red cream chalks, to make them appear aged and almost shabby chic. I used padded D.S. tape attach these to the back of the Burgundy and gold edged oval. I used a 1.5 m wide grosgrain, pale moss green ribbon to attach across the middle of this oval, and using power tape to secure it to the front of the oval. I made a textured dark moss green backing sheet which measures 12.5 x 11cm, and used white glue to attach the back of the doilies to this backing sheet. I then used copper coloured peel off strips to attach across each corner. I marked the position of these strips with a tiny pencil dot before attaching them, to make sure they sat equidistant from one another and looked balanced. I did not leave a long enough tail for each of these strips and had some difficulty in getting them to tuck out of sight, so I recommend attaching these before attaching it to the next backing sheet and leaving at least 1cm to overlap and tuck behind. The next backing sheet, is a very pale moss green textured light card and measures 14.5 x 12cm. I attached this using padded D.S. tape, and before I wrapped the ribbon around to the back and secured it, I used the same style of copper peel off strips to attach to the 4 sides of the moss green backing sheet. I tied a bow and used power tape to attach it. I used the second copy of the sheet to cut out the boot with the flower spray, and used padded D.S tape and small squares to attach it to the topper. The main card is a heavy 250gsm matte gold embossed card, which I cut at 25 x 15.5cm, and scored and folded it before I attached the completed topper using padded D.S. tape. I used a pink rose and some paper strips to attach to the left hand side of the insert. For the right hand side, I used 2 sheets of rose printed paper. One is cut 14.5 x 10cm and is white glued right side up, the other is glued to the top of this with the white side showing and measures 13.5 x 8.5 and is edged with copper peel off strips, and has an organza bow attached to the corner. These both have turned out to be stunning cards, suitable for so many female occasions and celebrations. I am absolutely thrilled with the results. Thank you Nick for offering them for purchase, I really love them both. I am sending a big hug for you and your designing flair.
Pamela Horton
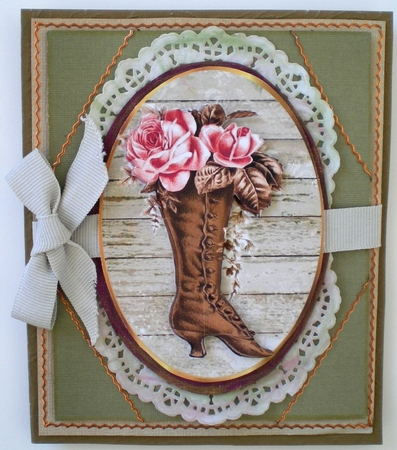
I really do like being able to purchase 2 card topper designs, for the price of one, particularly when they come with such detail, and flair. Thank you Nick, I love this card topper. I used CB matte white 200gsm card to print the sheet provided, twice. I cut out all the elements from the first sheet. I then made one template of an oval frame, as the oval shape is exactly the same size for both of the toppers, by tracing around the oval topper supplied, and allowing a width of 3mm wider to use as a cutting line. I used a camel coloured textured card, to then make both ovals. I used a gold metallic pen to colour in the outer edge by 0.5cm of one oval textured card shape, and a deep burgundy to colour in the second oval by a width of 0.5cm. I then used a gold glitter glue pen to randomly colour the burgundy edged oval. I wanted it to appear almost antique, but a little shabby chic as well. I used the same gold glitter glue pen to colour over the metallic gold pen on the other oval shape, but in a more definite and accurate manner. I then went ahead to complete the pink card by attaching a pink heart embossed ribbon to the back of the gold edged oval, using white glue, and then attaching 2 halves of a 9cm white doily to the upper left corner and the lower right corner, and wrapping the ribbon around to the back and securing all together with white glue. I used white glue to attach this to the first backing sheet, which is a soft salmon pink, semi-gloss rose embossed heavy duty paper, which measures 12.75x 11.25cm. I then attached the topper using padded D.S. tape. I cut out the matching roses from the second copied sheet and used padded D.S. tape, and tiny squares to attach this to the front of the topper. The next backing sheet is a black textured card which measures, 13.25 x 11.50cm. I attached this to the back of the pink backing sheet using padded D.S. tape. Before attaching this to the card front, I added the organza bow and 2 tails of the matching ribbon, and attached some delicate black peel off strips to the edges of the pink backing sheet. The main card is a light weight, pale salmon pink textured card, cut at 25x14 cm, then scored and folded. I used the same embossed rose pink paper for the insert, and added some ribbon tails and an organza bow to the left hand side. On the right hand side I added a simple hand cut flower from a rose print paper, I had coloured with a dark pink cream chalk. I then began to complete the second topper, by colouring two white 9cm doilies, using dark and light green and deep rose red cream chalks, to make them appear aged and almost shabby chic. I used padded D.S. tape attach these to the back of the Burgundy and gold edged oval. I used a 1.5 m wide grosgrain, pale moss green ribbon to attach across the middle of this oval, and using power tape to secure it to the front of the oval. I made a textured dark moss green backing sheet which measures 12.5 x 11cm, and used white glue to attach the back of the doilies to this backing sheet. I then used copper coloured peel off strips to attach across each corner. I marked the position of these strips with a tiny pencil dot before attaching them, to make sure they sat equidistant from one another and looked balanced. I did not leave a long enough tail for each of these strips and had some difficulty in getting them to tuck out of sight, so I recommend attaching these before attaching it to the next backing sheet and leaving at least 1cm to overlap and tuck behind. The next backing sheet, is a very pale moss green textured light card and measures 14.5 x 12cm. I attached this using padded D.S. tape, and before I wrapped the ribbon around to the back and secured it, I used the same style of copper peel off strips to attach to the 4 sides of the moss green backing sheet. I tied a bow and used power tape to attach it. I used the second copy of the sheet to cut out the boot with the flower spray, and used padded D.S tape and small squares to attach it to the topper. The main card is a heavy 250gsm matte gold embossed card, which I cut at 25 x 15.5cm, and scored and folded it before I attached the completed topper using padded D.S. tape. I used a pink rose and some paper strips to attach to the left hand side of the insert. For the right hand side, I used 2 sheets of rose printed paper. One is cut 14.5 x 10cm and is white glued right side up, the other is glued to the top of this with the white side showing and measures 13.5 x 8.5 and is edged with copper peel off strips, and has an organza bow attached to the corner. These both have turned out to be stunning cards, suitable for so many female occasions and celebrations. I am absolutely thrilled with the results. Thank you Nick for offering them for purchase, I really love them both. I am sending a big hug for you and your designing flair.
Pamela Horton
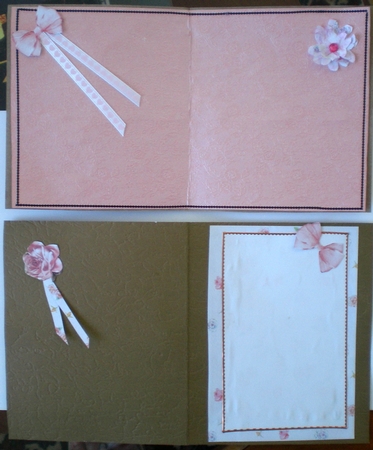
I really do like being able to purchase 2 card topper designs, for the price of one, particularly when they come with such detail, and flair. Thank you Nick, I love this card topper. I used CB matte white 200gsm card to print the sheet provided, twice. I cut out all the elements from the first sheet. I then made one template of an oval frame, as the oval shape is exactly the same size for both of the toppers, by tracing around the oval topper supplied, and allowing a width of 3mm wider to use as a cutting line. I used a camel coloured textured card, to then make both ovals. I used a gold metallic pen to colour in the outer edge by 0.5cm of one oval textured card shape, and a deep burgundy to colour in the second oval by a width of 0.5cm. I then used a gold glitter glue pen to randomly colour the burgundy edged oval. I wanted it to appear almost antique, but a little shabby chic as well. I used the same gold glitter glue pen to colour over the metallic gold pen on the other oval shape, but in a more definite and accurate manner. I then went ahead to complete the pink card by attaching a pink heart embossed ribbon to the back of the gold edged oval, using white glue, and then attaching 2 halves of a 9cm white doily to the upper left corner and the lower right corner, and wrapping the ribbon around to the back and securing all together with white glue. I used white glue to attach this to the first backing sheet, which is a soft salmon pink, semi-gloss rose embossed heavy duty paper, which measures 12.75x 11.25cm. I then attached the topper using padded D.S. tape. I cut out the matching roses from the second copied sheet and used padded D.S. tape, and tiny squares to attach this to the front of the topper. The next backing sheet is a black textured card which measures, 13.25 x 11.50cm. I attached this to the back of the pink backing sheet using padded D.S. tape. Before attaching this to the card front, I added the organza bow and 2 tails of the matching ribbon, and attached some delicate black peel off strips to the edges of the pink backing sheet. The main card is a light weight, pale salmon pink textured card, cut at 25x14 cm, then scored and folded. I used the same embossed rose pink paper for the insert, and added some ribbon tails and an organza bow to the left hand side. On the right hand side I added a simple hand cut flower from a rose print paper, I had coloured with a dark pink cream chalk. I then began to complete the second topper, by colouring two white 9cm doilies, using dark and light green and deep rose red cream chalks, to make them appear aged and almost shabby chic. I used padded D.S. tape attach these to the back of the Burgundy and gold edged oval. I used a 1.5 m wide grosgrain, pale moss green ribbon to attach across the middle of this oval, and using power tape to secure it to the front of the oval. I made a textured dark moss green backing sheet which measures 12.5 x 11cm, and used white glue to attach the back of the doilies to this backing sheet. I then used copper coloured peel off strips to attach across each corner. I marked the position of these strips with a tiny pencil dot before attaching them, to make sure they sat equidistant from one another and looked balanced. I did not leave a long enough tail for each of these strips and had some difficulty in getting them to tuck out of sight, so I recommend attaching these before attaching it to the next backing sheet and leaving at least 1cm to overlap and tuck behind. The next backing sheet, is a very pale moss green textured light card and measures 14.5 x 12cm. I attached this using padded D.S. tape, and before I wrapped the ribbon around to the back and secured it, I used the same style of copper peel off strips to attach to the 4 sides of the moss green backing sheet. I tied a bow and used power tape to attach it. I used the second copy of the sheet to cut out the boot with the flower spray, and used padded D.S tape and small squares to attach it to the topper. The main card is a heavy 250gsm matte gold embossed card, which I cut at 25 x 15.5cm, and scored and folded it before I attached the completed topper using padded D.S. tape. I used a pink rose and some paper strips to attach to the left hand side of the insert. For the right hand side, I used 2 sheets of rose printed paper. One is cut 14.5 x 10cm and is white glued right side up, the other is glued to the top of this with the white side showing and measures 13.5 x 8.5 and is edged with copper peel off strips, and has an organza bow attached to the corner. These both have turned out to be stunning cards, suitable for so many female occasions and celebrations. I am absolutely thrilled with the results. Thank you Nick for offering them for purchase, I really love them both. I am sending a big hug for you and your designing flair.
Pamela Horton