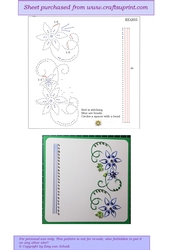

ED205 floral borderCompleted by Pamela Horton The whispering Platypus
OccasionI have used several graded shades of mauve in the completion of this project, which has given the beautifully designed floral and linear image a delicate and feminine appeal.
I have used the Hello as the greeting to a friend who lives alone and in self isolation.
I printed the sheet supplied at the actual size and copied it onto a 12.5cm square, 170gsm white card. I have used 2 shades of mauve embroidery floss to stitch the flowers. For the larger flowers, I have used the lighter shade. The swirls, representing the stems, I have stitched using a soft green embroidery floss.
I then used 15 pale mauve pearl finished seed beads for the buds sitting inside the swirls, 12 of the same seed beads to attach to the base of each of the petals of the larger flowers, 6 of the same seed beads to stitch into the base of the small flower.
Instead of using spacers I have used 3 rose gold faceted sequins and attached one of the small mauve seed beads to the centre of each one of these.
The 7 green leaves have each had a tiny green glass seed bead attached to the base of a green glass tube bead and I did this as I stitched these in place.
I secured this part of the work at the back using magic tape before attaching the 23 mauve pearl finished seed beads in place, using the lightest shade of mauve floss.
The lines are stitched using double threads of embroidery floss.
The line closest to the line of beads is the same shade as the largest flower. For the middle line of long stitching, I have used one strand of the lighter shade of mauve and one of the darker mauve, and for the line further away again from the bead line I have used 2 strands of the darkest mauve.
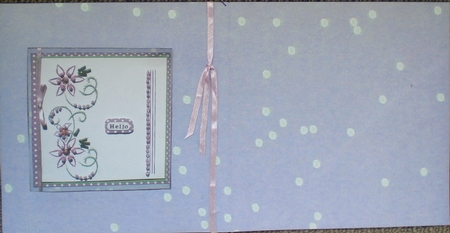
I used the magic tape to secure the stitching and used a water colour fine line marker to define the edges of the finished work and attached this to a 13cm bright green backing sheet using D.S. tape and then onto a 13.5cm mauve white spot backing sheet, which also has the edges defined using the same marker.
I have used the delicate pastel coloured spotty backing/ Background sheet, cup986138_21027, to change the hue into mauve and printed this onto both sides of the A4 white card which I then cut to measure 28.5 x14.5cm and scored and folded.
I attached the topper to the card front and used a very pale mauve 3mm wide satin ribbon to tie a bow in the centre and attached this to the front using 2mm wide red power tape.
I carried the tails over the card front to meet at the inside of the front cover, where it is secured with a slip knot and red power tape.
I have used a small image of the completed card as part of the insert.
I have made the sentiment using tiny peel off letters which I have coloured with a mauve permanent pen and attached this to some of the mauve white spot backing sheet.
I have left the right hand side of the insert blank for my personal message. The stitching guide is very easy to follow which made the project very easy and quick to complete. Pamela Horton. The Whispering Platypus.

Make your Own, Buy the Download!
ED205 floral border
Stitching with bads and spacers