
Ed-a the Letter ACompleted by Pamela Horton The whispering Platypus
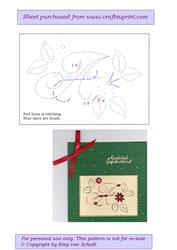
The letter A, I have chosen to purchase, and complete the stitching and beading, by following the instructions is a very easy and quick project. I chose red and green, to complete both the stitching and the beading. The threads I used are regular polyester threads. I stitched the letter A with the red thread, leaving the gaps for the beads to be attached later. I used a deep leaf green for the leaves, and as before followed the stitching guidelines. To complete the beading, I used 8 red, 6mm, rice beads, and 8 very tiny 2mm red seed beads for the larger flower. I used 4 red 6mm rice beads and 6 of the same tiny red seed beads, and 3 jade green, 3mm seed beads, to complete the lines left blank in the letter A. I also used 1 red rice bead at the top point of the letter A. I used 8 red 3mm round beads, for the smaller flower, and I used the red thread, so that it is clearly exposed, to give the appearance of fine edges to the petals. For the swirl at the bottom of the design, I used 4 jade green, 3mm seed beads and 1 iridescent, green, 6mm rice bead. Altogether this calculates to 43 beads.
The list is as follows, 12 red 6mm rice beads,
15 tiny 2mm red seed beads,
7 jade green, 3mm seed beads,
8 red 3mm round beads
1 iridescent green, 6mm rice bead.
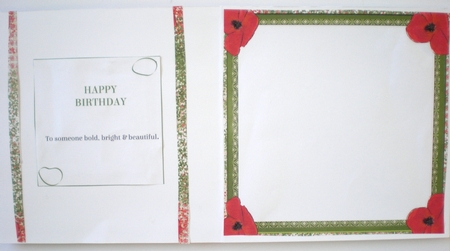
To make the card, I cut, 3mm wider, around the stitched and beaded area, of the completed project, and used power tape to attach this to a red backing sheet, and then cut, again at, 3mm wider all round, than the original cutting line. Using the power tape, I attached a 9cm doily, to the back of this red backing sheet. The frame is from a previous craftsuprint purchase, designed by Clare Walker, called, Happy Birthday Poppies Insert, cup838296_79993. I cut out the blank centre of this, and using a leaf green backing sheet, 12.5cm square, I attached this, behind the frame with D.S. tape. I then attached, the completed stitched and doily backed topper, using, D.S. tape, to the front. I made a cream backing sheet for this, 13.5 cm square, and then trimmed the sides of the frame to measure 13cm square. I used a copper peel off strip around the edge of the cream backing sheet, before attaching the framed topper. I then used the design, cup837844_20612, called, Delightful Poppies, to make a second copy, and use the decoupage pieces of the poppies only, to add to the left hand corner of the topper. I made a white card, 14cm square and mounted the completed topper with padded D.S tape. For the insert, I again used the insert from the Happy Birthday insert, as described above. This is a very, colourful, and most rewarding, outcome for this project. I was pleased to be able to use so much from my growing stash, of wonderful ideas. I have them all on an external plug in disc. So quick access is so easy, and keeps me motivated. So thank you to all those designers whose work I love to use. And in this instance a special thank you, to Emy, for this design.
Pamela Horton

Make your Own, Buy the Download!
Ed-a the Letter A
Stitching with beads