


Turquoise Fairy Step by StepCompleted by Taina Kankare
OccasionBirthday / Birthday Female
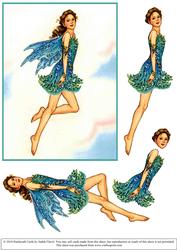
I printed the Turquoise Fairy sheet and cut all the parts out. I also cut the fairy from the topper. Then I attached it on background sheet cup332848_1446.jpg. After this I printed Aquamarine 1 Frame.png from 10 Fancy frames set.
I trimmed the background sheet to get it fit nicely into the frame. After this I attached my card front on light blue base card. Next I attached all the decoupage parts with foam pads. As a decoration I added four ribbon bows and four gold colored flatback sticker pearls into the corners.
As a finishing touch I added glossy accent into the eyes and lips of the fairy.

Make your Own, Buy the Download!
Turquoise Fairy Step by Step
$1.07USD
Designed By
CategoryCard Making / Step By Steps / Fairies Card Fronts
OccasionBirthday / Birthday Female
Ref #cup58884_2
A lovely 5" x 7" card front plus additional 3D pieces to create a fairy card that any girl would love.

Exclusive