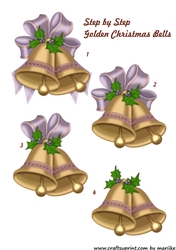
Golden Bells Step By StepCompleted by Pamela Horton The whispering Platypus
OccasionI have chosen to use these lovely golden bells as the front main image of a purple and gold theme Christmas card which I have incorporated with, cup814313_79993, Christmas lace Effect, a design by Clare Walker in a mauve print as the main backing sheet and the stitching pattern, Floral Corner, cup 894423_1549, a design by, Emy van Schaik, as the surrounding theme.
The step by step I completed using padded D.S. tape, and made a purple backing sheet cut 2mm wider than the size and shape of the largest bell shape.
I completed the stitching and the beading and then dusted the edges with the Gold Dust glitter effect, and repeated this on the 13.5cm square purple backing sheet and the purple background behind the bells.
I set all this aside to dry while I completed the 29x 14.5cm white main card and insert. I edged both inside and outside edges of the main white card with a mauve metallic pen, then scored and folded the card.
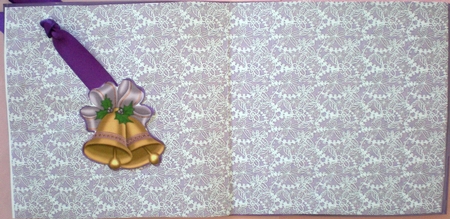
I used a darker mauve version of the lace effect as the insert and added an extra bell and a small ribbon as a hanger.
I then attached a purple ribbon vertically to the back of the stitched topper and used D.S. tape to secure the stitching and to also attach it to the purple backing sheet, and then onto the card front.
I tied the bow, and used red power tape to attach this to the top of the card and used a soft brush with some Gold Dust to lightly scatter the gold glitter effects across the card front.
Thank you Marijke, these bells look wonderful on this gold and purple Christmas greeting card. Pamela Horton. The Whispering Platypus.

Make your Own, Buy the Download!
Golden Bells Step By Step
Golden Bells Step By Step