
Santas Stopover 1Completed by Pamela Horton The whispering Platypus
OccasionWith all the sparkle, stars and the glow from the lamp and so much light coming from the house and reflecting onto the snow, Santa must be very busy there inside.
The blue hues with the burgundy trim work so well together, I was undecided whether to use a blue trim or the burgundy, or maybe some lace and organza ribbon.
I used the sheet provided to print twice onto the single A4 white 120gsm card, and have used one copy as the main backing sheet and the second copy to cutaway the frame reserving it for the insert and using some of the elements in the image as decoupage.
The silver satin finished card measures 29.75 x 15cm and is scored and folded. I used D.S tape to attach the main image, I used as the main backing sheet, onto a 13.5cm square silver foil backing sheet.
I then used a blue metallic pen to outline the edges of the main image onto this foil.
To give the appearance of another layer behind the main backing sheet, I have used a metallic blue marker to rule a frame around the main image directly onto the silver backing.
This has also given the appearance of extra dimension. I used D.S. tape to attach the 14.5cm blue square backing sheet, which I then edged with a silver metallic marker.
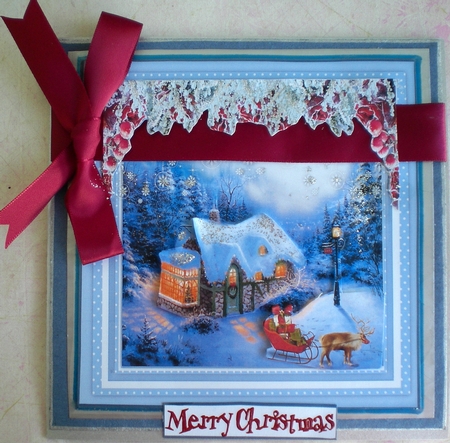
I measured down 2.5cm from the top edge and attached the burgundy ribbon across the front catching and securing the tails, at the back only, using red power tape.
I was then able to use D.S. tape to attach this toper to the card front. To make a quick card it would be so easy to omit the horizontal ribbon and simply add a bow.
However, as I love completing cards using step by step and decoupage methods, I really wanted to make full use of all the delightful elements, so I then I used the second copy to carefully cut away the frame from the main image keeping the spot frame intact to use as part of the insert.
I then carefully cut away the burgundy arbour, the cottage, and the front image of the reindeer, sleigh, snow and the lamp.
I have used tiny padded squares and some thickened white glue to attach all these elements in place.
I left the silver sprinkle of glitter glue until I had completed the insert. I attached one of the small images and one of the supplied sentiments onto the left hand side of the inside.
To complete the right hand side of the insert, I chose a verse, from the free Christmas for friends list, and copied it, then used D.S. tape to attach it to the back of the reserved frame.
I trimmed this to leave a small margin and used the same blue metallic pen to rule a frame to make a further dimension.
This, I then attached to the inside as shown.
To finish the card front I used silver glitter glue to apply to the snowflakes with a tiny brush and my fore finger to apply it to the roof, trees and the arbour.
I tied the bow in a matching but slightly narrower ribbon and attached it with red power tape.
I have used the second small image to make a gift card by cutting off the extra blue frame to even the image and attached it to a silver satin scored and folded 14.5 x 6cm card.
The design has made a gorgeous Christmas greeting card and I am so ready to now try the different combinations of ribbon and lace.
Thank you, Ceredwyn, I really love this design. Pamela Horton The whispering Platypus

Make your Own, Buy the Download!
Santas Stopover 1
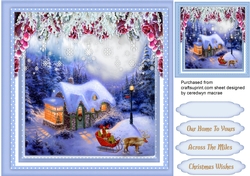
A lovely 8x8 card to make and give to anyone at Christmas with Santa's Stopover has 3 greeting tags and a blank one