Beautiful Christmas Pine cones and Holly Completed by Pamela Horton The whispering Platypus
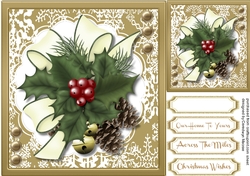
OccasionHolly, Pine cones, bells and ribbon, always make for a very Christmassy image, particularly on a greeting card. The gold lace background and gold buttons, are a decorative bonus. Ceredwyn, is a master when it comes to designing really beautiful and very easy cards. However, if simple and easy, isn't what you like, I have made 2 from the same design in 2 slightly different ways.
For the first card, I printed it twice, once onto copy paper, and once, onto 200gsm white card. I cut out the main element, which measures, 9.4cm x10cm, from the copy paper, and used D.S Tape to attach it to, a white, 200gsm, backing sheet, which measures 9.8cm x 10.4cm, to use as the card topper. I then used a gold glitter pen, to enhance the gold frame and the 2mm edges of the white card. I then used padded D.S. tape, to attach the topper to a pale burgundy, backing sheet, 11cm x 10.2cm.
I used, a 2.5cm wide, cream satin ribbon, to attach it vertically, to the centre back, of the Burgundy backing sheet. I then attached, a deep pink, backing sheet, 11.5cm x 10.5cm,, but still left the ribbon tails loose.
I prepared the main card, which is white, and measures, 12.75cm high, x 24cm wide. I used lengths of gold, peel off Merry Christmas strips, to attach around the edge, of this card front. I used D.S. tape to attach the ribbon tails, to the inside of the card. I now used, the second copy made onto the 200gsm white card and carefully cut around the scalloped frame for the art work. I attached this, to the card front, with Padded D.S. tape. I made a simple bow, and attached it, to the top with power tape.
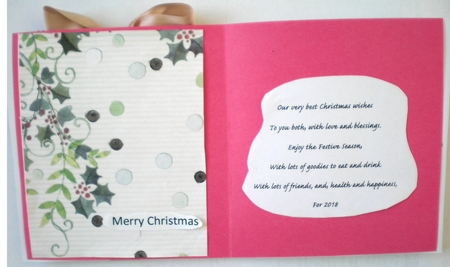
For the insert, I used, the same deep pink, backing sheet, cut to size, and added a section of some scrap Christmas wrapping paper, to the left hand side, and a Greeting on the right hand side, with my own words. Which if you like you are welcome to use, or change around, to suit your need. To finish the front of the card, I used the gold glitter pen, on the buttons, and a very fine silver glitter pen, on the pine cone tips, and the holly leaf veins. In the photograph this silver shows up as a fuzzy look, however it doesn't look fuzzy in actuality.
The second card I made, I virtually followed the same steps, but used red and green for the backing sheets. The green backing sheet is larger, and measures, 12cm x 11.5cm, and is D.S taped to a white card front, which measure 13 x 12 cm. I used the Christmas ribbon, to wrap around the entire card at the lower edge, and firmly attached it on the inside of the card.
Using the 200gsm copy of the sheet, I cut out the Holly, the ribbons, the bells and the pine cones as the front decoupage, and reversed the topper, which I attached, to the card front, and toppers with padded D.S tape, and then, using the padded tiny squares, I attached the smaller version of the decoupage, without the scalloped shape. I made a bow with the same ribbon and attached it at the side. I finished the insert in a similar fashion, but used the green for the backing sheet. With four copies of the miniature image left over, I have made some more Christmas gift tags. Great value for one purchase. Thank You Ceredwyn a truly beautiful design.
Pamela Horton

Make your Own, Buy the Download!
Beautiful Christmas Pine cones and Holly
A lovely card with Beautiful pine cones and holly has 3 greeting tags and a blank one