


OMG..You Did It
3 Page mini kit includes:-
7.5 x 7.5 card front
Insert, matt and layer, decoupage and 6 sentiments ( one blank for your own text).


Photographs from the Community (11)

Printed on matte photo paper and attached to scalloped card. Built up image with foam pads. Added my selected sentiment and insert. A fabulous fun, modern and colourful graduation card.


Great design and great clarity to this card. Very current quirky image that stands out from all other graduation cards.
I cut the various images from the generous pages given including the card insert, edged the pieces with a black marker, and stuck the decoupage pieces on an 8x 8 160gsm card with sticky foam.
Enjoyed making this one.
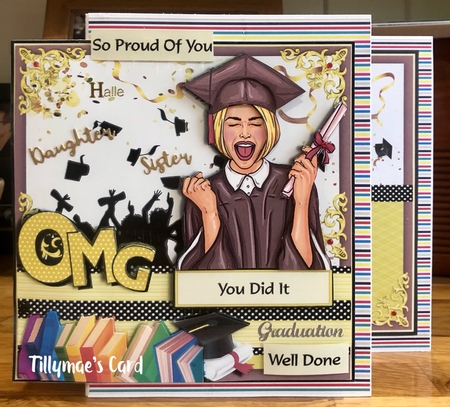
Graduation card for a Daughter & sister. I printed onto glossy printable decoupage paper. I cut out all the elements building up the layers using pin flair glue. I used white linen card layered with pinstripe paper. I used one of my scoring techniques.
I used various tags from the kit along with peel offs for sentiments. I embellished with little gems throughout. I finished with the matching insert. Cup 966472_67282

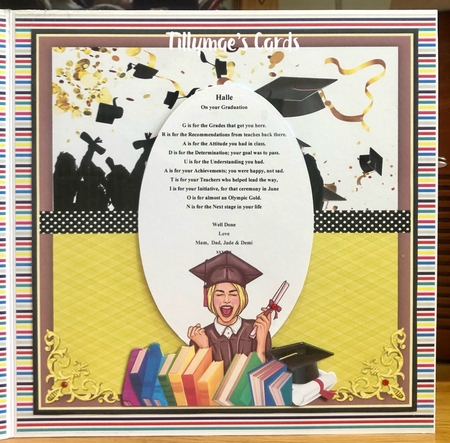
I printed off the image sheets on to 220 gsm card and used an 8” by 8” card base.
Here is how I made my card:
Cut out all the elements on the three image sheets.
Then cut a square from black card measuring 19.5 cms by 19.5 cms.
Cut a square from white card measuring 19 cms by 19 cms.
Matt and layer with the main image and attach to the card base.
Attach all the decoupage elements using foam pads.
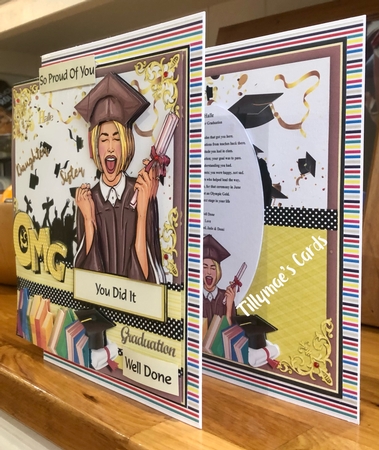
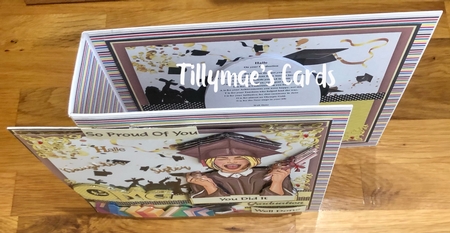
As you can see from my second picture this card has lots of dimension.
I love that it also has a matching insert and different sentiments to choose from.

Great design and great clarity to this card. Very current quirky image that stands out from all other graduation cards.
I cut the various images from the generous pages given including the card insert, edged the pieces with a black marker, and stuck the decoupage pieces on an 8x 8 160gsm card with sticky foam.
Enjoyed making this one.
Graduation card for a Daughter & sister. I printed onto glossy printable decoupage paper. I cut out all the elements building up the layers using pin flair glue. I used white linen card layered with pinstripe paper. I used one of my scoring techniques.
I used various tags from the kit along with peel offs for sentiments. I embellished with little gems throughout. I finished with the matching insert. Cup 966472_67282

I printed off the image sheets on to 220 gsm card and used an 8” by 8” card base.
Here is how I made my card:
Cut out all the elements on the three image sheets.
Then cut a square from black card measuring 19.5 cms by 19.5 cms.
Cut a square from white card measuring 19 cms by 19 cms.
Matt and layer with the main image and attach to the card base.
Attach all the decoupage elements using foam pads.
As you can see from my second picture this card has lots of dimension.
I love that it also has a matching insert and different sentiments to choose from.
More Products from Little Misscraft

