


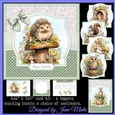
CUPCAKE DRAGONS
this kit is only suitable for PRINTING AT HOME.
As it includes 5 toppers to make 5 cards.
There is only ONE card front sheet, ONE insert sheet, which is fine to print at home as many times as you need if you were to use all the topper sheets in the kit.
6x6" and 5x7" card fronts, 5 toppers, matching inserts and sentiments and ages.
Please have a look at my other designs by clicking on my name to visit my shop. Thank you x
 FLOWER BEARS 5x7
 WILD BEAUTIES
 WILD CUTIES set 1
 WILD CUTIES set 2
 BEST FRIENDS
 LITTLE GIRLS
 BEAR HUGS
 BUTTERFLY FRIENDS
 WOODLAND CUTIES
 WILD PRETTIES
 BIRTHDAY ANIMALS
 THE WOODLAND SWING
 PRETTY OWLS
 BIRTHDAY CATS
 BIRTHDAY HAMSTERS
 BIRTHDAY GUINEA PIGS
 SUMMER TIME MICE
 STRAWBERRY MOUSE
 PINK PRINCESS
 BIRTHDAY BEARS
 IN THE WOODS
 MONSTERS
 DINOSAURS
 SAY CHEESE
 PUDDLE DUCKS
 5X7 & 6X6 - LITTLE DRAGONS
 PRINCESS
 BIRTHDAY CATS
 BIRTHDAY BRIGHTS
 DAISY ANIMALS
 MERMAID BIRTHDAY


Photographs from the Community (5)

I resized and printed the design onto good quality 250gsm digital paper, then fussy cut the card front, topper, insert and some additional decoupage images I fussy cut from extra printed layers.
I wrapped pieces of wide and thin satin ribbon around the card front, then adhered it to a square card base, leaving a small white border around the edges.
I assembled the decoupage layers onto the card topper, using foam tape between the layers for additional dimension, then adhered it to the centre of the card front using a piece of scrap cardboard for additional height.
I attached the insert to the inside of the card using double sided tape, and added a sentiment to the front using thin foam tape.
I added a paper flower on the bow, then finished with some pearls.


Printed on pro-print paper and mounted onto 7x7 card blanks. Matted using foam tape. Embellishments and glitter added. Printed insert left blank for own messages.

I resized and printed the design onto good quality 250gsm digital paper, then fussy cut the card front, topper, insert and some additional decoupage images I fussy cut from extra printed layers.
I wrapped pieces of wide and thin satin ribbon around the card front, then adhered it to a square card base, leaving a small white border around the edges.
I assembled the decoupage layers onto the card topper, using foam tape between the layers for additional dimension, then adhered it to the centre of the card front using a piece of scrap cardboard for additional height.
I attached the insert to the inside of the card using double sided tape, and added a sentiment to the front using thin foam tape.
I added a paper flower on the bow, then finished with some pearls.
More Products from Jane Minto
