


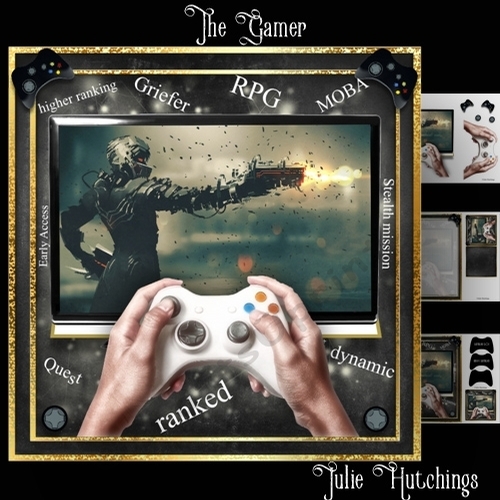

The Gamer Card Front Kit
Beautiful card front Kit that has 3 sheets to print,cut and assemble to make a stunning card that includes the card front, decoupage, insert and a cut and front gift card and a topper


Photographs from the Community
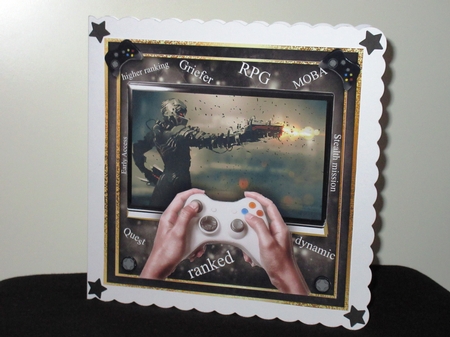
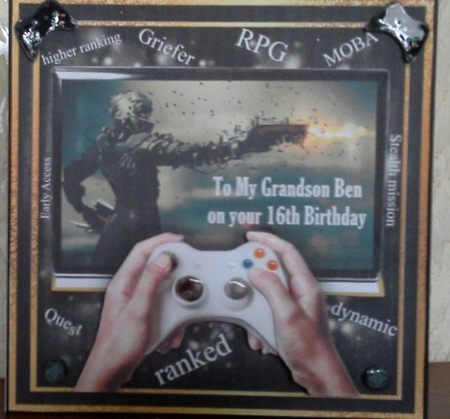
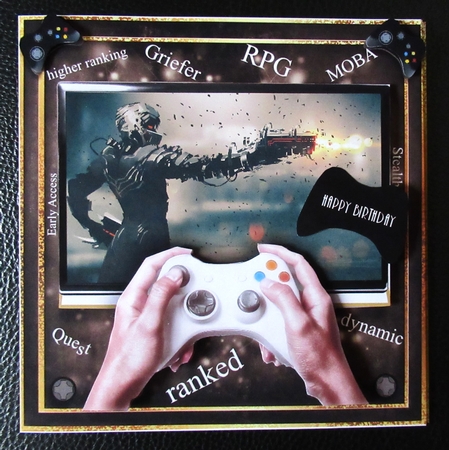
I printed the design on to a Glossy photo paper. I clipped the items out. I glued the design on to a 8 by 8 Scalloped card and attached the Decoupage and Sentiment on using Sticky pads.
I Punched out Black stars and glued them on to the card.
A quick and easy Great and Brilliant Superb design that you will use and use! I Recommend this design to all of you! It turned in to a Gorgeous, Brilliant, Cool and Great card that I will use time and time again!
I hope you can see my photo I have a newish camera that doesn´t take good photos and I´ve tried for 2 days now so I hope it´s ok?
Enjoy your crafting! xxx

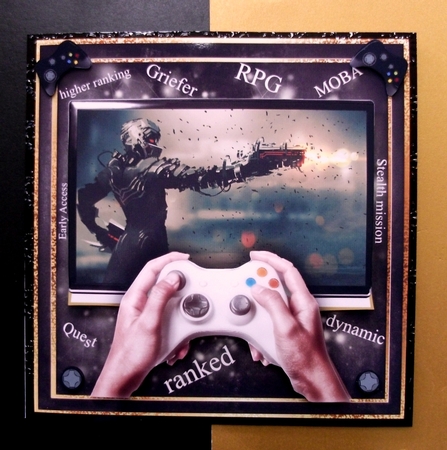
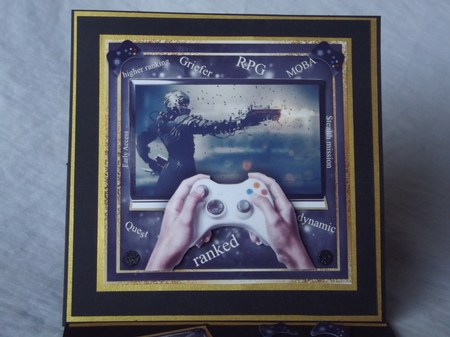
 Smith-Kirk%20-%20I printed onto glossy photo paper and cut out all the elements, I covered my card base with black gloss embossed card and added the main image. I added the rest of the elements using 3D glue and sticky pads. A lovely quick and easy card to make with a great eye-catching result )
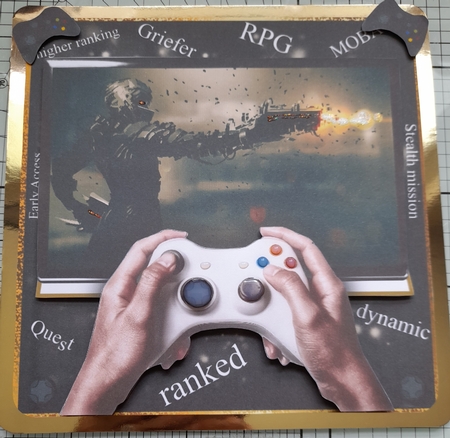
I printed onto glossy photo paper and cut out all the elements, I covered my card base with black gloss embossed card and added the main image.
I added the rest of the elements using 3D glue and sticky pads.
A lovely quick and easy card to make with a great eye-catching result

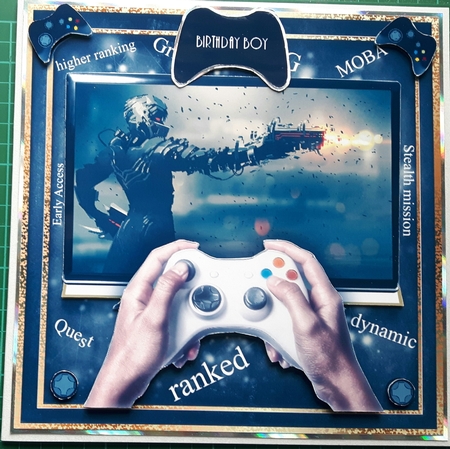
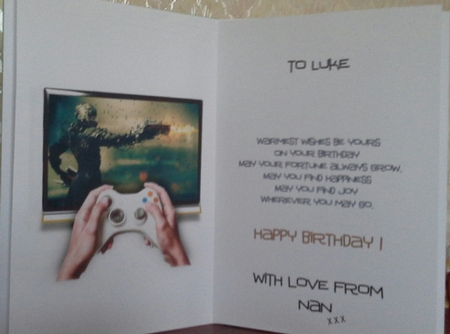
I printed the sheets onto A5 size matte photo paper, cut out the pieces and mounted the main image onto a 14.5cm.sq. card.
I added the layers using sticky pads and finished this one with the 'Birthday Boy' caption. You could have Happy Birthday instead, Just let me know.
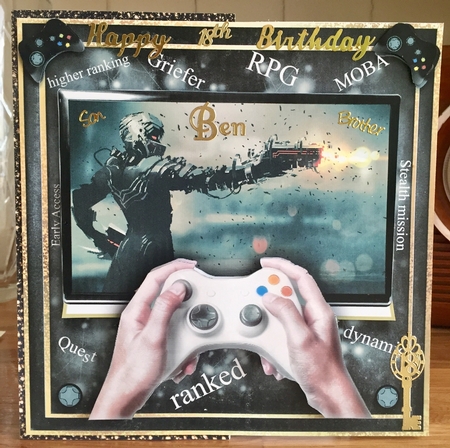
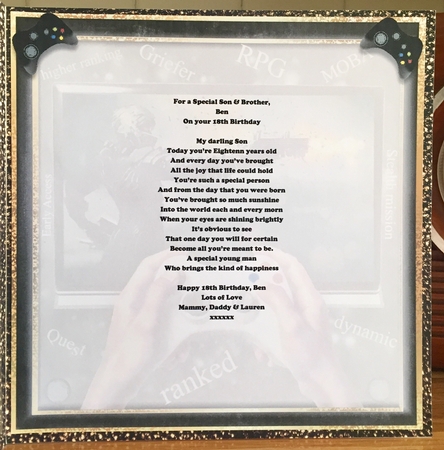
18th Birthday Card for a son & brother. I printed onto glossy printable decoupage paper building up the layers using pin flair glue. I scored card in 10cm. I used gold & black card. I embellished with peel offs. I finished with the matching insert. Cup 841801_1483. Designer Julie Hutchings
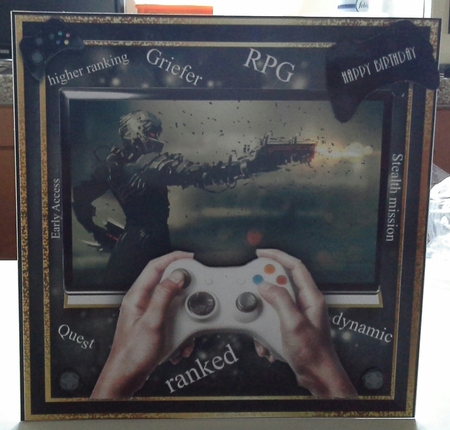
I added text onto the screen in my graphics programme, printed onto matt paper, added layers with foam tape.
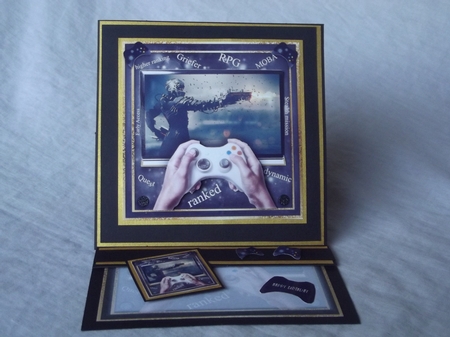
I decided to do this as an easel card, so I printed the main image and decoupage image onto A5 photographic paper and cut the elements out.
I then printed the insert twice.
I made an easel card from black card and attached one of the inserts to the base of the card and the other to the underneath of the card for writing your message on.
The main image was layered onto gold card then black then more gold and attached to the front of the card using double sided tape.
I used 3D foam to attach the screen to the card front as I wanted a flat surface and then attached the decoupage using glue gel for shape.
I scattered the spare elements on the base of the card again using 3D gel.

Great card for all those gamers I decided to use a plain brown card to bring the colours out on the card itself added sentiments to finish off
I printed onto Crafty Bob's photo paper and cut out all pieces. The base layer was matted onto Silver Mirri card with d/s tape and added to a White card base.
The decoupage was added with foam Tape and pads and to finish I used the Matching insert inside and after matting a Greeting Tag onto Silver Mirri card, cut out and added to the top of my card.
A great design for Gamers Birthdays.
The design was printed on to matte photo paper and cut out.
I added a contrast panel to a 7x7 card then added the main image with foam tape.
The other elements were added with foam pads.
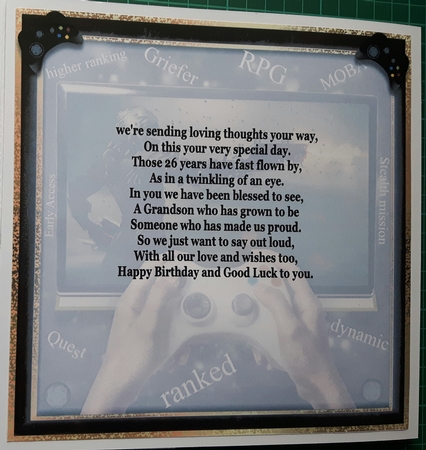
To finish the card I added a printed verse inside and a sentiment tag.
I printed on to matte photo paper. Mounted the topper on to a card. Layered all elements. Added a sentiment. A fabulous design.
If you purchase this finished card please let me know your choice of sentiment, either leave a message through Paypal or use the support request facility above my card description
Printed out 2 of the sheets onto matt paper, mounted the
base layer onto the 8x8 base card I'd covered with mirri card.
I decoupaged the layers with foam tape and pads and used stickles glitter glue to accent and
glossy accents to raise the buttons slightly.
18th Birthday Card for a son & brother. I printed onto glossy printable decoupage paper building up the layers using pin flair glue. I scored card in 10cm. I used gold & black card. I embellished with peel offs. I finished with the matching insert. Cup 841801_1483. Designer Julie Hutchings
I added text onto the screen in my graphics programme, printed onto matt paper, added layers with foam tape.
I added text onto the screen in my graphics programme, printed onto matt paper, added layers with foam tape.
I decided to do this as an easel card, so I printed the main image and decoupage image onto A5 photographic paper and cut the elements out.
I then printed the insert twice.
I made an easel card from black card and attached one of the inserts to the base of the card and the other to the underneath of the card for writing your message on.
The main image was layered onto gold card then black then more gold and attached to the front of the card using double sided tape.
I used 3D foam to attach the screen to the card front as I wanted a flat surface and then attached the decoupage using glue gel for shape.
I scattered the spare elements on the base of the card again using 3D gel.
I printed onto Crafty Bob's photo paper and cut out all pieces. The base layer was matted onto Silver Mirri card with d/s tape and added to a White card base.
The decoupage was added with foam Tape and pads and to finish I used the Matching insert inside and after matting a Greeting Tag onto Silver Mirri card, cut out and added to the top of my card.
A great design for Gamers Birthdays.
More Products from Julie Hutchings