


3D On the Shelf Card Kit - Winter Sports Little Snowboarder Jaida is Shreddin The Gnar
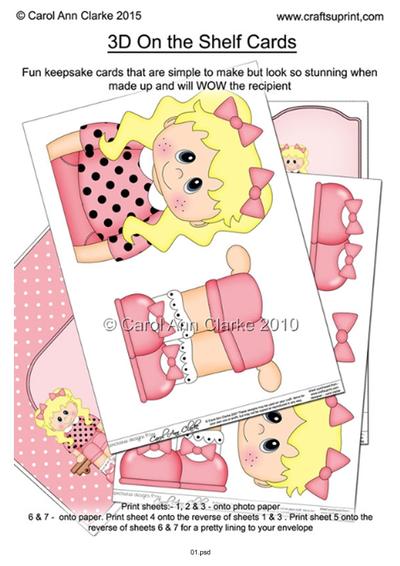
7 Sheets in the kit
On the shelf base card
On the Shelf Character top piece
On the Shelf Character bottom piece
3D decoupage
Matching 2 piece envelope
Coordinating backing papers
Greetings sentiment Panels
Blank sentiment layer for your own greeting
Larger writing panel for the reverse of the card
A Gorgeous Keepsake 3D On the Shelf Card with that added WOW factor! A card that will really sit on the shelf making a super cute and original card that will sit head and shoulders above the rest! lol Also included in the kit is a matching 2 piece envelope and coordinating backing paper to print onto the reverse to give a pretty lining to the envelope too, 3D decoupage plus a selection of:- greetings sentiment layers, blank sentiment layer larger writing panel.
Everything you need to make a really gorgeous 3D card that sits at least 6.5" above the shelf and 4" below the shelf x 5" wide when opened and sat on the shelf (approx 8.5" high x 5" wide when closed) and will fold flat to fit into it's matching envelope that is also included in the kit. There are lots of my On the Shelf Card Kits to choose from and together they would make a great set of cards to sell at craft fairs etc.
 3D On the Shelf Card Kit - Winter Sports Little Snowboarder Alberto is Shreddin The Gnar
 3D On the Shelf Card Kit - Winter Sports Little Ice Skater Kaylee
 3D On the Shelf Card Kit - Winter Sports Little Ice Skater Lincoln
 3D On the Shelf Card Kit - Winter Sports Little Skier Shilene
 3D On the Shelf Card Kit - Winter Sports Little Skier Michal
 3D On the Shelf Card Kit - Winter Sports Branda goes Curling
 3D On the Shelf Card Kit - Winter Sports Garry goes Curling
 3D On the Shelf Card Kit - Winter Sports Little Sledger Marylee
 3D On the Shelf Card Kit - Winter Sports Little Sledger Marylee
7 Sheets in the kits On the shelf base card On the Shelf Character top piece On the Shelf Character bottom piece 3D decoupage Matching 2 piece envelope 2 Coordinating backing papers Greetings sentiment Panels Blank sentiment layer for your own greeting Larger writing panel for the reverse of the card Gorgeous Keepsake 3D On the Shelf Cards with that added WOW factor!
Cards that really do sit on the shelf making super cute and original cards that sit head and shoulders above the rest! lol Also included in the kits are matching 2 piece envelope and coordinating backing paper to print onto the reverse to give a pretty lining to the envelope too, 3D decoupage plus a selection of:- greetings sentiment layers, blank sentiment layer larger writing panel. Everything you need to make a really gorgeous 3D cards that sit at least 6.5" above the shelf and 4" below the shelf x 5" wide when opened and sat on the shelf (approx 8.5" high x 5" wide when closed) and fold flat to fit into their matching envelopes that are also included in the kits. There are lots of my On the Shelf Card Kits to choose from and together they would make a great set of cards to sell at craft fairs etc.

Related Products


Photographs from the Community


These cards tend to be on display for quite some time, so it is worth taking the time to print on a good heavy weight card stock, use wet glue rather than tape (which may dry too much then the card will fall apart, especially over an extended period of time on display), and I always print the backing sheet on the back and cover the cut edges with a complimentary colour marker.
This snowboarder is really easy to cut out, though I do cheat and use my SNC now-a-days (pure laziness on my part) and once the parts are cut, scored and cut edges coloured I always glue the top part to the card base first, then fold it up and place it onto the matching envelope so that I can guesstimate where the leg portion needs to be attached, so that it fits nicely in the envelope. Then I use foam tape and pads to add the paper toile, and finish with glossy accents on the eyes, or reflective surface such as the goggles. In this instance as this is snow themed NOT Christmas I also added some fake snow to the pompoms on her hat. A quick and easy card, with impact.)
Snow Boarder Girl On the Shelf.
I live in Rossendale which has had a dry Ski slope since 1973, so this is quite apt for where I live. This is ideal for those younger people who are into "Shredding the 'gnar",( give me a pair of ski's any day!)
These cards tend to be on display for quite some time, so it is worth taking the time to print on a good heavy weight card stock, use wet glue rather than tape (which may dry too much then the card will fall apart, especially over an extended period of time on display), and I always print the backing sheet on the back and cover the cut edges with a complimentary colour marker.
This snowboarder is really easy to cut out, though I do cheat and use my SNC now-a-days (pure laziness on my part) and once the parts are cut, scored and cut edges coloured I always glue the top part to the card base first, then fold it up and place it onto the matching envelope so that I can guesstimate where the leg portion needs to be attached, so that it fits nicely in the envelope. Then I use foam tape and pads to add the paper toile, and finish with glossy accents on the eyes, or reflective surface such as the goggles. In this instance as this is snow themed NOT Christmas I also added some fake snow to the pompoms on her hat. A quick and easy card, with impact.


These cards tend to be on display for quite some time, so it is worth taking the time to print on a good heavy weight card stock, use wet glue rather than tape (which may dry too much then the card will fall apart, especially over an extended period of time on display), and I always print the backing sheet on the back and cover the cut edges with a complimentary colour marker.
This snowboarder is really easy to cut out, though I do cheat and use my SNC now-a-days (pure laziness on my part) and once the parts are cut, scored and cut edges coloured I always glue the top part to the card base first, then fold it up and place it onto the matching envelope so that I can guesstimate where the leg portion needs to be attached, so that it fits nicely in the envelope. Then I use foam tape and pads to add the paper toile, and finish with glossy accents on the eyes, or reflective surface such as the goggles. In this instance as this is snow themed NOT Christmas I also added some fake snow to the pompoms on her hat. A quick and easy card, with impact.)
Snow Boarder Girl On the Shelf.
I live in Rossendale which has had a dry Ski slope since 1973, so this is quite apt for where I live. This is ideal for those younger people who are into "Shredding the 'gnar",( give me a pair of ski's any day!)
These cards tend to be on display for quite some time, so it is worth taking the time to print on a good heavy weight card stock, use wet glue rather than tape (which may dry too much then the card will fall apart, especially over an extended period of time on display), and I always print the backing sheet on the back and cover the cut edges with a complimentary colour marker.
This snowboarder is really easy to cut out, though I do cheat and use my SNC now-a-days (pure laziness on my part) and once the parts are cut, scored and cut edges coloured I always glue the top part to the card base first, then fold it up and place it onto the matching envelope so that I can guesstimate where the leg portion needs to be attached, so that it fits nicely in the envelope. Then I use foam tape and pads to add the paper toile, and finish with glossy accents on the eyes, or reflective surface such as the goggles. In this instance as this is snow themed NOT Christmas I also added some fake snow to the pompoms on her hat. A quick and easy card, with impact.