

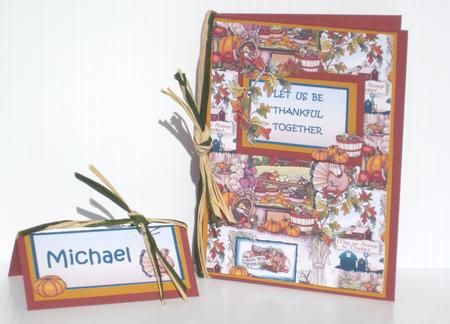

Autumn BountyCompleted by Carolyn Norris
First I downloaded Annie's "Autumn Bounty" background designer paper. I resized it to 1/2" smaller than an invitation sized card. I cut it out and backed it with two colours I found in the design - yellow and rust. I then glued it onto a dark green card base.
Then, I resized the sheet again. This time I made it the size I would need the text box to be using the cornucopia rectangle as my focal point. I then imported the sheet into a program where I could change the center of the cornucopia rectangle. I printed out the reduced sheet and the altered rectangle. I cut out the new rectangular text box and some of the other signs of autumn on the sheet ( pumpkin, branch of Fall leaves, turkey).
I mounted the altered rectangle that now invites the recipient to share in our Thanksgiving, with the same colours as the card front and glued it in the upper third of the card. I then placed some of the Fall shapes around the text box. Finally, I twisted green and natural raffia and tied it around the card at the fold.
I also made matching place cards. I framed the name in the same colour as the border of the cards text box. I mounted it on the same colours as the card front matte and used the remaining shapes that I had cut out to decorate around the text box to decorate the guest's name. I folded it in the center (mountain fold) and tied some raffia at the fold.
There are so many things you can do with this very versatile designer paper. These were just two of the ideas I thought of. Have fun creating!
