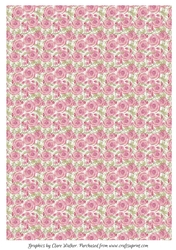
ROSE BACKGROUND-Floral Pink Rose Background Paper with Commercial UseCompleted by Pamela Horton The whispering Platypus
OccasionWell Clare, I have had loads of fun with this background sheet. I made the main pink card 27cm x 14 cm and used a glue tape to attach the beautiful rose backing sheet to both inside and outside. I wrote the verse for my friend and added it to the inside, I then began with the shades from the backing sheet to add the backing sheets for the focal flower. The green is the largest, the pale pink and the deep pink. I edged all of these with a deep pink alcohol pen and attached them to the card front with double sided tape. Once I had completed these I added the horizontal ribbon and the bow at the top, attaching it, 3cm down from the top, centre of the card. Using a 10" doily, I cut one slit from the scalloped edge to just the centre of the doily, and folded the left over the right, so that they were equal and glued them in place. I needed to hold them, while the glue began to hold. This curved the top of the doily over, as I intended the doily to bend at the top. I used a pencil to roll the top of the doily back a little, as this made a frame for the main flower.
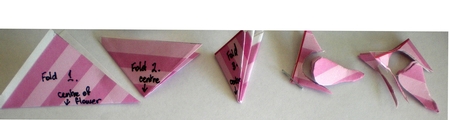
To make the main flower, I used the same rose backing sheet printed on both sides of an A4 sheet of copy paper. I made a pattern for the flower. I used squares of paper varying from 5 ",4", 3", 21/2", Squares. I folded each one, as the photograph below and cut out a petal shape making sure that the central pivotal point is held, while cutting, as it forms the centre of the flower. Each flower will make 8 petals
The tiny ones need one less fold and therefore only make 4 petals.
I uses tiny spots of white glue in the entre of each flower, while I built up the flower using, 2 of each size of the 5", 4", and, 3 of each of the smaller sizes. Then I took 2 extra of the tiny size and rolled them to make a bud. I used white glue to hold the flower in place.
I made the ear rings with the same rose backing sheet. I used the rose paper copied on both sides again, and cut, 6x 1.5cm strips of 28 cm. I rolled 3 held together, using a tooth pick, and applied white glue on the last 3cm, cutting to level the ends, before gluing, and cutting at a point, so that a main rose was on top, as a focus.
The oval bead is made from a light pink card stock, the same as the main card. I cut it at 2cm wide x 20cm long. I then cut it diagonally down the length and made 2 identical lengths. I rolled each one, again around a tooth pick, gluing the last 3cm.
Each bead was coated with 2 layers, of mod podge allowing drying time in between. And finally a coat of sealer. I used a gloss, polyurethane water based varnish. However, I have had the same good result with 2 coats of clear nail varnish.
I intend to make them again and a bracelet to go with them.
Clare didn't I have loads of fun with this one sheet. Thank You ever so much.
A big Hug
Pamela Horton

Make your Own, Buy the Download!
ROSE BACKGROUND-Floral Pink Rose Background Paper with Commercial Use
This pretty pink rose background patterned paper is also versatile. It makes a great card background, but you can also use it as printable gift wrap for small items, to make gift boxes or bags, or as ... Read More