
Beginner Crafters: 4-Layer Pyramage Card in 1 Hour with Craftsuprint
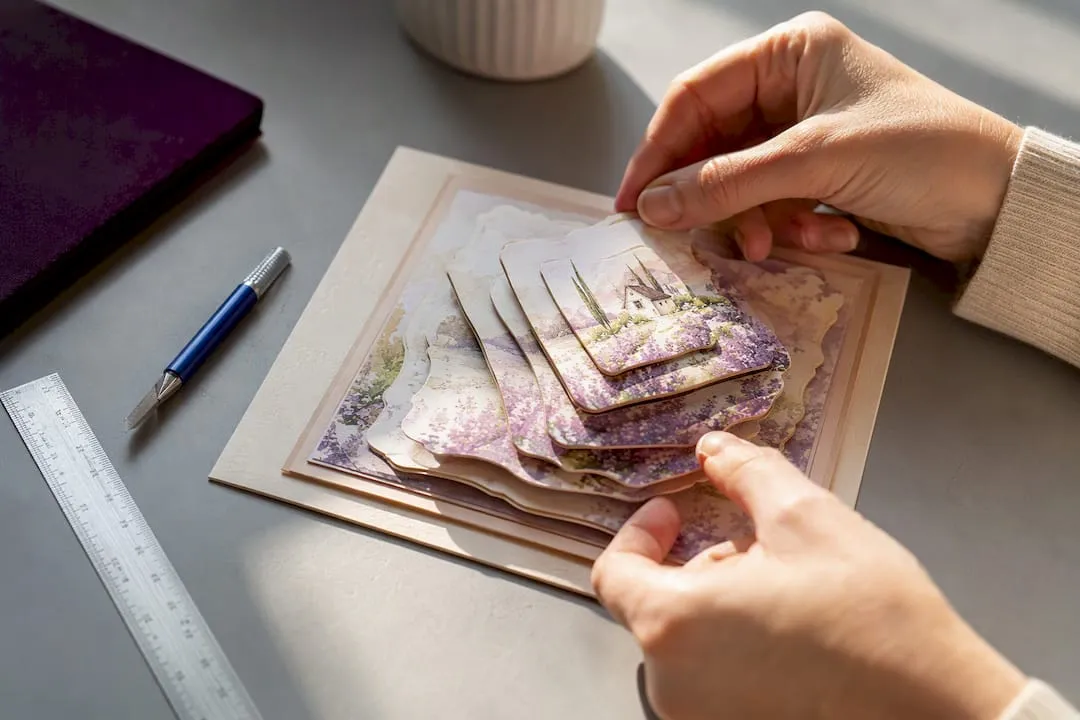
A pyramage card is made by stacking graduated copies of the same image so each layer sits smaller and higher than the last, creating a pyramid-style 3D effect. The quickest reliable method uses a printed template, a craft knife, and foam pads to raise each layer. Most beginners finish a simple four-layer design within an hour once the template is printed and cut.
TL;DR:
- Most beginners can complete a four-layer pyramage card within an hour using a printed template and foam pads for even height.
- Use 200 to 250gsm digital cardstock for crisp printing and stability, avoiding lighter or heavier weights that cause curling or jamming.
- Reducing each layer by approximately 3 to 5mm per side maintains proportion, and perfect registration relies on careful alignment and light table checks.
- Nesting dies or die-frames improve consistency and save time, especially when producing multiple cards, with invertage offering a recessed alternative to pyramid stacking.
- Printable templates and cutting files are readily available from craft sites, with safety precautions needed when handling craft knives to prevent slips and injuries.
Table of Contents
- Materials and tools you need for pyramage
- Step-by-step pyramage tutorial with measurements
- Faster routes: nesting dies, die-frames and invertage
- Troubleshooting alignment and adhesive problems
- Templates and resources that support this tutorial
- Safety tips for craft knives and cutting tools
- When pyramage works best and creative variations
- Where to get templates, cutting files and supplies
- Sources
- FAQ
Materials and tools you need for pyramage
Pyramage rewards good preparation more than expensive kit. A mid-weight digital cardstock, around 200 to 250gsm, feeds cleanly through most home printers and holds its shape once layers are stacked, according to guidance from PaperCrafter. Anything lighter tends to curl once foam adhesive goes on; anything heavier can jam an inkjet feed tray.
Your adhesive choice shapes the whole build. Foam pads are the fastest option and give consistent height between layers, though they set instantly with no room to shift a piece once pressed down. Silicone glue buys you longer working time for fiddly alignment, and PVA spread thinly over foam tape lets you nudge a layer into place before it grips fully.
- Cardstock: 200 to 250gsm digital card for crisp printing and enough rigidity to support stacked layers.
- Adhesive: foam pads for speed, silicone glue for repositioning, PVA over foam for fine adjustment.
- Cutting tools: a sharp craft knife for custom shapes, nesting dies when you want identical concentric layers.
- Printer setup: best-quality photo settings and matte or semi-gloss card stop ink from smudging.
- Embellishments: glitter pens, gel highlighters or flocking add texture but also add height, so factor that into your foam thickness.
Step-by-step pyramage tutorial with measurements
Start by deciding your finished card size and how many layers you want. A 5-inch square card with four graduated layers is a manageable first project and gives a clear, visible pyramid without excessive cutting.
- Choose your image and card size. Pick a motif with a simple, bold outline; busy details get lost once a layer is only a few centimetres wide.
- Print four copies of the design, each one printed at a slightly reduced scale, or print one sheet with the layers pre-arranged if your template includes them.
- Reduce each layer evenly. Trim an even amount from every side of each successive copy rather than shrinking from one edge only, a technique noted in early hobby lessons on cardmaking pyramage. Reducing by roughly 3 to 5mm per side between layers keeps the pyramid proportionate on a 5-inch card.
- Cut the largest layer first and set it aside as your base image; this is the one that sits flat against the card front.
- Cut the remaining three layers, checking each against the one before it so the outline shrinks consistently.
- Colour or highlight edges if needed before assembly; it is far easier to shade a flat piece than one already raised on foam.
- Apply foam pads to the back of the second-largest layer, small pieces at the centre and points rather than a single large pad, then press it onto the base layer.
- Spread a thin line of PVA over the foam before placing each subsequent layer if you want a few seconds to nudge it into alignment; the glue tacks in place once you release pressure.
- Repeat foam and glue placement for the third and fourth layers, checking from above after each addition that the pyramid stays centred.
- Mat the finished pyramage onto a contrasting card layer, add your sentiment, and finish with a small flag, ribbon or twine detail if the design calls for it.
Pyramage is closely related to decoupage, built from progressively smaller identical shapes stacked to form a pyramid, and taking an even amount from each side when reducing layers is the detail most beginners skip, according to an early step-by-step cardmaking lesson. Getting that one step right is usually the difference between a lopsided build and a clean, centred pyramid.
Layers do not have to be square. PaperCrafter’s pyramage guide notes that round, oval or irregularly shaped motifs all work with the same graduated-layer principle, so once you have the sequence down you can apply it to almost any image.
Faster routes: nesting dies, die-frames and invertage
Cutting four layers by hand with a craft knife works, but it is not the only route to a clean pyramid. Nesting dies remove most of the guesswork because each die in the set is cut to fit precisely inside the last, giving perfectly concentric layers with far less trimming. Crafts Beautiful’s pyramage masterclass recommends nesting dies as the ideal way to get consistent, well-registered layers, particularly useful once you are assembling several cards in one sitting.
- Nesting dies cut concentric shapes automatically, saving time on measuring and trimming by hand.
- Die-frame technique uses the negative frame shapes left over from die-cutting, stacked in sequence, to build the pyramid without cutting separate solid layers.
- Invertage reverses the effect, stacking larger layers over a smaller base so the design recedes rather than rises, a look worth trying on a card that needs a subtler finish.
- Pre-printed topper sheets suit a quick project; custom artwork suits a design you want to reuse across several card sizes.
The die-frame approach in particular can use alternating dies from the same nesting set, cutting one size from the main sheet and a slightly different size from a contrasting sheet, then stacking the resulting frames for the pyramid effect.
Troubleshooting alignment and adhesive problems
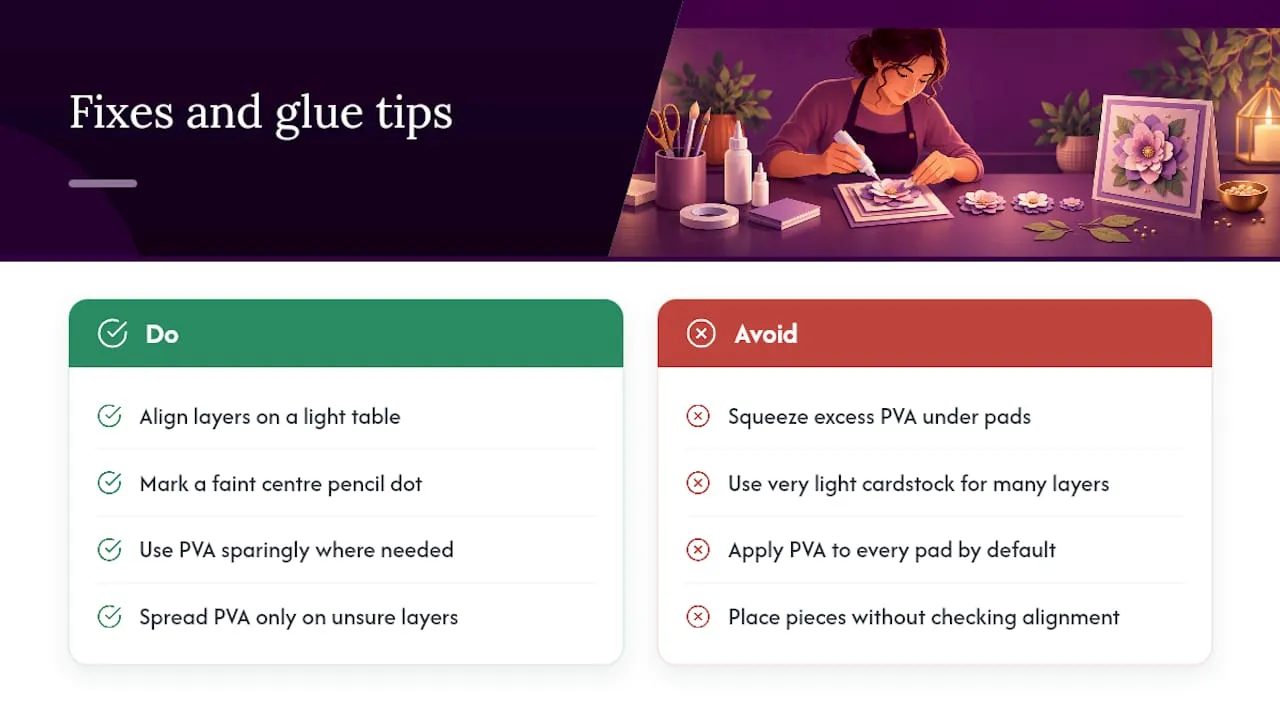
Most pyramage mistakes come down to registration rather than cutting quality. Lining each layer up against a light table, or marking a faint pencil dot at the centre of the base image before you start, keeps every layer sitting true as you build upward.
Adhesive show-through is the other common issue: too much PVA squeezed out from under foam pads leaves a visible sheen once it dries, so use it sparingly and only where you genuinely need repositioning time. Warping usually means the cardstock was too light for the number of layers stacked on it.
Pro Tip: Spread PVA over foam pads only on the layers you are least confident about placing; save the instant-grip foam pads alone for anything you are certain will sit correctly first time.
Silicone glue is worth reaching for on detailed shapes where even a few seconds of repositioning time saves a layer from going in crooked, while foam pads alone suit anyone confident enough to place a piece once and leave it.
Templates and resources that support this tutorial
Printable pyramage templates typically come as PNG, PDF or SVG files, and the format you choose should match your workflow: PNG or PDF for print-and-cut with a craft knife, SVG when you are feeding a cutting machine. Some digital craft marketplaces organise downloads by theme and craft type, so a template built for this tutorial’s four-layer, 5-inch format can often be resized in printer settings or cutting software to suit a different card size without redrawing the artwork.
Some platforms host printable card toppers, cutting files and paper patterns from independent designers alongside tutorials, providing crafters with a place to find both artwork and guidance needed to complete projects like this one.
Safety tips for craft knives and cutting tools
A craft knife is the one tool in this build that deserves real caution. Always cut on a proper self-healing mat, never directly on a table, and keep your free hand well clear of the blade’s path with fingers curled away from the cutting line rather than flat beside it.
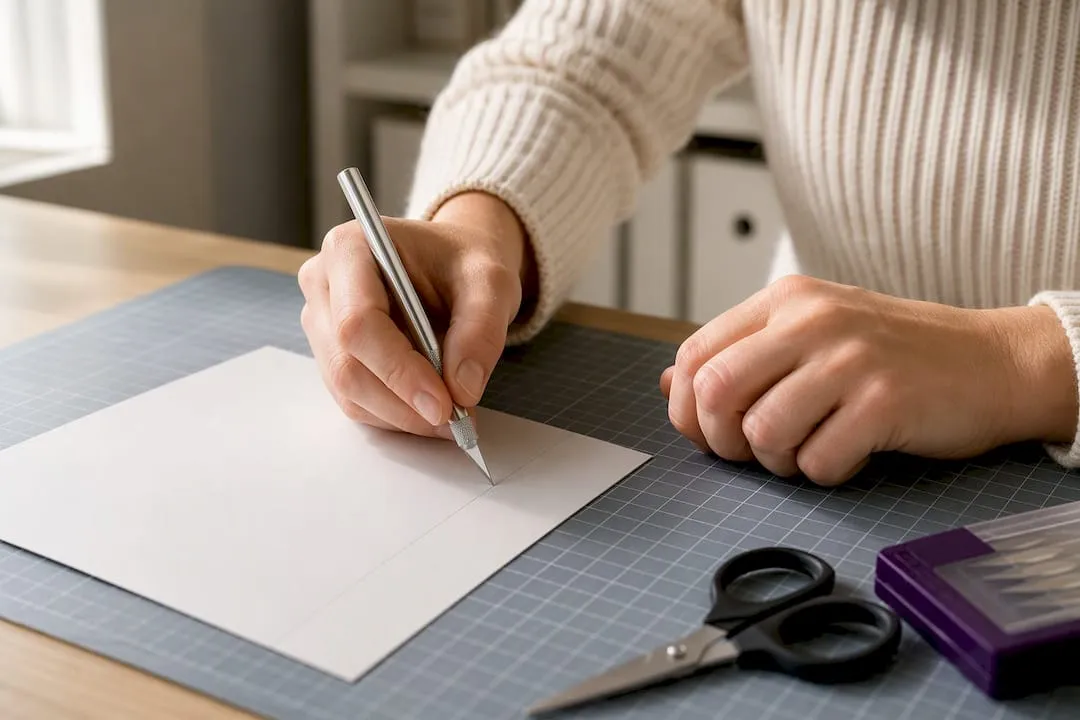
Change blades as soon as they start to drag rather than pushing on with a dull one; a blunt blade needs more pressure, and more pressure is exactly what causes slips. Cut away from your body wherever the design allows, and take slow, light passes rather than trying to cut through cardstock in one heavy stroke.
Store blades in a dedicated case or the original packaging rather than loose in a craft box, and dispose of used blades in a rigid container, never straight into a paper bin. If you are working with children or in a group setting, swap the craft knife for a pair of detail scissors on the smaller layers and reserve the blade for an adult to handle the trickier cuts.
Keep your cutting area well lit and free of clutter. A cramped, dimly lit desk is where most slips happen, not from the blade itself but from misjudging where the card edge actually is.
When pyramage works best and creative variations
Pyramage suits celebration cards where a bit of drama earns its keep: birthdays, anniversaries, retirements. For a quick creative twist, try swapping a square layer set for ovals, rotating alternate layers a few degrees for a pinwheel look, or adding a mixed media accent like a flocked centre on the top layer. A template library can be a useful starting point if you want to experiment beyond your own artwork.
— Rob
Where to get templates, cutting files and supplies
Once you have the technique down, the fastest way to keep making pyramage cards is to work from ready-made artwork rather than drawing every layer yourself. Craftsuprint’s Card Making category carries printable toppers and matching matting papers sized for exactly this kind of layered build, and the Cutting Files section covers SVGs for anyone working with a cutting machine instead of a craft knife.

- Browse Card Making for pyramage-ready toppers, sentiments and coordinating matting layers.
- Check Cutting Files for SVG die-cut files if you are working with a cutting machine rather than a craft knife.
- Look at Craft Supplies for cardstock, foam pads and adhesives if you need to restock before your next build.
Some sites offer free weekly downloads to test templates against tutorial measurements before committing to full kits.
Sources
For more layered techniques and downloadable practice sheets, see Crafts Beautiful’s pyramage masterclass and the invertage comparison from Opulence by Design, useful for seeing the technique applied to different shapes.
- Pyramage: Everything You Need To Know | PaperCrafter Blog
- Pyramage Masterclass - Free Card Making Downloads | Crafts Beautiful
- Step by Step Cardmaking- Lesson 5- pyramage
FAQ
What is the difference between pyramage and decoupage?
Pyramage and decoupage both use layered copies of the same image to build height, and early hobby lessons describe pyramage as closely related to decoupage, differing mainly in how evenly each layer is reduced from its predecessor, as explained in this step-by-step cardmaking lesson. In practice, most crafters use the terms to describe the same graduated-layer, foam-raised technique.
What is invertage and how does it differ from pyramage?
Invertage reverses the standard pyramid effect by stacking larger layers over a smaller base so the design appears to recede rather than rise, as described in this comparison of pyramage, invertage and standard toppers. It suits designs where a recessed, sunken look fits the theme better than a raised pyramid.
Do I need nesting dies to make a pyramage card?
No, a craft knife and a printed template are enough for a first pyramage card, though nesting dies make the layers more consistently concentric with less manual trimming, according to Crafts Beautiful’s pyramage masterclass. Nesting dies become more useful once you are producing several pyramage cards regularly.
What cardstock weight works best for pyramage layers?
A mid-weight digital cardstock around 200 to 250gsm generally prints cleanly and holds its shape once stacked with foam adhesive, based on practical guidance from PaperCrafter’s pyramage guide. Lighter card tends to curl under foam pads, while much heavier stock can struggle to feed through a home printer.
Where can I find printable pyramage templates?
Craftsuprint’s Card Making category lists printable toppers and template sets designed for layered techniques including pyramage, with matching matting papers included in many designs. Files are typically available as PNG or PDF for print-and-cut work, or SVG for cutting machines.