
Gatefold Cards: 2 Sizes From Cut to Post for UK Crafters
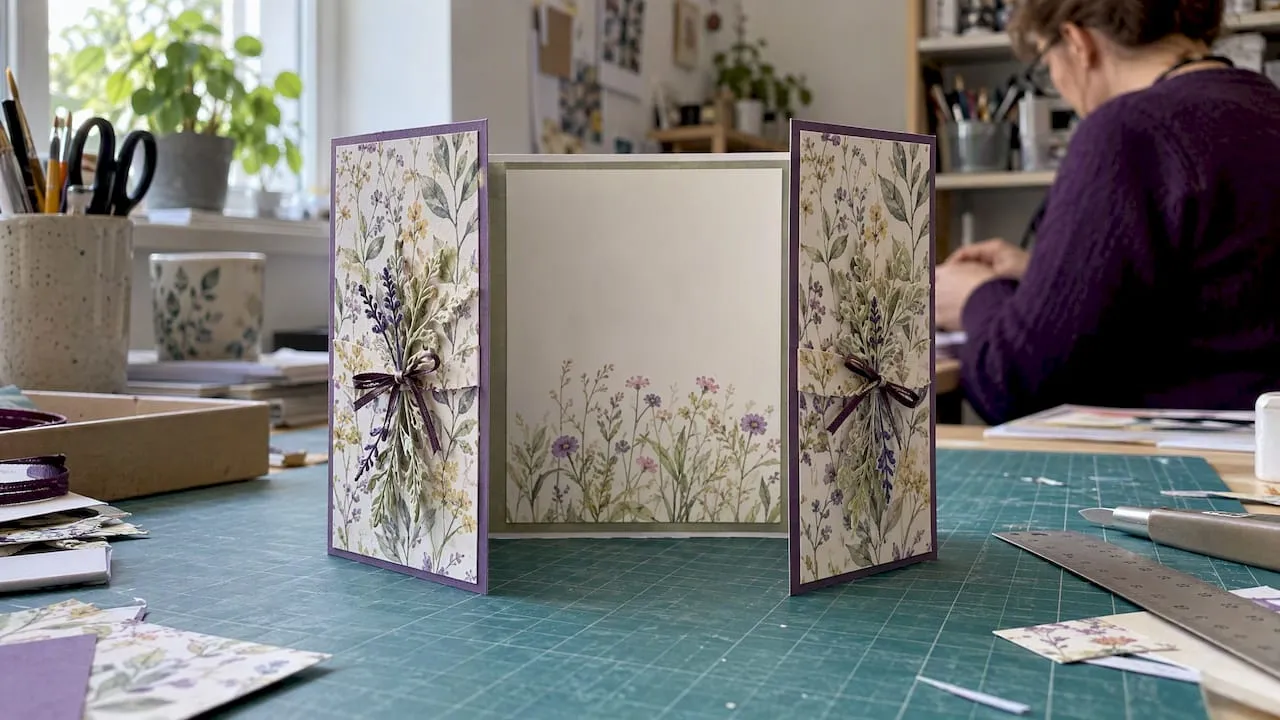
A gatefold card is made by scoring a card base into two outer panels that fold inwards to meet in the middle, like a pair of cupboard doors. Start with an A2-style base cut at the common 148 x 210mm size, score each panel about 37mm from the outer edges, and you have a working template to practise on before moving to the full steps, variations and postage guidance below.
TL;DR:
- For a larger A5 size card, cut the base to 210 x 297mm and score each panel about 52.5mm from the outer edges.
- For other sizes, divide the finished width by four to set each score distance; if you add an insert, increase both distances by at least 2mm.
- Score before folding and follow the card grain where possible; heavier stock often needs two parallel score lines about 1mm apart to prevent cracking.
- Raised embellishments can push a card beyond Royal Mail’s large letter limits, so weigh the sleeved card and check its dimensions before buying postage.
Table of Contents
- Materials and tools you need before you start
- Exact measurements and cutting guide for two starter templates
- Folding, scoring and assembling the card step by step
- Creative variations to try once you know the basics
- Finishing and posting your gatefold card safely
- Craftsuprint resources that speed up gatefold projects
- A note from the author
- Find templates and supplies to start your next gatefold
- FAQ
- Sources
Materials and tools you need before you start
Clean cuts and crisp folds depend on having the right kit to hand before the card base goes anywhere near a trimmer. A guillotine or paper trimmer gives straight edges that a scissor cut rarely matches, and a bone folder turns a scored line into a sharp, flat fold instead of a soft crease that springs back open. A scoring board or scoring tool stops heavier card from splitting along the fold, which happens often when card is folded without scoring first.
For the base, medium weight card holds a crease well without cracking. Lighter mats and inserts need lighter card, while very heavy card usually needs a double score line, two parallel scores a millimetre apart, to fold cleanly.
- A paper trimmer or guillotine for straight, repeatable cuts.
- A bone folder for sharp, lasting creases.
- A scoring board or a craft knife handle used as a scoring tool.
- Double-sided tape, foam pads and a glue pen for layering.
- Optional extras: eyelets, ribbon, patterned paper and a corner rounder for decoration.
A metal ruler and the back edge of a craft knife can stand in for a scoring board if you are just starting out: score gently, then repeat the pass with slightly more pressure until the line folds without resistance.
Exact measurements and cutting guide for two starter templates
Getting the cut and score positions right the first time saves far more card than it costs in careful measuring. Two sizes cover most occasions and both scale easily once you understand the logic behind them.
- A2-style finished gatefold: cut the base to a common postcard size near 148 x 210mm, then score both side panels about 37mm in from each outer edge so the two doors meet exactly at the centre.
- A5-style finished gatefold: cut the base to a larger card size near 210 x 297mm, then score each panel roughly 52.5mm in from the outer edges for a larger, more dramatic opening.
To adapt either template, measure the finished width you want, divide by four, and use that figure as your score distance from each edge; this keeps both doors identical and meeting cleanly in the centre. Wider panels suit chunkier embellishments or an extra inner insert layer, but add at least 2mm to each score distance once an insert is glued in, otherwise the doors will overlap instead of meeting flush.
If you are using patterned paper, cut one panel-width piece slightly oversized, then trim it precisely in half along the centre line so the pattern repeats evenly across both doors when closed. Thick embellishments, such as layered flowers or 3D decoupage, add real thickness to a closed card: reduce mat card weight by one grade to compensate, or the finished card will not close flat.
Folding, scoring and assembling the card step by step
Once the base is cut and scored, assembly is a sequence of small, repeatable actions rather than one difficult step.
- Trim the card base to your chosen finished size using the measurements above.
- Score both panel lines using a bone folder run along the scoring board groove, working with the grain where possible for a cleaner fold.
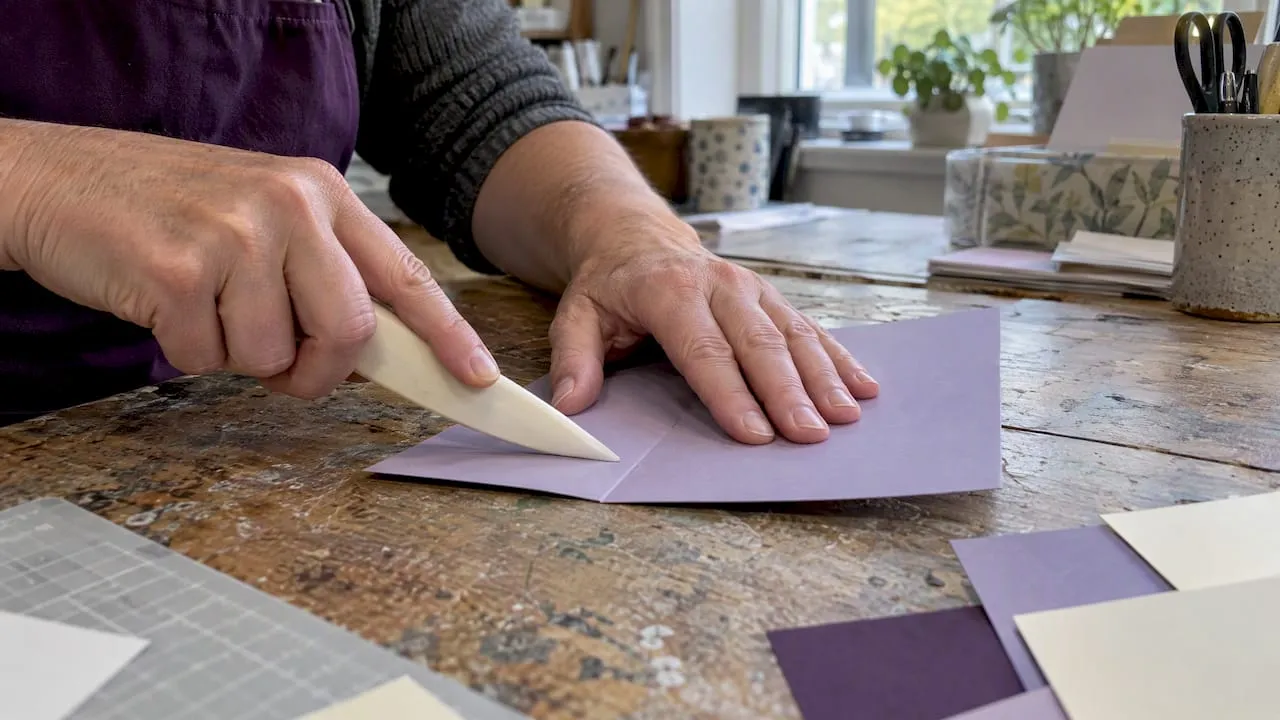
- Fold both panels inward along the scored lines and burnish each crease firmly with the flat edge of the bone folder.
- Check that the two inner edges meet exactly in the centre with no gap or overlap; trim a sliver from one panel if they do not.
- Attach any inner panel, insert or decorative layer using double-sided tape for flat items and a glue pen or liquid glue for anything with texture or weight.
- Add an interlocking tab if you want the card to stay closed: cut a small tongue shape on one door and a matching slot on the other, then apply adhesive only to the non-slot side so the tab can still slide freely into place.
- Press the whole card under a flat, heavy book for a few minutes to set all the creases and adhesive before handling it further.
Checking grain direction before you score matters more than it seems. Card folded against the grain is more likely to crack along the crease, so where you can choose, score with the grain running parallel to the fold. Use tape for flat paper layers and a thin bead of wet glue for anything heavier, since tape alone often lets weighty embellishments peel away in transit.
Pro Tip: Run your bone folder along each score line twice, once before folding and once after, for a crease that stays flat under its own weight.
If the panels will not meet, the most common cause is an inaccurate score distance, so re-measure from the actual trimmed width rather than the intended one. Bulging usually means an insert is too thick for the mat weight chosen, and oozing adhesive is almost always a sign of too much glue applied too close to an edge.
Creative variations to try once you know the basics
The same scoring and folding logic behind a standard gatefold supports several more adventurous builds without any extra tools.
- Twisted gatefold: add a diagonal score across each panel so the doors twist open rather than swinging flat, adjusting the standard score distance by a few millimetres to allow for the extra fold.
- Double Z or pop-out: add two further parallel score lines inside each panel so the card concertinas outward, creating space for a pop-out tab or layered scene behind the doors.
- Interlocking buckle: cut a small slotted tab on one door and a matching aperture on the other, then reinforce the back of the tab with a second layer of card so it holds under light pressure without any metal fastener.
Windows cut into the doors, simple frames around a central image, or a small shaker panel behind the opening all work well with any of these three variations, since the folding mechanics underneath stay the same.
Finishing and posting your gatefold card safely
A well-built gatefold card can still arrive damaged if it is packed badly, so finishing matters as much as the fold itself.
- Slide the finished card into a cellophane sleeve to keep edges and embellishments clean in transit.
- Add a stiff cardback behind the card inside the envelope to stop it bending.
- Use foam pads sparingly on raised elements, since too many will push the card over large-letter thickness limits.
Royal Mail’s size and weight guide sets dimensional and thickness thresholds for the “large letter” category. Heavily embellished gatefold cards may exceed these limits and incur parcel pricing, so measure and weigh the finished, sleeved card before buying postage. A trial fit in an envelope of the size you intend to use will help you decide if a flatter build is needed.
Craftsuprint resources that speed up gatefold projects
Printable templates, cutting files and themed kits take the guesswork out of scoring and cutting a gatefold base. A downloadable template gives you the exact cut and score lines to print onto your chosen card, so you transfer the measurements directly rather than working them out by hand each time.
A note from the author
Measure twice before you score, since a single misplaced line throws the whole fold out. Try one variation on your next card, and always give a finished gatefold a trial fit in its envelope before it goes in the post.
— Rob
Find templates and supplies to start your next gatefold
Printable gatefold templates, themed kits and cutting files can turn the measurements in this guide into ready-to-cut designs, so you spend your time folding and decorating rather than working out score lines from scratch.
The card making category holds a broad range of printable gatefold designs, and the cutting files collection suits anyone working with a cutting machine who wants the panels pre-sized and ready to go. Browse the card making range to find a template that matches the occasion you are working towards.
FAQ
What is the standard size for a gatefold card?
There is no single fixed standard, but an A2-style finished size of 148 x 210mm with each panel scored 37mm from the outer edge is a common and reliable starting point. Larger A5-style cards use the same logic at 210 x 297mm with panels scored at 52.5mm.
How do I stop my gatefold panels splitting when folded?
Splitting usually happens when card is folded without scoring first, so always run a bone folder along a scored line before folding heavier stock. Heavier card often needs a double score line to fold cleanly without cracking.
Can I post a gatefold card as a large letter?
Yes, provided the finished card stays within Royal Mail’s large-letter dimension and thickness limits, which heavily embellished cards can exceed. Weigh and measure the sleeved card and buy a large letter stamp suited to its final thickness.
What is the easiest way to keep two gatefold doors even?
Measure your score distance from the actual trimmed width of the base rather than an intended figure, since small cutting variations throw the doors off centre. Check the meeting point after folding and trim a sliver from the longer panel if a gap or overlap appears.
Do I need special tools to make a gatefold card?
A trimmer, bone folder and scoring tool make the process far more consistent, but a metal ruler and the back of a craft knife can substitute for a scoring board when starting out. Printable templates from the card making range also remove most of the measuring work for beginners.
Sources
- Size & weight guide - parcels, letters and envelopes
- 50 x 1st Class Large Letter Stamp Sheet | Royal Mail