
7 Step Easel Card Tutorial UK: A2/A5, Templates & Posting Tips
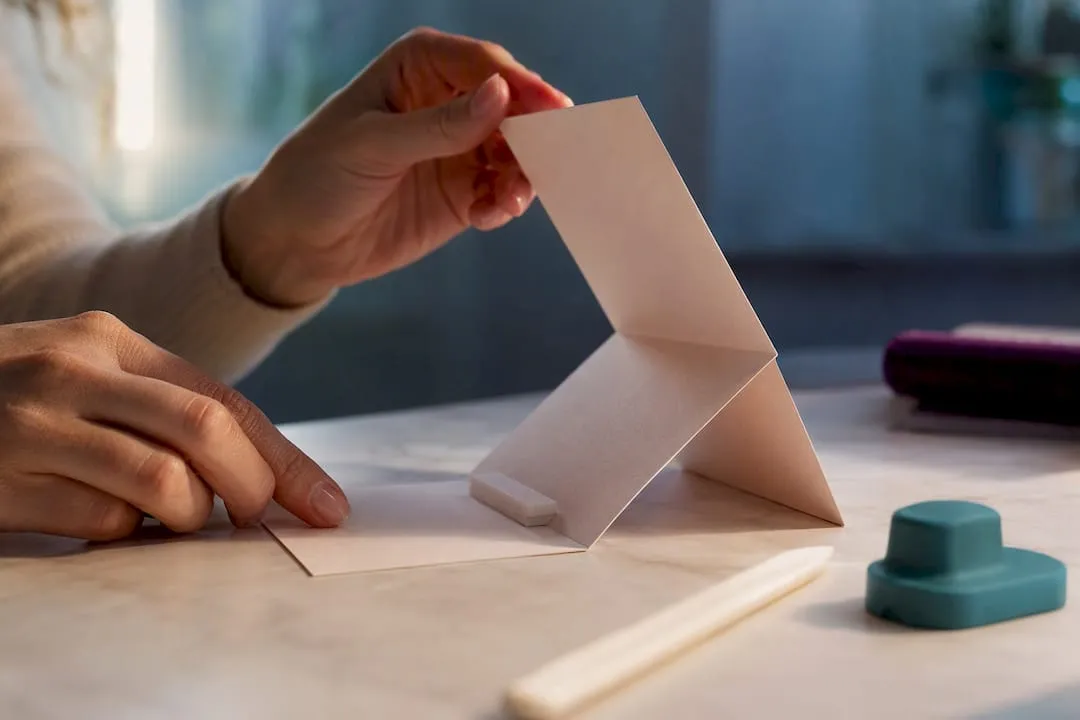
The simplest easel card is just a scored base panel with a matching front panel glued along only its lower half, propped open by a small stopper stuck to the inside. Get the maths right and everything else follows: the easel base should measure roughly twice the height of the finished card front. Below you’ll find the materials list, full step-by-step folding instructions, three quick variations, and the fixes for the mistakes that trip up almost every beginner.
TL;DR:
- The base of an easel card should be roughly twice the finished front panel’s height to ensure proper proportion and stability.
- Only the lower half of the front panel should be glued to allow the card to fold flat for posting, requiring precise adhesive placement.
- The prop that keeps the card open should be positioned about one-third up from the bottom to maintain a stable display angle.
- Using ready-made templates and matching toppers can significantly reduce measuring errors and save time on shaping complex designs.
- Heavy embellishments require proper support, and flattening the card before mailing along with the right envelope size ensures safe posting.
Table of Contents
- Easel card tutorial: materials and tools you’ll need
- How do you make a standard easel card step by step?
- Three easy easel card variations and how to scale them
- Common easel card mistakes and how to post them safely
- Decoration ideas that won’t jam the easel mechanism
- Where Craftsuprint templates save you time
- A quick note before you start cutting
- Get printable easel card templates and supplies
- Further reading and video demonstrations
- FAQ
Easel card tutorial: materials and tools you’ll need
You don’t need a workshop full of kit for this. A handful of reliable basics will get you through your first easel card and every variation after it.
- Cardstock: 250 to 300gsm for the base (it needs to hold its shape); 200 to 250gsm works fine for the front panel and decorative layers.
- Common sizes: A2 or A5 cards of commonly used sizes are the easiest starting points for beginners.
- Scoring tools: a bone folder for crisp creases, or a Scor-Pal if you want repeatable, exact score lines every time.
- Adhesive: strong double-sided tape for structural joins, wet glue for paper layers, and foam pads for raising the stopper and any 3D elements.
- Cutting tools: a trimmer or craft knife, plus a metal ruler for straight edges.
- Decorative extras: dies, stamps, and toppers, or a ready-made printable kit from Craftsuprint’s downloads if you’d rather skip the design stage entirely.
Buying a pre-cut template also saves time if you’re prone to measuring twice and cutting wrong anyway.
How do you make a standard easel card step by step?
Here’s the full build for a classic vertical easel card, using a typical A-format example: a 4¼" × 8½" sheet for the base, scored at 4¼" and 6⅜", plus a 4¼" square front panel. This mirrors the scoring pattern used across most standard easel card tutorials, including the classic version from Splitcoaststampers.
- Cut your base panel to 4¼" × 8½" and score at 4¼" and 6⅜" along the long edge. This gives you three sections: a bottom support flap, a middle “shelf” panel, and the top back panel.
- Fold along both score lines, mountain-folding so the shelf pops forward slightly. Run a bone folder firmly along each crease. Heavier cardstock benefits from a light double pass with the scoring tool before folding, which stops the fibres cracking on the outside of the fold.
- Cut your front panel to match the card’s finished width and height, roughly 4¼" square for this example, and score it horizontally at the halfway point so it folds forward and meets the shelf.
- Apply adhesive to the lower half only of the front panel’s back side. Leave the top half completely free of glue. This is the single most important step in the whole process; the free top half is what allows the card to fold flat for posting.
- Attach the front panel to the base along that lower half, lining up the bottom edges precisely.
- Add the prop: stick two or three foam pads (or a small folded card strip) to the shelf, positioned about one-third of the way up from the bottom edge. Press the front panel against the prop to test the stand height before committing to final placement.
- Test the mechanism by closing and opening the card several times. It should fold flat and pop back up cleanly, with the front resting against the prop at a comfortable display angle.
Only decorate the inside and the stopper before you fold the card flat for the final time. This order matters, because working with the card open makes it far easier to position layers without them fouling the mechanism.
Pro Tip: Watch how the front panel sits against the prop before you add any embellishments. If it flops too far forward or won’t stay open, move the foam pads up or down a few millimetres and test again. It’s much easier to fix now than after you’ve stuck down a layered topper.
Three easy easel card variations and how to scale them
Once the standard vertical format feels comfortable, the same sizing logic stretches to almost any shape you fancy.
- Horizontal (landscape) easel: start with a wider base, say 6" × 8" (15cm × 20cm), and score at 6" and 7½" (15cm and 19cm) so the shelf sits proportionally the same as the vertical version.
- Square easel: cut a square base and front panel of matching dimensions, then score the base at the halfway point plus a small shelf allowance of roughly 1.5cm to 2cm beyond that. The stop still goes on the shelf, never the top panel.
- Circular or shaped easel: use a die or a printable template to cut a circle, then fold it in half. Score only the half that becomes the base attachment; the front half stays completely free of adhesive and folds forward independently, exactly as Splitcoaststampers demonstrates with their circular variant.
The rule that ties all three together: the easel base should measure roughly twice the height of the card front. For a 3" × 6" finished card, that means a 6" square base scored at 3" and 1½", the exact worked example Splitcoaststampers uses as their reference point. Once that ratio is fixed in your head, you can resize any easel card to fit an envelope, a display box, or a specific occasion without redoing the maths from scratch.
Common easel card mistakes and how to post them safely
Most easel card failures trace back to one of a small handful of errors, and they’re all avoidable once you know what to look for.
- Gluing the entire front panel: this is the mistake that ruins the mechanism outright. Adhesive across the whole back stops the top from folding, so the card can’t lie flat. Glue the bottom half only, always.
- Wrong prop placement: a stopper glued too low leaves the front panel sagging; too high and it stands too upright. Placing it around one-third up from the bottom keeps the angle consistent across most card sizes.
- Foam pad choice: thin foam pads (around 1mm) suit lighter card fronts; go up to 2mm or 3mm foam for heavier, layered fronts that need more support to stay open.
- Posting: flatten the card fully before it goes in the post, and use a board-backed envelope for anything with raised embellishments. Check current Royal Mail size and thickness limits before choosing your envelope, particularly for chunkier 3D pieces.
- Long-term display: reinforce your score lines with a second light pass if the card will stand for weeks rather than days, and choose a slightly heavier base weight to resist sagging.
Pro Tip: If you’re making several easel cards in a batch, cut and score all your base panels first, then test one complete mechanism before you glue any fronts down. Catching a sizing problem early saves you from unpicking foam pads off six finished cards.
Decoration ideas that won’t jam the easel mechanism
Decorating an easel card is really an exercise in restraint. Every layer you add to the front panel needs to sit within the glued lower half, or it risks locking the fold shut.
- Keep die-cuts, embellishments, and toppers within the bottom two-thirds of the front panel where possible, leaving the fold area itself clear.
- Layer sparingly near the crease; a single thin topper across the fold line is fine, but stacked foam layers there will crack the score.
- Shaker windows work well on easel fronts, provided the shaker cavity sits below the score line rather than straddling it.
- For birthdays, add a raised number or balloon topper on the shelf itself. For festive cards, a die-cut wreath or star makes a strong, uncomplicated focal point that won’t add bulk to the fold.
Where Craftsuprint templates save you time
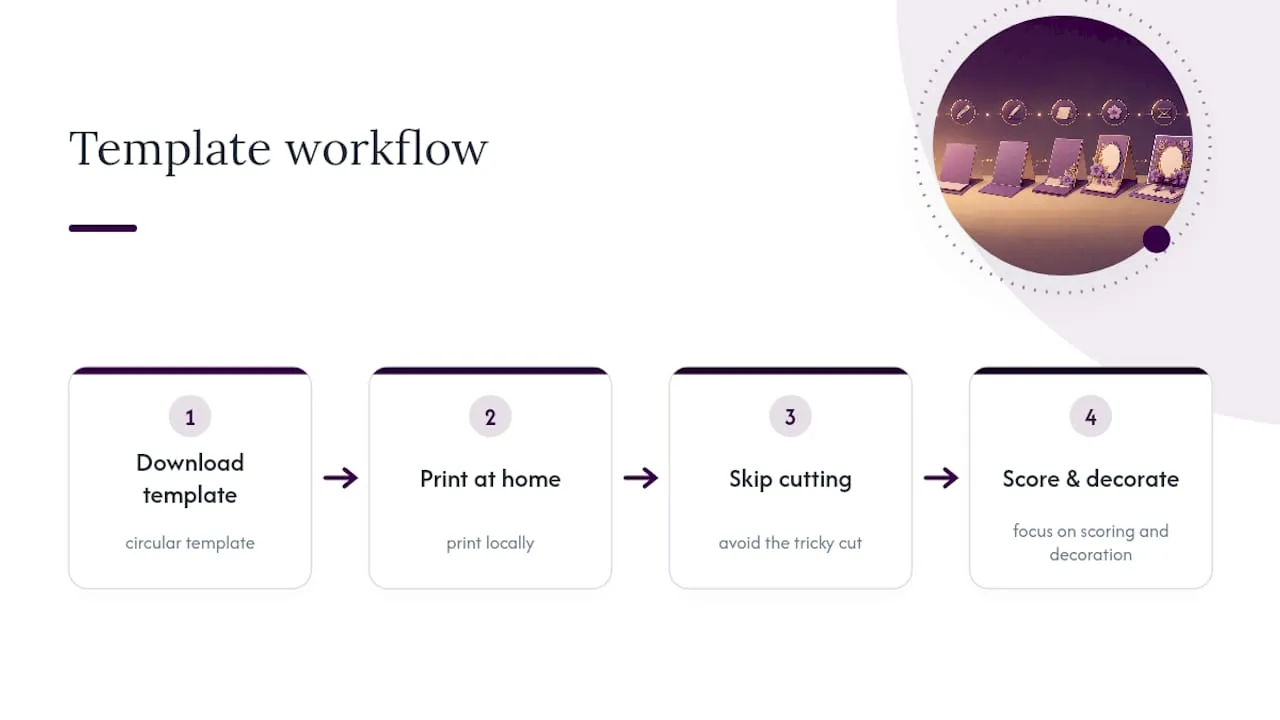
Printable stepper card templates and matching toppers cut down on measuring and cutting errors, especially for shaped or circular easel designs. Download a circular template, print it at home, and you’ve skipped the trickiest cutting stage entirely, leaving you free to focus on scoring and decoration.
A quick note before you start cutting
Your first easel card won’t be perfect, and that’s genuinely fine. Most wobbles trace back to two things: prop height and how much adhesive you’ve used, both fixable in under a minute. Try the basic version, adjust as you go, and share how yours turns out.
— Rob
Get printable easel card templates and supplies
There are practical shortcuts when you’d rather skip drafting your own templates from scratch: browse ready-cut stepper and shaper designs, matching toppers, and printable sentiment sets that slot straight into the scoring pattern covered above. Rather than measuring and trimming every panel by hand, you print, score, and fold, which shaves real time off a project like a batch of birthday easel cards.

For the physical side of the build, stock up on foam pads, strong tape, and scoring tools through the craft supplies section, and check the decoration materials range for toppers that suit the occasion you’re making for. If you want to try before committing to a full kit, the Create and Craft members gift is a low-risk way to sample a template and see how it fits your workflow. Head to the downloads hub now and pick a shape to print for your next card.
Further reading and video demonstrations
For alternate measurements and a full video walkthrough, see the Splitcoaststampers easel card tutorial and the photo-led Inkitupwithjessica guide, both useful if you prefer watching a fold before attempting it yourself.
FAQ
What size should an easel card base be?
As a general rule, the base should measure about twice the height of the finished card front. For a 3" × 6" card, start with a 6" square base scored at 3" and 1½".
Where do you put glue on an easel card?
Glue only the lower half of the front panel to the base. The top half must stay free of adhesive so the card can fold flat for posting.
How do you stop an easel card from collapsing?
Add a small prop, usually two or three foam pads or a folded card strip, on the shelf about one-third of the way up from the bottom edge to hold the front panel open at a stable angle.
Can you post an easel card safely?
Yes, if you flatten it fully first and use a board-backed envelope or small parcel for anything with raised embellishments, checking Royal Mail’s size guidance beforehand.
Do I need special templates to make shaped easel cards?
Not strictly, but a printable template from a resource like Craftsuprint makes circular or stepper-style easel cards considerably faster and reduces cutting errors.