


Triangular Base Vintage Shabby Chic Christmas Poinsettia Wre
I wanted to design a collection of 8in x 8in Decoupage Shabby Chic kits, so that card makers could make a card that appears to have lots of embellishments, (which are really popular at the moment), without the expense of having to buy all those expensive embellishments! I think this busy style, originated in Holland, where card making is very popular, and this style of card is now becoming very popular all over the world. This card kit, features a Triangular Base Card, with matching Envelope, matching Gift Tag, a wide choice of Sentiment Labels and a Card Back Panel for your own sentiments/greetings. There are the following pages in the kit: Card Front with Gift Tag; Card Back Panel with a large choice of sentiments; Card Stand; Decoupage; Envelope Front; Envelope Back and three sheets to choose from for the version of the first layer of the Frame Decoupage. The 3 options are explained below.
My Shabby Chic Triangular Base kits, are ideal to use with your own stamps/images (Option 3), but I also provide a ready coloured Digistamp in each Shabby Chic kit (Option 2), if you want to imitate the look of a coloured stamp without having to do all the work, or if stamping or colouring, isn?t something you are in to at this time in your crafting journey! Alternatively, you can make up the card without having anything in the frame (Option 1), if you prefer. The design has been created so that all options look good!
A full Photographic PDF Tutorial is also supplied in the kit, if you would like to see it, before purchasing a kit, please click on the Mortarboard Icon, and you will be taken to where the tutorial for this kit resides in the forum. To see the full range of kits in this collection, please click on my photo and search for Triangular. To see my large range of Christmas sheets and kits, please click on my photo and search for Christmas. More Shabby chic kits are being designed, so please check back often if you like the concept! Please take a look at my other designs, by clicking on my name or photo.
 Triangular Base Kit Peach Roses, Lilac Flowers & Butterflies
 Triangular Base Kit Yellow Old English Roses
 Triangular Base Kit Lilac Pansies & Butterflies
 Triangular Base Kit Pink Roses
 Triangular Base Kit White and Yellow Lilies
 Triangular Base Kit Red Roses
 Triangular Base Kit Cream Roses
 Triangular Base Kit Colourful Petunias
 Triangular Base Kit Blue Flowers and Daisies
 Triangular Base Kit Roses and Butterflies
 Triangular Base Kit Stargazer Lilies
 Shaped Triangular Base Purple Flowers & Butterflies Mini Kit
 Shaped Triangular Base Bluebird, Flowers and Butterflies
 Triangular Base Kit Shabby Chic - Blue Roses
 Shaped Triangular Base Purple Christmas Fireplace Mini Kit
 Shaped Triangular Base Puppy & Cat on a Striped Armchair Kit
 Triangular Base Shabby Chic Christmas Roses & Holly Wreath
 Triangular Base Shabby Chic Lilac Paper Roses Kit
 Envelope Triangular Base Pink Roses and Butterflies Mini Kit
 Envelope Triangular Base Cream Roses and Butterflies Kit
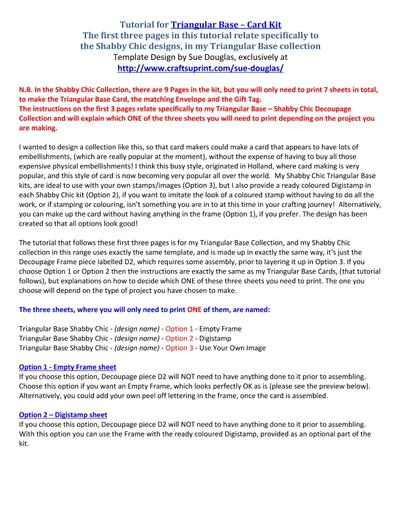
Hi All In the Shabby Chic Collection, there are 9 Pages in the kit, but you will only need to print 7 sheets in total, to make the Triangular Base Card, the matching Envelope and the Gift Tag.
To make the card only, you will need to print 5 sheets.
It would have fit on to 4 sheets if I had included 1 of the 3 Frame options though, but if you didn't want to use that Frame option that I'd put on the Decoupage sheet, it would have meant that you would be wasting ink, and I think it's less expensive to use a sheet of paper, rather than to print out something that's not going to be used. The instructions on the first 3 pages of the Tutorial relate specifically to my Triangular Base â??
Shabby Chic Decoupage Collection and will explain which ONE of the three sheets you will need to print depending on the project you are making: Option 1 - Empty Frame sheet If you choose this option, Decoupage piece D2 will NOT need to have anything done to it prior to assembling. Choose this option if you want an Empty Frame, which looks perfectly OK as is (please see the preview below).
Alternatively, you could add your own peel off lettering in the frame, once the card is assembled. Option 2 â??
Digistamp sheet If you choose this option, Decoupage piece D2 will NOT need to have anything done to it prior to assembling. With this option you can use the Frame with the ready coloured Digistamp, provided as an optional part of the kit. â?? Option 3 â??
Use Your Own Image sheet This option can be used with your own stamped (or digistamp) and coloured image or an image of your own choosing.
It can also be used with transparent peel-off verses. (The only company I have seen who supply transparent peel-off verses is Pinflair in the UK.
Alternatively, you can print out a verse on to a coloured paper that coordinates with the design and place that behind the frame (D2). To make the card only, you will need to print 5 sheets.
It would have fit on to 4 sheets if I had included 1 of the 3 Frame options on the Decoupage sheet though, but if you didn't want to use that option of Frame, that was on the Decoupage Sheet. it would have meant that you would be wasting ink, and I think it's less expensive to use an extra sheet of paper, rather than to print out something that's not needed. My Shabby Chic collection in my range of Triangular Base kits (that I created in December last year), uses exactly the same template, and is made up in exactly the same way, itâ??s just the Decoupage Frame piece labelled D2, which requires some assembly, prior to layering it up in Option 3.
If you choose Option 1 or Option 2 then the instructions are exactly the same as my Triangular Base Cards.

Related Products

Photographs from the Community

I printed onto 230gsm photo paper and cut out all the pieces. I scored and folded as required and assembled the card, which is very easy. I then added the decoupage using foam pads.
With this kit there are more choices for the front of the card, so will make different cards and each one will be well received.


I printed the design on to a Glossy photo paper. I clipped the items out. I Folded the design as instructed. I folded and Glued the main card into the Triangular base. I glued the main design on to it. I attached the Decoupage/3D and Sentiment on using Sticky pads.
I put a Red matching Ribbon through the small card. I wrote Merry christmas in Swedish = God Jul. A quick and easy Stunning and Amazing design that turned into a Gorgeous and breath taking card. I really LOVE this design and I know you will too!!!! I really Recomend this design to all of you!!! Enjoy your crafting!!!