


Nativity Diorama Card Kit
Very 3D! Definitely a card with the WOW factor! Huge card using a full A4 sheet for the front - and another for the back of the card (with large box left blank for your greeting).
Very easy to make - just 4 folds and glue the front to the back at the sides! Pull out the sides and the card fold flat to post in an A4 envelope! Arrange the images as you wish - a whole A4 sheet full of easy to cut out characters!
You can even use as a nativity scene to be added to day by day - great fun for children .......
You will receive ..... A4 card front ..... A4 card back with text box ........
A4 sheet of characters and decoupage layers for the manger scene ....... background for inside the card with the empty stable so you can arrange the characters and animals as YOU want inside and outside the card - and WHEN you want ...... label to use on your A4 envelope.
PS I have another Diorama kit available - Santa's Arrival cup277842_489.


Photographs from the Community

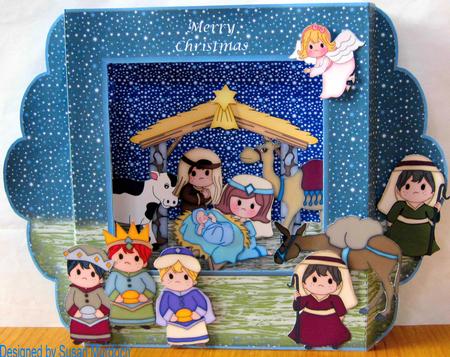
Printed the main card components onto 225gsm white card and the elements on glossy photo paper. Cut it all out and assembled the card according to easy to follow instructions and the animals, people etc to my own liking.
I have used a little glitter on the sky, but that is not really visible on the photo and green flower soft on the grassy areas.
I really like this card, as it can be used as a Christmas decoration as well.

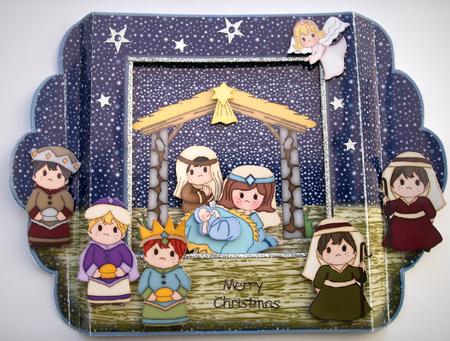
This was printed out onto white glossy photo paper and cut out following the easy instructions. I attached some of the characters using foam pads. I placed glittery silver peeloffs around the aperture and a Merry Christmas greeting at the bottom. I also added silver stars around the edge.
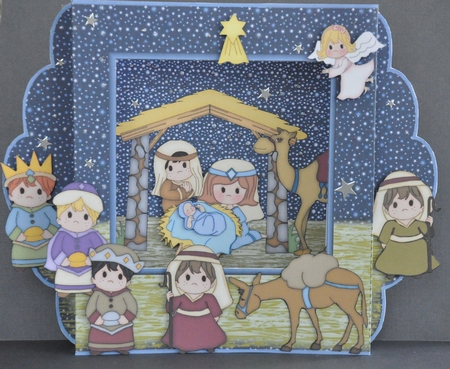
I printed the design onto good quality white card and cut out all the elements. I carefully followed the directions but discovered, after I had joined the sides that there was nothing there to tell you to add the background BEFORE you join the sides!
I managed but would suggest that you add it earlier. Also, if you are going to 'sparkle' the stars or add peel offs, this should be done before the sides are joined as well.
I assembled the card using a combination of DST and spongy tape. Finally, I added some silver glitter glue and some silver stars.

Printed out on good quality photo paper, cut out all elements as per instructions & used 3D Foam pads to mount.
This is a beautiful Christmas card!